Samsung 500N Quick Guide (ENGLISH)
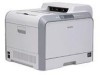
Samsung 500N - CLP Color Laser Printer Manual
 |
UPC - 635753700107
View all Samsung 500N manuals
Add to My Manuals
Save this manual to your list of manuals |
Samsung 500N manual content summary:
- Samsung 500N | Quick Guide (ENGLISH) - Page 1
COLOR LASER PRINTER Setup Guide - Samsung 500N | Quick Guide (ENGLISH) - Page 2
Unpacking 3 Step 2. Understanding Your Printer 5 Step 3. Installing the Imaging Unit, Transfer Belt and Toner Cartridges 7 Step 4. Loading Paper 16 Step 5. Connecting a Printer Cable 19 For Local Printing 19 For Networking Printing 21 Step 6. Turning the Printer On 22 Step 7. Printing a Demo - Samsung 500N | Quick Guide (ENGLISH) - Page 3
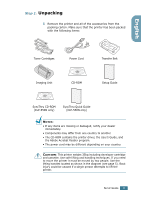
the accessories from the packing carton. Make sure that the printer has been packed with the following items: Toner Cartridges Power Cord Transfer Belt Imaging Unit CD-ROM Setup Guide SyncThru CD-ROM (CLP-550N only) SyncThru Quick Guide (CLP-550N only) NOTES: • If any items are missing or - Samsung 500N | Quick Guide (ENGLISH) - Page 4
air conditioners, heaters, or ventilators - Free of temperature, sunlight, or humidity extremes or fluctuations - Clean, dry, and free of dust CAUTION: You must place your printer in the level surface. If you do not, the print quality problems can occur. 4 SETUP GUIDE - Samsung 500N | Quick Guide (ENGLISH) - Page 5
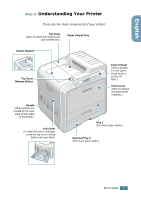
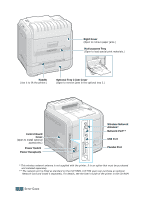
: Top Cover (Open to install the imaging unit, and transfer belt.) Paper Output Tray Output Support Top Cover Release Button Handle (Lifting handles are located at the lower edge of both sides of the printer.) Left Cover (To install the toner cartridges press the top cover release button and - Samsung 500N | Quick Guide (ENGLISH) - Page 6
antenna is not supplied with the printer. It is an option that must be purchased and installed separately. ** The network port is fitted as standard on the CLP-550N. CLP-550 users can purchase an optional Network Card and install it separately. For details, see the User's Guide of the printer in the - Samsung 500N | Quick Guide (ENGLISH) - Page 7
English Step 3. Installing the Imaging Unit, Transfer Belt and Toner Cartridges 1 Using the handle, completely open the left cover until it is at right angles to the main frame. CAUTION: top cover release button to unlatch the top cover and open it all the way. Top cover release button SETUP GUIDE 7 - Samsung 500N | Quick Guide (ENGLISH) - Page 8
, do not expose the imaging unit to light for more than a few minutes. Cover it with black paper, if necessary. • Do not touch the surface of the green roller on the imaging unit or print quality problems can occur. 5 Locate the imaging unit slots inside the printer, one on each side. 8 SETUP GUIDE - Samsung 500N | Quick Guide (ENGLISH) - Page 9
6 Hold the handle on the imaging unit with the green roller facing you. Align the imaging unit with the slots in your printer so that the colors on both sides of the imaging unit slide into the corresponding colors of the slots. CAUTION: Insert the imaging unit carefully so as not to scratch - Samsung 500N | Quick Guide (ENGLISH) - Page 10
or scissors, to open the transfer belt package. You could damage the surface of the transfer belt. 10 Pinch the transfer belt tention levers on both sides of the transfer belt. Then, pull them out, as shown below. 11 Locate the transfer belt slots inside the printer, one on each side. 10 SETUP GUIDE - Samsung 500N | Quick Guide (ENGLISH) - Page 11
on the transfer belt and align it with the slots in your printer. NOTE: Keep the transfer belt level, do not turn the transfer belt over otherwise looses toner may be spilled. 13 Slide the transfer belt down into the printer. Press it firmly to make sure that it latches into place. SETUP GUIDE 11 - Samsung 500N | Quick Guide (ENGLISH) - Page 12
levers on each side towards the top cover, as shown below, to lock the transfer belt into place. CAUTION: If you open the left cover for a few minutes, the imaging unit can be exposed to light. This causes damage to the imaging unit. 15 After making sure that the left cover is open, close the top - Samsung 500N | Quick Guide (ENGLISH) - Page 13
, such as a knife or scissors, to open the toner cartridges packages. You could damage the surface of the toner cartridges. 17 Holding both sides of the cartridges, gently roll them from side to side to distribute the toner. 18 Place the toner cartridges on a flat surface as shown and remove the - Samsung 500N | Quick Guide (ENGLISH) - Page 14
On the right hand side of the toner cartridge slot is a label that identifies which color cartridge to fit into each slot. K Black Y Yellow M Magenta C Cyan 20 Holding each toner cartridge, insert them into their corresponding positions shown in order of Cyan, Magenta, Yellow and then Black - Samsung 500N | Quick Guide (ENGLISH) - Page 15
the toner cartridges incorrectly, the left cover will not close properly. Check again to make sure the cartridge colors correspond to those marked on the right hand side. Never use force to close the cover. NOTE: When printing text at 5% coverage, you can expect a toner cartridge - Samsung 500N | Quick Guide (ENGLISH) - Page 16
hold a maximum of 250 sheets of plain paper. You can use A4 and letter-sized paper. To load paper: 1 Pull the tray out of the printer. 2 Push down on the metal plate until it locks into position. 3 Flex the paper sheets back and forth to separate the pages and then fan - Samsung 500N | Quick Guide (ENGLISH) - Page 17
English 4 Load paper with the print side facing up. Make sure that all four corners are flat in the tray and under the corner brackets, as shown below. 5 Do not exceed the maximum stack height. Overfilling the tray may cause a paper jam. SETUP GUIDE 17 - Samsung 500N | Quick Guide (ENGLISH) - Page 18
paper. NOTE: If you want to change the paper size in the tray, refer to the User's Guide of your printer supplied in the CD-ROM. 7 Slide the tray back into the printer. NOTES: • Do not push the width guide far enough to cause the material to warp. • If you do not adjust the width - Samsung 500N | Quick Guide (ENGLISH) - Page 19
local printing. Using a USB Cable NOTE: Connecting the printer to the USB port of the computer requires a certified printer cable into the connector on the back of the printer. To the USB port on your computer 3 Connect the other end of the cable to the USB port on your computer. See the User's Guide - Samsung 500N | Quick Guide (ENGLISH) - Page 20
the back of the printer. Push the metal clips down to fit inside the notches on the cable plug. To the parallel port on your computer 3 Connect the other end of the cable to the parallel interface port on your computer, and tighten the screws. See the User's Guide of your computer - Samsung 500N | Quick Guide (ENGLISH) - Page 21
CLP-550 or CLP-550N printer to a network using an Ethernet cable (UTP cable with RJ.45 connector). CLP-550N has a built-in network interface card. If you are a CLP-550 , see the User's Guide of your printer in the CD-ROM. Using an Ethernet cable 1 Make sure that both the printer and the computer are - Samsung 500N | Quick Guide (ENGLISH) - Page 22
use the software supplied with the card. Refer to the software User's Guide. Step 6. Turning the Printer On 1 Plug the power cord into the power receptacle on the back of the printer. 2 Plug the other end into a properly grounded AC outlet and turn on the power. 1 2 CAUTIONS: • Some parts inside of - Samsung 500N | Quick Guide (ENGLISH) - Page 23
( ) on the control panel for 2 seconds to print a demo page. A demo page showing the printer's features and capabilities prints out. Step 8. Changing the Display Language To change the language that is displayed on . 6 Press the On Line/Continue button ( ) to return to ready mode. SETUP GUIDE 23 - Samsung 500N | Quick Guide (ENGLISH) - Page 24
Step 9. Installing the Printer Software The supplied CD-ROM contains Windows printing software, Macintosh printing software, Linux printing software, Win RCP (Remote Control Panel), on-line User's Guide and Acrobat Reader to view the User's Guide. If you are printing from Windows: You can install - Samsung 500N | Quick Guide (ENGLISH) - Page 25
Windows Verify the following before you install the printer software: Item Operating system RAM Free disk space Internet Explorer Requirements Windows 95/98/Me/NT 4.0/2000/XP appears during the installation procedure, click in the upper right corner of the box, or click Cancel. SETUP GUIDE 25 - Samsung 500N | Quick Guide (ENGLISH) - Page 26
click Next. If the printer is already connected and turned on, this screen does not appear. Skip to the next step. 3 Choose the installation type. •Auto Install: Installs the common software for your printer, such as printer driver, USB driver, PS driver and User's Guide. This is recommended for - Samsung 500N | Quick Guide (ENGLISH) - Page 27
the language and the component(s), click Next. •View User's Guide: Opens Samsung CLP-550 Series User's Guide. If your computer doesn't have Adobe Acrobat, click on this reprint it. 6 To register yourself as a user of Samsung Printers, select the checkbox and click Finish. You are now accessed to the - Samsung 500N | Quick Guide (ENGLISH) - Page 28
. Then repair the printer driver; select Start ¡ Programs ¡ Samsung CLP-550 Series ¡ Printer Maintenance ¡ Repair ¡ Printer. If you have replaced the parallel cable with the USB cable, do the same to repair the driver. • If your printer doesn't work properly, reinstall the printer driver. • You can - Samsung 500N | Quick Guide (ENGLISH) - Page 29
-550 Series, and then Printer Maintenance. 3 Select Repair and then click Next. NOTE: If your printer is not connected to the computer, the Connect Samsung CLP-550 Series window opens. After connecting the printer, click Next. 4 Select the components you want to reinstall and click Next. SETUP GUIDE - Samsung 500N | Quick Guide (ENGLISH) - Page 30
is done, click Finish. Removing Printer software 1 From the Start menu, select Programs. 2 Select Samsung CLP-550 Series, and then Printer Maintenance. 3 Select Remove and of the software, you can change the display language. 1 From the Start menu, select Programs. 2 Select Samsung CLP-550 Series, - Samsung 500N | Quick Guide (ENGLISH) - Page 31
can also print the manual, if necessary. In Windows After installing the printer software, you can view User's Guide in PDF format at any time from your Windows desktop. 1 From the Start menu, select Programs. 2 Select Samsung CLP-550 Series and View User's Guide. Adobe Acrobat automatically runs - Samsung 500N | Quick Guide (ENGLISH) - Page 32
appears, type in "root" in the login field and enter the system password. 2 Insert the printer software CD-ROM. 3 Click the icon at the bottom of the screen. When the terminal screen appears, pdf files with Acrobat Reader. [root@local cdrom]# acroread /mnt/cdrom/manual/ EnGuide.pdf 32 SETUP GUIDE - Samsung 500N | Quick Guide (ENGLISH) - Page 33
Visit us at: www.samsungprinter.com Home Rev.1.00
-
 1
1 -
 2
2 -
 3
3 -
 4
4 -
 5
5 -
 6
6 -
 7
7 -
8
-
9
-
10
-
11
-
12
-
13
-
14
-
15
-
16
-
17
-
18
-
19
-
20
-
21
-
22
-
23
-
24
-
25
-
26
-
27
-
28
-
29
-
30
-
31
-
32
-
33
 |
 |
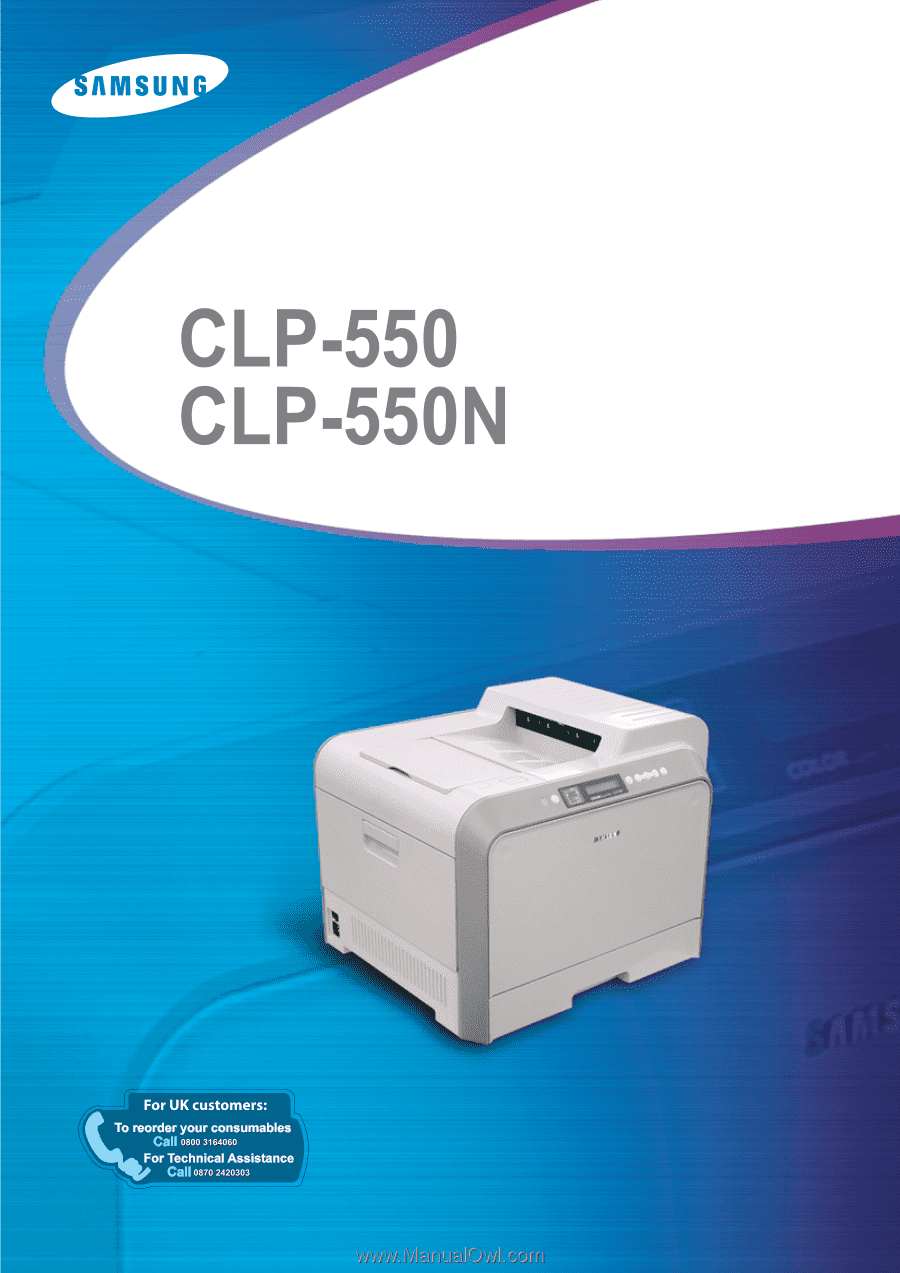
COLOR LASER PRINTER
Setup Guide