Samsung R500 User Manual
Samsung R500 - Series Earbud Headset Manual
 |
UPC - 803831623147
View all Samsung R500 manuals
Add to My Manuals
Save this manual to your list of manuals |
Samsung R500 manual content summary:
- Samsung R500 | User Manual - Page 1
without prior notice to improve the performance. The contents of this manual are subject to change without notice to improve quality. © Samsung Electronics Samsung Electronics owns the copyright for this manual. Use or reproduction of this manual in parts or entirety without the authorization of - Samsung R500 | User Manual - Page 2
Parts 1 0 Control Panel 1 0 Direct Key guide 1 1 Function Key Guide 1 2 Changing Brightness, Contrast and 14 Sharpness 3 Correct posture to use the product 24 Driver Installation 2 4 Setting Optimum Resolution 24 Screen Setup SAMSUNG MAGIC Bright 25 Brightness 2 6 Contrast 2 - Samsung R500 | User Manual - Page 3
Time 35 Power LED On 35 Reset All 35 Information 36 Installing the Software Easy Setting Box 37 Restrictions and Problems with the Installation 37 System Requirements 37 Troubleshooting Guide Requirements Before Contacting Samsung Customer Service Center 38 Testing the Product 38 - Samsung R500 | User Manual - Page 4
your nearest Samsung Customer Service Center if you want to clean the inside of the product (Service fee will NOT REMOVE COVER (OR BACK). THERE ARE NO USER SERVICEABLE PARTS INSIDE. REFER ALL SERVICING TO QUALIFIED instructions for use: This symbol instructs the user to consult the user manual for - Samsung R500 | User Manual - Page 5
easily accessible. Caution ࡙ Do not disconnect the power cord while the product is being used. ࡙ Only use the power cord provided with your product by Samsung. Do not use the power cord with other products. ࡙ Keep the power socket where the power cord is connected unobstructed. ࣕ The power cord must - Samsung R500 | User Manual - Page 6
of moisture, or a place where the product will operate continuously for an extended period of time) may seriously affect its performance. ࣕ Be sure to consult Samsung Customer Service Center if you want to install the product at such a place. 6 - Samsung R500 | User Manual - Page 7
harmed. ࡙ If the product is dropped or the outer case is damaged, turn off the power and disconnect the power cord. Then contact Samsung Customer Service Center. ࣕ Continued use can result in a fire or electric shock. ࡙ Do not leave heavy objects or items that children like (toys, sweets, etc - Samsung R500 | User Manual - Page 8
a stationary image for an extended period of time may cause afterimage burn-in or defective pixels. ࣕ Activate power-saving mode or a moving-picture screen saver if you will not be using the product for . ࡙ Use the AC/DC adapter after removing its plastic cover. ࣕ Otherwise, this may result fire. 8 - Samsung R500 | User Manual - Page 9
. ࡙ Do not touch the screen when the product has been turned on for an extended period of time as it will become hot. ࡙ Store small accessories out of the reach of children. ࡙ Exercise caution when adjusting the product angle. ࣕ Your hand or finger may get stuck and injured. ࣕ Tilting the product - Samsung R500 | User Manual - Page 10
is shown. Speciѣcations are subject to change without notice to improve quality. Power LED JOG Button UP Function Key Guide Icons JOG Button Power LED Function Key Guide Description Multi directional button that helps navigate. ࣖ The JOG button is located on the rear left side of the product - Samsung R500 | User Manual - Page 11
Sharpness. ࡙ : Auto Adjustment. ࣖ Changing the resolution in Display Properties will activate the Auto Adjustment function. ࣖ This function is only available in Analog mode. ࡙ : Display Function Key Guide. ࣖ HDMI mode option ࡙ / : Adjust Brightness, Contrast, Sharpness. ࡙ : Adjust Volume - Samsung R500 | User Manual - Page 12
(ENTER): The selected item will be applied. Return Icons Description Selects to change the input signal by moving the JOG button in the Function Key Guide screen. A message will appear on the top left corner of the screen if the input signal has been changed. Selects by moving the JOG button - Samsung R500 | User Manual - Page 13
When the monitor displays nothing (i.e. Power saving mode or Non-signal mode), 2 direct keys for control source and power could be used as below. JOG Button UP Down Power saving/Non-signal mode Source Change PRESS(ENTER) for 2 seconds Power Off When the monitor displays the Main menu the JOG - Samsung R500 | User Manual - Page 14
the audio to improve sound effect when there is sound noise or when the input signal is weak, usually due to a problem with the volume of an input device. ࣖ To activate the Mute function, access the Volume control screen, then use the JOG button to move the focus down. To deactivate the - Samsung R500 | User Manual - Page 15
Types of Ports The functions available may vary depending on the product model. The color and shape of parts may differ from what is shown. Speci cations are subject to change without notice to improve quality. Refer to the actual product. C27R50* C32R50* D-SUB IN 4 D-SUB IN 9 Port HDMI IN D- - Samsung R500 | User Manual - Page 16
you to use the product securely even in public places. ࣖ The locking device shape and locking method depend on the manufacturer. Refer to the user guide provided with your anti-theft locking device for details. To lock an anti-theft locking device: ࡙ The monitor tilt can be adjusted. ࡙ Hold the - Samsung R500 | User Manual - Page 17
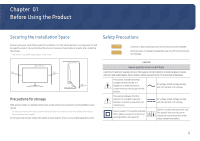
Precautions for moving the monitor ࡙ Do not directly apply pressure on the screen. ࡙ Do not hold the screen when moving the monitor. ࡙ Do not hold the product upside down only by the stand. ࡙ Hold the lower corners or edges of the monitor when moving it. 17 - Samsung R500 | User Manual - Page 18
force. The product may get damaged or fall and cause personal injury. Samsung shall not be held liable for any damage or injury caused by using or attaching the wall-mount kit or desktop stand using excessive force. Samsung shall not be held liable for any product damage or personal injury caused - Samsung R500 | User Manual - Page 19
Installation Attaching the Stand Before assembling the product, place the product down on a at and stable surface so that the screen is facing downwards. : The product is curved. Placing pressure on the product when on a at surface may damage the product. When the product is on the ground facing up - Samsung R500 | User Manual - Page 20
Removing the Stand Before assembling the product, place the product down on a at and stable surface so that the screen is facing downwards. : The product is curved. Placing pressure on the product when on a at surface may damage the product. When the product is on the ground facing up or down, do - Samsung R500 | User Manual - Page 21
and external devices to the power outlet. 4 Read the user manual to familiarize yourself with the monitor functions, precautions, and proper an HDMI cable other than provided by Samsung, the image quality may be degraded. The audio function is not supported if the source device is connected using - Samsung R500 | User Manual - Page 22
and external devices, such as computers and set-top boxes, are not connected to the power outlet. D-SUB IN Connecting to Headphones Use headphones when activating sound with an HDMI-HDMI. The earphone jack supports only the 3 conductor tip-ring-sleeve (TRS) type. 22 - Samsung R500 | User Manual - Page 23
Connecting the Power Optional C27R50* 3 1 2 1 Connect the power cable to the AC/DC adapter. Then, connect the AC/DC adapter to the DC 14V port on the back of the product. 2 Next, connect the power cable to the power outlet. 3 Press the JOG button on the back of the monitor to turn it on. The - Samsung R500 | User Manual - Page 24
set the optimum resolution and frequency for this product by installing the corresponding drivers. ࣖ To install the latest version of the product driver, download it from the Samsung Electronics website at http://www.samsung.com. Setting Optimum Resolution Use the product in the correct posture as - Samsung R500 | User Manual - Page 25
description of each function is provided. Refer to your product for details. SAMSUNG MAGIC Bright This menu provides an optimum picture quality suitable for the Movie and Custom) that are preset at the factory. You can activate either Dynamic, Standard, Movie or Custom. You can select Custom - Samsung R500 | User Manual - Page 26
mode. ࣖ This menu is not available when Game Mode is enabled. ࣖ This menu is not available when Eye Saver Mode is enabled. ࡙ Red: Adjust the red saturation level. Values closer to 100 mean greater intensity for the color. ࡙ Green: Adjust the green saturation level. Values closer to 100 mean - Samsung R500 | User Manual - Page 27
level and increase the white level when there is a contrast ratio degradation. ࣖ HDMI Black Level may not be compatible with some source devices. ࣖ The HDMI Black Level feature is only activated at a certain AV resolution, such as 720P and 1080P. Set to an optimum picture quality suitable for eye - Samsung R500 | User Manual - Page 28
original aspect ratio without cutting off. The function may not be supported depending on the ports provided with the product. Changing the screen size , 720p, or 1080p and monitor can display normally (Not every model can support all of these signals.). This can only be set when the external input - Samsung R500 | User Manual - Page 29
Chapter 05 Adjusting OSD (On Screen Display) settings A detailed description of each function is provided. Refer to your product for details. ࣖ The functions available may vary depending on the product model. The color and shape of parts may differ from what is shown. Speciѣcations are subject to - Samsung R500 | User Manual - Page 30
and Reset A to improve quality. Self Diagnosis 1 Use the Function Key Guide and go to System Self Diagnosis FreeSync Eco Saving Plus Off Diagnosis. Perform this test when you experience a off problem with your monitor's picture. Off Auto Acceleration Return ― Review the test screen. 30 - Samsung R500 | User Manual - Page 31
Self Diagnosis Complete Contact the Samsung Call Center for assistance. Please have the following information ready: ‐ Model Code S/N OK • You will card driver to the latest version and restart your PC. ‐ Connect the other device, such as a PC, to a different input port on your monitor. ‐ Reset - Samsung R500 | User Manual - Page 32
on the monitor model and compatibility with the AMD graphics card. The sound quality of the or visit the AMD website to check your graphics driver's version and update it with the latest one. issues when using the function, contact the Samsung Service Center. When the resolution is changed while - Samsung R500 | User Manual - Page 33
can only be used with speci c AMD graphics card models. Refer to the following list for supported graphics cards: Make sure to install the latest of cial graphics drivers from AMD that support FreeSync. For additional AMD graphics card models that support the FreeSync feature, visit the of cial AMD - Samsung R500 | User Manual - Page 34
is only available when Off Timer is set to On. For products for the market in some regions, the Off Timer is set to automatically activate 4 hours after the product powers on. This is done in accordance with power supply regulations. If you do not want the timer to - Samsung R500 | User Manual - Page 35
AV device. This function does not support Analog mode. Supplied for the wide Cable or power saving mode activates, press the JOG button to AV. Source Detection Select either Auto or Manual as the method to recognize input signal Reset All Return all the settings for the product to the default - Samsung R500 | User Manual - Page 36
Information View the current input source, frequency and resolution. Picture OnScreen Display System Information Information LC S/N HDMI **kHz **Hz ** ****x**** Optimal Mode ****x**** **Hz Exit The displayed image may differ depending on the model. 36 - Samsung R500 | User Manual - Page 37
version of Easy Setting Box, download it from the Samsung Electronics website at http://www.samsung.com. The software may not work properly if key. Restrictions and Problems with the Installation The Easy Setting Box installation may be affected by the Graphics Card, Motherboard and the Networking - Samsung R500 | User Manual - Page 38
Chapter 08 Troubleshooting Guide Requirements Before Contacting Samsung Customer Service Center Before calling Samsung Customer Service Center, test your product as follows. If the problem persists, contact Samsung Customer Service Center. Testing the Product Check if your product is operating - Samsung R500 | User Manual - Page 39
frequency compatible with the product. Next, if required, change the settings, referring to Standard Signal Mode Table (P.42 ) in this manual and to the maximum level, adjust the volume on your PC sound card or software program. Video is available but there is no sound. Sound cannot be serviced. 39 - Samsung R500 | User Manual - Page 40
Q & A Refer to the user manual for your PC or graphics card for further instructions on adjustment. How can I change the frequency? Set the frequency on your graphics card. Windows 7: Go to Control Panel Appearance and Personalization Display Screen Resolution Advanced settings Monitor, and adjust - Samsung R500 | User Manual - Page 41
condensing ― Plug-and-Play This monitor can be installed and used with any Plug-and-Play compatible systems. Two-way data exchange between the monitor and PC system optimizes the monitor settings. digital apparatus. ― For detailed device specifications, visit the Samsung Electronics website. 41 - Samsung R500 | User Manual - Page 42
even though the power LED turns on. In such a case, change the settings according to the following table by referring to the graphics card user manual. VGA/HDMI Resolution IBM, 720 x 400 Horizontal Frequency (kHz) 31.469 Vertical Frequency (Hz) 70.087 Pixel Clock (MHz) 28.322 Sync Polarity - Samsung R500 | User Manual - Page 43
even though the power LED turns on. In such a case, change the settings according to the following table by referring to the graphics card user manual. VGA Resolution Horizontal Frequency (kHz) Vertical Frequency (Hz) Pixel Clock (MHz) Sync Polarity (H/V) IBM, 720 x 400 31.469 70.087 28.322 - Samsung R500 | User Manual - Page 44
VGA Resolution VESA, 1600 x 900 VESA, 1680 x 1050 VESA, 1920 x 1080 HDMI Resolution IBM, 720 x 400 VESA, 640 x 480 MAC, 640 x 480 VESA, 640 x 480 VESA, 640 x 480 VESA, 800 x 600 VESA, 800 x 600 VESA, 800 x 600 VESA, 800 x 600 MAC, 832 x 624 VESA, 1024 x 768 VESA, 1024 x 768 VESA, 1024 x 768 VESA, - Samsung R500 | User Manual - Page 45
that you select the optimum resolution speci ed for your product. Some resolutions listed in the table above may not be available depending on graphics card speci cations. 45 - Samsung R500 | User Manual - Page 46
how to use because of another company's product. If customer requests instructions on how to use the network or another company's Program. If customer requests software installation and setup for the product. If a service technician removes/cleans dusts or foreign materials inside of the product. If
-
 1
1 -
 2
2 -
 3
3 -
 4
4 -
 5
5 -
 6
6 -
 7
7 -
8
-
9
-
10
-
11
-
12
-
13
-
14
-
15
-
16
-
17
-
18
-
19
-
20
-
21
-
22
-
23
-
24
-
25
-
26
-
27
-
28
-
29
-
30
-
31
-
32
-
33
-
34
-
35
-
36
-
37
-
38
-
39
-
40
-
41
-
42
-
43
-
44
-
45
-
46
 |
 |

User Manual
The color and the appearance may differ depending on the product, and the
ϑ
peci
ѣ
cations are subject to change without
prior notice to improve the performance.
The contents of this manual are subject to change without notice to improve quality.
© Samsung Electronics
Samsung Electronics owns the copyright for this manual.
Use or reproduction of this manual in parts or entirety without the authorization of Samsung Electronics is prohibited.
Trademarks other than that of Samsung Electronics are owned by their respective owners.
C27R50*
C
32
R50*
(For India Only)
This product is RoHS compliant.
For more information on safe disposal and recycling visit our
website www.samsung.com/in or contact our Helpline numbers-
1800 40 SAMSUNG (1800 40 7267864) (Toll-Free)