Samsung RH25H5611SG User Manual - Page 11
Removing The Refrigerator, Doors - parts
 |
View all Samsung RH25H5611SG manuals
Add to My Manuals
Save this manual to your list of manuals |
Page 11 highlights
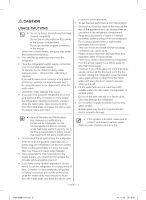
setting up How to install the handles Using a Philips head screwdriver, attach fixer screws to the screw holes on each door. If your refrigerator already has the fixer screws installed, skip this step. ( 4 ) L ( 5 ) S Orient each handle so that the end with the sticker attached is at the top and the holes for the screws are facing the screw holes on the refrigerator door. REMOVING THE REFRIGERATOR DOORS If your entrance won't allow the refrigerator to pass through it easily, you can remove the refrigerator doors. To remove the doors, follow the steps below. If you do not need to remove the doors, go to "Leveling the Refrigerator" on page 14. Place a handle over the fixer screws on one door, and then slide the handle down firmly. Repeat with the second handle on the other door. For Models with a lever attached to the right handle, push the lever button on the handle in, hold it in place, and then slide the bottom of the handle down over the fixer screw. L ( 1 ) Tools You'll Need Philips Screwdriver Flat-blade Screwdriver 10 mm Socket Wrench S ( 2 ) ( 3 ) 1. Remove the Front Leg Cover Open both the freezer and refrigerator doors. Unscrew the three screws holding the front leg cover in place by turning them counter-clockwise. When the screws are loose, remove the front leg cover. Fix the handles to the doors by sliding them down firmly. Using the include hex wrench, tighten the set screw on the top inside section of each handle. Use the longer part of the hex wrench to begin tightening, and then the shorter part to tighten the screw fully, as shown in the diagram below. Front leg cover Screw CAUTION When disassembling, make sure the unit is turned off. English - 11 DA68-02981J-00.indb 11 14. 11. 25. �� 10:26
-
 1
1 -
2
-
3
-
4
-
5
-
 6
6 -
 7
7 -
 8
8 -
 9
9 -
 10
10 -
 11
11 -
 12
12 -
 13
13 -
 14
14 -
 15
15 -
 16
16 -
17
-
18
-
19
-
20
-
21
-
22
-
23
-
24
-
25
-
26
-
27
-
28
-
29
-
30
-
31
-
32
-
33
-
34
-
35
-
36
-
37
-
38
-
39
-
40
-
41
-
42
-
43
-
44
-
45
-
46
-
47
-
48
-
49
-
50
-
51
-
52
-
53
-
54
-
55
-
56
-
57
-
58
-
59
-
60
-
61
-
62
-
63
-
64
-
65
-
66
-
67
-
68
-
69
-
70
-
71
-
72
-
73
-
74
-
75
-
76
-
77
-
78
-
79
-
80
-
81
-
82
-
83
-
84
-
85
-
86
-
87
-
88
-
89
-
90
-
91
-
92
-
93
-
94
-
95
-
96
-
97
-
98
-
99
-
100
-
101
-
102
-
103
-
104
 |
 |
