Samsung SCV-3080 User Manual - Page 14
Installation
 |
View all Samsung SCV-3080 manuals
Add to My Manuals
Save this manual to your list of manuals |
Page 14 highlights
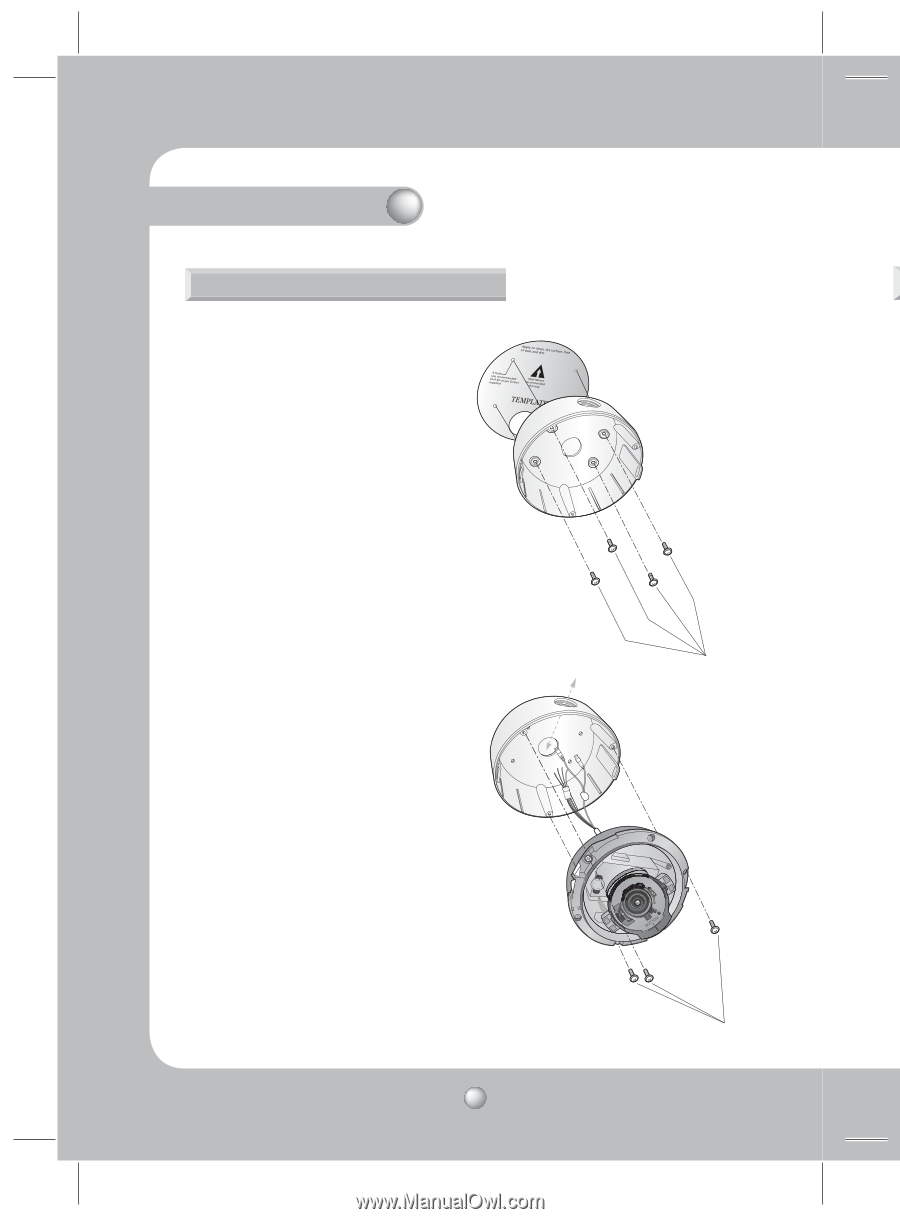
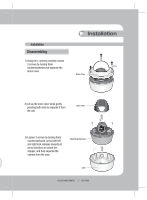
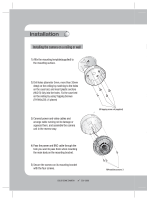
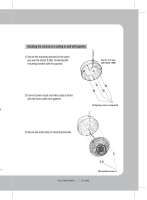
Installation Installing the camera on a ceiling or wall 1 1) Affix the mounting template(supplied) to the mounting surface. 2) Drill holes (diameter 5mm, more than 35mm deep) on the ceiling by matching to the holes on the case bed, and insert plastic anchors (HUD 5) fully into the holes. Fix the case bed on the ceiling by using Tapping Screws 2 (TH M4xL30). (4 places) Ø5 tapping screw x 4 (supplied) 3) Connect power and video cables and arrange cable running not to damage or squeeze them, and assemble the camera unit in the reverse way. 3 4) Pass the power and BNC cable through the hole you want to pass them when mounting the main body on the mounting bracket. 5) Secure the camera on its mounting bracket with the four screws. COLOR DOME CAMERA 14 SCV-3080 M4 machine screw x 3
-
 1
1 -
2
-
3
-
4
-
5
-
6
-
7
-
8
-
 9
9 -
 10
10 -
 11
11 -
 12
12 -
 13
13 -
 14
14 -
 15
15 -
 16
16 -
 17
17 -
 18
18 -
 19
19 -
20
-
21
-
22
-
23
-
24
-
25
-
26
-
27
-
28
-
29
-
30
-
31
-
32
-
33
-
34
-
35
-
36
-
37
-
38
-
39
-
40
-
41
-
42
-
43
-
44
-
45
-
46
-
47
-
48
 |
 |