Samsung SM-T110 User Manual Generic Wireless Sm-t110 Galaxy Tab 3 Lite Kk Engl - Page 126
System, Adding an Account, Date and Time
 |
View all Samsung SM-T110 manuals
Add to My Manuals
Save this manual to your list of manuals |
Page 126 highlights
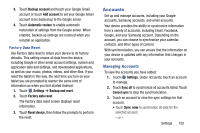
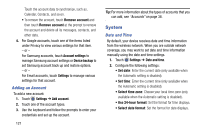
Touch the account data to synchronize, such as, Calendar, Contacts, and so on. • To remove the account, touch Remove account and then touch Remove account at the prompt to remove the account and delete all its messages, contacts, and other data. 4. For Google accounts, touch one of the items listed under Privacy to view various settings for that item. - or - For Samsung accounts, touch Account settings to manage Samsung account settings or Device backup to set Samsung account back up and restore options. - or - For Email accounts, touch Settings to manage various settings for that account. Adding an Account To add a new account: 1. Touch Settings ➔ Add account. 2. Touch one of the account types. 3. Use the keyboard and follow the prompts to enter your credentials and set up the account. 121 Tip: For more information about the types of accounts that you can add, see "Accounts" on page 38. System Date and Time By default, your device receives date and time information from the wireless network. When you are outside network coverage, you may want to set date and time information manually using the date and time settings. 1. Touch Settings ➔ Date and time. 2. Configure the following settings: • Set date: Enter the current date (only available when the Automatic setting is disabled). • Set time: Enter the current time (only available when the Automatic setting is disabled). • Select time zone: Choose your local time zone (only available when the Automatic setting is disabled). • Use 24-hour format: Set the format for time displays. • Select date format: Set the format for date displays.
-
 1
1 -
2
-
3
-
4
-
5
-
6
-
7
-
8
-
9
-
10
-
11
-
12
-
13
-
14
-
15
-
16
-
17
-
18
-
19
-
20
-
21
-
22
-
23
-
24
-
25
-
26
-
27
-
28
-
29
-
30
-
31
-
32
-
33
-
34
-
35
-
36
-
37
-
38
-
39
-
40
-
41
-
42
-
43
-
44
-
45
-
46
-
47
-
48
-
49
-
50
-
51
-
52
-
53
-
54
-
55
-
56
-
57
-
58
-
59
-
60
-
61
-
62
-
63
-
64
-
65
-
66
-
67
-
68
-
69
-
70
-
71
-
72
-
73
-
74
-
75
-
76
-
77
-
78
-
79
-
80
-
81
-
82
-
83
-
84
-
85
-
86
-
87
-
88
-
89
-
90
-
91
-
92
-
93
-
94
-
95
-
96
-
97
-
98
-
99
-
100
-
101
-
102
-
103
-
104
-
105
-
106
-
107
-
108
-
109
-
110
-
111
-
112
-
113
-
114
-
115
-
116
-
117
-
118
-
119
-
120
-
 121
121 -
 122
122 -
 123
123 -
 124
124 -
 125
125 -
 126
126 -
 127
127 -
 128
128 -
 129
129 -
 130
130 -
 131
131 -
132
-
133
-
134
-
135
-
136
-
137
-
138
-
139
-
140
-
141
-
142
-
143
-
144
-
145
-
146
-
147
-
148
-
149
-
150
-
151
-
152
-
153
-
154
-
155
-
156
-
157
-
158
-
159
-
160
-
161
-
162
-
163
-
164
-
165
-
166
-
167
-
168
-
169
-
170
 |
 |
