Samsung SMH7159BC User Manual (user Manual) (ver.1.0) (English) - Page 19
Auto Sensor Cook, Utensils & Cover For Sensor Cooking, Important, the Auto Sensor.
 |
View all Samsung SMH7159BC manuals
Add to My Manuals
Save this manual to your list of manuals |
Page 19 highlights
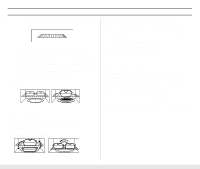
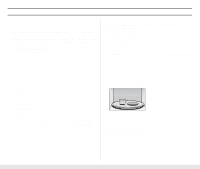
Cooking Instructions Auto Sensor Cook The Auto Sensor allows you to cook your food automatically by detecting the amount of gases generated from the food while cooking. • When cooking food, many kinds of gases are generated. The Auto Sensor determines the proper time and power level by detecting these gases from the food, eliminating the need to set the cooking time and power level. • When you cover a container with its lid or plastic wrap during Sensor Cooking, the Auto Sensor will detect the gases generated after the container has been saturated with steam. • Shortly before cooking ends, the remaining cooking time will begin its count down. This will be a good time for you to rotate or stir the food for even cooking if it is necessary. • Before auto sensor cooking food may be seasoned with herbs, spices or browning sauces. A word of caution though, salt or sugar may cause burn spots on food so these ingredients should be added after cooking. • The More/Less function pad is used to increase or decrease cooking time. You should use this function to adjust the degree of cooking to suit your personal taste. Important • After installing the oven and plugging into an electrical outlet, do not unplug the power cord. The gas sensor needs time to stabilize in order to cook satisfactorily. • It its not advisable to use the auto sensor cooking feature on a continuous cooking operation, i.e. one cooking operation immediately after another. • Install the oven in a well ventilated location for proper cooling and airflow and to ensure the sensor will operate accurately. • To avoid poor results, do not use the Auto sensor when the room ambient temperature is too high or too low. • Do not use volatile detergent to clean your oven. Gas resulting from this detergent may affect the sensor. • Avoid placing the oven near high moisture or gas emitting appliances, since this will interfere with the proper performance of the Auto Sensor. • Always keep the inside of the oven clean. Wipe all spills with a damp cloth. This oven is designed for household use only. Utensils & Cover For Sensor Cooking • To obtain good cooking results with this function, follow the directions for selecting appropriate containers and covers in the charts in this book. • Always use microwave-safe containers and cover them with their lids or with plastic wrap. When using plastic wrap, turn back one corner to allow steam to escape at the proper rate. • Always cover with the lid intended for the utensil being used. If the utensil does not have its own lid, use plastic wrap. • Fill containers at least half full. • Foods that require stirring or rotating should be stirred or turned toward the end of the Sensor Cook cycle, after the time has started to count down on the display. 19
-
 1
1 -
2
-
3
-
4
-
5
-
6
-
7
-
8
-
9
-
10
-
11
-
12
-
13
-
 14
14 -
 15
15 -
 16
16 -
 17
17 -
 18
18 -
 19
19 -
 20
20 -
 21
21 -
 22
22 -
 23
23 -
 24
24 -
25
-
26
-
27
-
28
-
29
-
30
-
31
-
32
-
33
-
34
-
35
-
36
 |
 |
