Sharp 172A-W Operation Manual
Sharp 172A-W - 17" LCD Monitor Manual
 |
UPC - 074000046115
View all Sharp 172A-W manuals
Add to My Manuals
Save this manual to your list of manuals |
Sharp 172A-W manual content summary:
- Sharp 172A-W | Operation Manual - Page 1
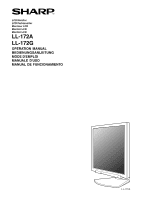
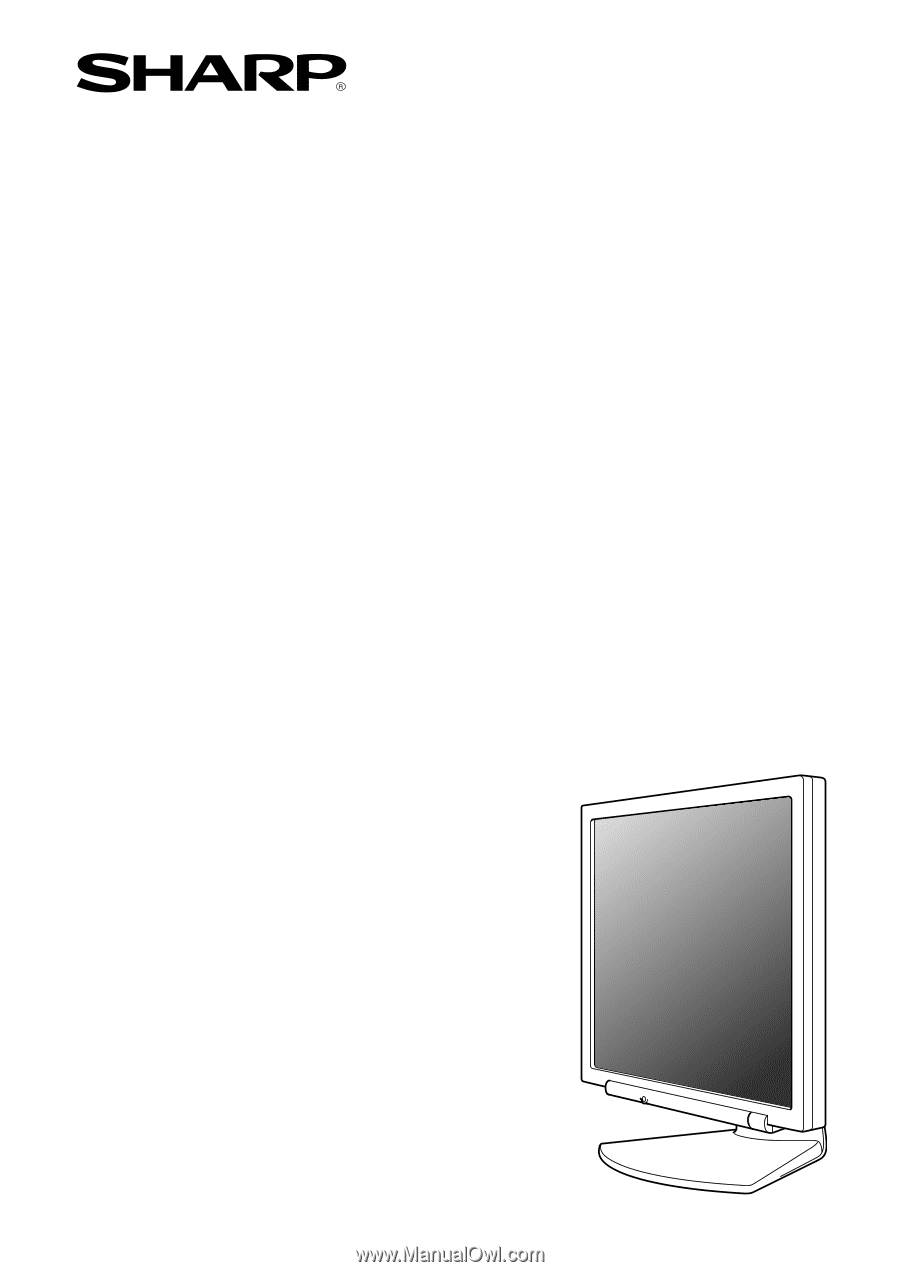
LCD Monitor LCD Farbmonitor Moniteur LCD Monitor LCD Monitor LCD LL-172A LL-172G OPERATION MANUAL BEDIENUNGSANLEITUNG MODE D'EMPLOI MANUALE D'USO MANUAL DE FUNCIONAMIENTO LL-172A - Sharp 172A-W | Operation Manual - Page 2
Table of Contents/Inhaltsverzeichnis/Table des matières/Indice/Índice Notice for Users in the USA 3 Notice for Users in Europe 4 Notice for Users in the UK 5 Notice for Users in Australia 5 TCO'03 6 TCO'99 7 English 9 Deutsch 37 Français 65 Italiano 93 Español 121 - Sharp 172A-W | Operation Manual - Page 3
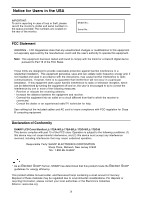
in accordance with the instructions, may cause harmful interference TV technician for help. Use nothing but the included cables and AC cord to insure compliance with FCC regulation for Class B computing equipment. Declaration of Conformity SHARP LCD Color Monitor LL-172A-W/LL-172A-B/LL-172G-W/LL-172G - Sharp 172A-W | Operation Manual - Page 4
EEC ja 73/23/EEC vaatimukset, joita on muutettu direktiivillä 93/ 68/EEC. CAUTION: TO PREVENT ELECTRICAL SHOCK, DISCONNECT THE AC CORD BEFORE SERVICING. CAUTION: FOR A COMPLETE ELECTRICAL DISCONNECTION, PULL OUT THE MAIN PLUG. VORSICHT: UM DIE STROMZUFUHR VOLLSTÄNDIG ZU UNTERBRECHEN, DEN NETZSTECKER - Sharp 172A-W | Operation Manual - Page 5
. If you are in any doubt consult a qualified electrician. "WARNING: THIS APPARATUS MUST BE EARTHED." Notice for Users in Australia Service Inquiries Please contact your dealer for service if required or contact Sharp Corporation of Australia on 1 300 13 50 22 for referral to your nearest - Sharp 172A-W | Operation Manual - Page 6
Congratulations! LL-172A-W LL-172G-W The display you have just purchased carries the TCO'03 order to improve the working environment for the user and to reduce sight and strain problems. Important parameters are luminance, contrast, resolution, reflectance, colour rendition and image stability. - Sharp 172A-W | Operation Manual - Page 7
English Français Deutsch Italiano Español LL-172A-B LL-172G-B Congratulations! You have just purchased a TCO'99 approved and encouraging the adaptation of goods and services to the environment. The main problem, as far as computers and other electronics equipment are concerned, is that - Sharp 172A-W | Operation Manual - Page 8
'99 requirement states that batteries may not contain any mercury. It also demands that mercury is not present in any of the electrical or electronics components associated with the labelled unit. There is however one exception. Mercury is, for the time being, permitted in the back light system of - Sharp 172A-W | Operation Manual - Page 9
Turning the power on 17 Changing between input terminals [LL-172G 18 Turning the power off 18 Adjusting the screen display and Manual screen adjustment 22 Monitor care 25 Monitor care 25 Storage 25 Troubleshooting 25 Information for customers on environmentally friendly disposal of this SHARP - Sharp 172A-W | Operation Manual - Page 10
brightness. Please note that these are not malfunctions but common phenomena of LCDs and will not affect the performance of the monitor. - Do not rub or tap the monitor with hard objects. - Please understand that Sharp Corporation bears no responsibility for errors made during use by the customer - Sharp 172A-W | Operation Manual - Page 11
LCD monitor (1) - Analog signal cable (1) (model name: 0NW1738GAB01A) - [LL-172G] Digital signal cable (1) (model name: 0NW1748LAB007) - Audio cable (1) (model name: 0NW0173056023) - [LL-172G] Cable clamp (2) - Power cord (1) - CD-ROM (1) - Operation manual transported. - Sharp Corporation holds - Sharp 172A-W | Operation Manual - Page 12
AUTO button [LL-172A This button is used to perform automatic adjustment of the screen (CLOCK, PHASE, H-POS and V-POS). (p.21) INPUT button [LL-172G] ......... To switch between the signal's input terminals. 2. MENU button This button is used to pop-up, select and close the OSD (On Screen Display - Sharp 172A-W | Operation Manual - Page 13
from hands on the LCD panel could cause damage. - Be careful not to allow your fingers to be pinched. Height adjustment [LL-172G] 1. Release the lock 2 Angle adjustment [LL-172A] approx. 25° 3 1 approx. 5° [LL-172G] approx. 25° approx. 5° CAUTION! - Be sure to release the lock before - Sharp 172A-W | Operation Manual - Page 14
Analog connection [LL-172A] Connect the accessory analog signal cable to the analog RGB output terminal of the computer. Securing the cables [LL-172G] Use the supplied cable clamps to secure the cables connected to the terminals. The upper and lower cable clamps have different shapes. Check the - Sharp 172A-W | Operation Manual - Page 15
terminal (INPUT-1). - Connect the separately-sold analog signal cable (model name: NL-C02E) to the DVI-I input terminal (INPUT-2). Digital connection [LL-172G] Connect the accessory digital signal cable to the digital RGB output terminal of the computer. - The monitor has an input for connecting to - Sharp 172A-W | Operation Manual - Page 16
on and off When connecting using a separately sold 2-input cable [LL-172G] The separately sold 2-input cable (model name: NL-C03J) enables recognized and setup under Plug & Play. Perform storage of setup information manually. (p.31) Connect the accessory audio cable When the accessory audio cable - Sharp 172A-W | Operation Manual - Page 17
. (After power is turned on, it may take a little time until the screen is displayed.) Note for LL-172G: - If the input terminal to which the computer is connected has not been selected, the screen will not be display properly. In this case, change the setting to display only the LCD monitor. 17 - Sharp 172A-W | Operation Manual - Page 18
Connecting the monitor and turning the monitor on and off Changing between input terminals [LL-172G] Use the INPUT button to switch between signal input terminals. Analog RGB input terminal DVI-I input terminal INPUT-1 INPUT INPUT-2 < > Turning the power off 1. - Sharp 172A-W | Operation Manual - Page 19
For analog signal 1. First perform an automatic adjustment. (p.21) 2. Perform manual adjustment where necessary. (p.22) For digital signal [LL-172G] The monitor can generally be used without adjustment. If necessary perform manual adjustment. (p.22) Note: - All adjustments will be saved even after - Sharp 172A-W | Operation Manual - Page 20
Adjusting the screen display and speaker volume Adjusting the speaker volume 1. Without the OSD Menu being displayed, press the or the button. 2. Check that [VOLUME] is selected. If it is not selected, press the / MODE button and select [VOLUME]. 3. Adjust by pressing the button (decrease) or - Sharp 172A-W | Operation Manual - Page 21
of the current system, perform an automatic screen adjustment before use. - Automatic screen adjustment is unnecessary when the LL-172G is used with a digital connection. Perform manual screen adjustment when necessary. (p.22) AUTO button [LL-172A] 1. Press the AUTO button. 2. Press the AUTO button - Sharp 172A-W | Operation Manual - Page 22
Adjusting the screen display Manual screen adjustment 1. Display an image that makes the entire screen light. (p.21) 2. Display the OSD Menu by pressing the MENU button. (Example: Displayed screen of the LL-172G) ADJUSTMENT Menu Select the option by pressing the / MODE button. MENU GAIN CONTROL - Sharp 172A-W | Operation Manual - Page 23
Adjusting the screen display GAIN CONTROL Menu When the LL-172G is used with a digital connection, this menu adjustment is [CONTRAST] settings are automatically adjusted. After the automatic adjustment, perform manual adjustment when necessary. COLOR CONTROL Menu WHITE BALANCE 1. After selecting - Sharp 172A-W | Operation Manual - Page 24
inspection and other activities during manufacture. SCALING (Level of scaling) The sharpness of the image can be adjusted. ( buttons) Note: - When the If there is no input signal, [NO SIGNAL] is displayed.) INPUT-2 [LL-172G] Set [1LINE] when connecting a digital or analog signal cable to a DVI - Sharp 172A-W | Operation Manual - Page 25
Troubleshooting LCD panel section Use a soft dry cloth to lightly wipe away dirt and dust from the surface of the LCD the monitor or your nearest Sharp authorized Service Center. - In the LL-172G, confirm that the signal's input terminal is selected correctly. (p.18) - If using the LL-172G, confirm - Sharp 172A-W | Operation Manual - Page 26
Please contact your local authorities for collection and recycling facilities, or contact a recycling service company, which is licensed for the recycling of electronic equipment. SHARP recommends the recycling services of MIREC, the General information on MIREC can be obtained from http://www.mirec - Sharp 172A-W | Operation Manual - Page 27
Français Deutsch Italiano Español Product specifications Model name LL-172A-W (White)/LL-172A-B (Black) LL-172G-W (White)/LL-172G-B (Black) LCD display 43 cm measured diagonally TFT LCD module Resolution (max.) SXGA 1280 x 1024 pixels Displayable colors (max.) Approx.16.19 million colors (6 bit - Sharp 172A-W | Operation Manual - Page 28
- Analog signal cable: approx. 1.8 m - Audio cable: approx. 1.8 m [LL-172G] - Digital signal cable: approx. 1.8 m - Analog signal cable, NL-C02E (purchased : - As a part of our policy of continuous improvement, SHARP reserves the right to make design and specification changes for product improvement - Sharp 172A-W | Operation Manual - Page 29
Hsync Vsync Dot frequency Relevant signal timings (digital) [LL-172G] Display mode VESA Hsync Dot Vsync frequency US text Power that are not compatible, [OUT OF TIMING] will appear. Follow your computer's instruction manual to set the timing so that it is compatible with the monitor. - If - Sharp 172A-W | Operation Manual - Page 30
15 GND Power management The LL-172A is based on VESA DPMS. The LL172G is based on both VESA DPMS and DVI DMPM. To activate the power Power Management [LL-172G] DMPM mode Screen Power consumption ON Display on 35 W OFF Display off 1 W DDC (Plug & Play) This monitor supports the VESA DDC ( - Sharp 172A-W | Operation Manual - Page 31
Please follow the computer's own operation manual while reading this.) About the ICC the color reproduction characteristics of the LCD monitor. Using an application compatible with [Display a list of all the drivers in a specific location, so you can select the driver you want.], then click [Next]. - Sharp 172A-W | Operation Manual - Page 32
CD-ROM into the CD-ROM drive of the computer. 2. Check [Specify the location of the driver [Advanced]] and click [Next]. 3. Check [Display a list of all the drivers in a specific location, so you can select the driver you want.], then click [Next]. 4. When [Models] is displayed, click on [Have disk - Sharp 172A-W | Operation Manual - Page 33
[Hardware Update Wizard] appears, check [Install from a list or specific location [Advanced]] and click [Next]. 8. Check [Don't search. I will choose the driver to install.] and click [Next]. 9. Click on [Have Disk], confirm that [Copy manufacturer's files from:] is [D:], and click [OK]. 10. Select - Sharp 172A-W | Operation Manual - Page 34
application. A ColorSync profile describes the color characteristics of the LCD monitor. Notes: - This monitor's ColorSync profile works OS, command names and methods may differ. Please follow the computer's own operation manual while reading this. 1. Load the accessory CD-ROM into the CD-ROM drive - Sharp 172A-W | Operation Manual - Page 35
also refer to the installation instructions in the operation manual included with the arm or stand. CAUTION! - Be careful not to get your fingers pinched between the display and stand nor to let the stand drop. These could lead to injury. CAUTION! Store the stand of the LL-172G in its most extended - Sharp 172A-W | Operation Manual - Page 36
36 - Sharp 172A-W | Operation Manual - Page 37
und Ein- und Ausschalten des Monitors 42 Befestigen der Kabel [LL-172G 42 Verbinden des Monitors mit einem Computer 42 Anschluss von Kopfhörern 53 Informationen für Kunden über umweltfreundliche Entsorgung dieses SHARP-Produkts 54 Technische Daten 55 Installieren der Setup-Informationen - Sharp 172A-W | Operation Manual - Page 38
die Farben unregelmäßig oder zu hell erscheinen. Dies ist normal bei LCD-Monitoren und hat keinen Einfluss auf die Leistungsfähigkeit des Gerätes. berührt werden. - Wir bitten um Ihr Verständnis, dass Sharp Corporation über die gesetzlich anerkannte Leistungshaftung hinaus keine Haftung für Fehler - Sharp 172A-W | Operation Manual - Page 39
Vollständigkeit. - LCD-Monitor (1) - Analogsignalkabel (1) (Modellbezeichnung: 0NW1738GAB01A) - [LL-172G] Digitalsignalkabel (1) ( den Karton für einen eventuellen Transport des Monitors auf. - Sharp Corporation besitzt Urheberrechte am Programm Utility Disk. Eine Reproduktion ist ohne - Sharp 172A-W | Operation Manual - Page 40
AUTO [LL-172A Diese Taste dient zum Ausführen automatischer Einstellung des Bildschirms (CLOCK, PHASE, H-POS und V-POS). (S.49) Taste INPUT [LL-172G Für die Umschaltung zwischen den Signaleingangsanschlüssen. 2. Taste MENU Mit dieser Taste öffnen, wählen und schließen Sie das OSD (On Screen - Sharp 172A-W | Operation Manual - Page 41
besteht aus Glas. Durch Druck mit der Hand auf das LCD-Panel können Schäden hervorgerufen werden. - Vorsichtig vorgehen und Sie die Sperre. Ca. 70 mm 2 Winkeleinstellung [LL-172A] Ca. 25° 3 1 Ca. 5° [LL-172G] Ca. 25° Ca. 5° Ca. 45° Ca. 45° ACHTUNG! - Stellen Sie sicher, dass die Sperre - Sharp 172A-W | Operation Manual - Page 42
-172A] Schließen Sie das als Zubehör mitgelieferte Analogsignalkabel am analogen RGBAusgangsanschluss des Computers an. Befestigen der Kabel [LL-172G] Verwenden Sie die mitgelieferten Kabelklammern zum Befestigen der Kabel an den Anschlüssen. Die oberen und unteren Kabelklammern haben verschiedene - Sharp 172A-W | Operation Manual - Page 43
ßen Sie das getrennt erhältliche Analogsignalkabel (Modellbezeichnung: NL-C02E) an den DVI-I-Eingangsanschluss (INPUT-2) an. Digitaler Anschluss [LL-172G] Schließen Sie das als Zubehör mitgelieferte Digitalsignalkabel an den digitalen RGBAusgangsanschluss des Computers an. - Der Monitor hat einen - Sharp 172A-W | Operation Manual - Page 44
Anschließen des Monitors und Ein- und Ausschalten des Monitors Beim Anschluss eines getrennt erhältlichen 2-Eingangskabels [LL-172G] Das getrennt erhältliche 2-Eingangskabel (Modellbezeichnung: NL-C03J) ermöglicht die Verbindung zwischen dem DVI-IEingangsanschluss des Monitors und zwei Computern. ( - Sharp 172A-W | Operation Manual - Page 45
die Wiedergabe wird aktiviert. (Nach dem Einschalten des Gerätes kann es eine kurze Zeit dauern, bis die Wiedergabe aktiviert wird.) Hinweis für LL-172G: - Wenn der Eingangsanschluss, an den der Computer angeschlossen ist, nicht gewählt ist, wird auf dem Bildschirm nichts angezeigt. Falls notwendig - Sharp 172A-W | Operation Manual - Page 46
Anschließen des Monitors und Ein- und Ausschalten des Monitors Umschalten zwischen Eingangsanschlüssen [LL-172G] Mit der Taste INPUT schalten Sie die Signaleingangsanschlüsse um. Analoger RGB-Eingangsanschluss DVI-I-Eingangsanschluss INPUT-1 INPUT INPUT-2 < > Ausschalten des - Sharp 172A-W | Operation Manual - Page 47
1. Führen Sie zunächst eine automatische Einstellung durch. (S.49) 2. Führen Sie bei Bedarf eine manuelle Einstellung durch. (S.50) Digitalsignal [LL-172G] Der Monitor kann in der Regel ohne Einstellung verwendet werden. Führen Sie bei Bedarf eine manuelle Einstellung durch. (S.50) Hinweis: - Alle - Sharp 172A-W | Operation Manual - Page 48
0 (Null) ist. Der Farbton oder die Helligkeit kann mit einem Befehl geändert werden. STD Der Farbton stammt vom Originalschema des LCD-Panels. OFFICE Die Display-Helligkeit wird verringert. (Dieser Modus spart Energie.) sRGB sRGB ist ein internationaler Standard für die Farbdarstellung, der von - Sharp 172A-W | Operation Manual - Page 49
ist damit abgeschlossen.) Taste MENU 1. Drücken Sie die Taste MENU. Das Menü ADJUSTMENT wird angezeigt. (Beispiel: Dargestellter Bildschirm des LL-172G) Bildschirmanzeige zur Einstellung Zeigen Sie zunächst ein Bild an, das den gesamten Bildschirm sehr hell erscheinen lässt. Wenn Sie mit Windows - Sharp 172A-W | Operation Manual - Page 50
gesamten Bildschirm sehr hell erscheinen lässt. (S.49) 2. Rufen Sie das OSD-Menü durch Drücken der Taste MENU ab. (Beispiel: Dargestellter Bildschirm des LL-172G) Menü ADJUSTMENT Wählen Sie die Option durch Drücken der Taste / MODE. MENU Menü GAIN CONTROL Wählen Sie die Option durch Drücken der - Sharp 172A-W | Operation Manual - Page 51
Einstellen der Bildschirmanzeige English Français Deutsch Italiano Español Menü GAIN CONTROL Wenn der LL-172G mit einer digitalen Verbindung verwendet wird, ist dise Menüeinstellung nicht nötig. AUTO Wenn [AUTO] mit der Taste gewählt ist, werden die Einstellungen von [ - Sharp 172A-W | Operation Manual - Page 52
, wird die eingestellte Zeit einige Sekunden lang angezeigt. (Wenn kein Eingangssignal vorhanden ist, wird [NO SIGNAL] angezeigt.) INPUT-2 [LL-172G] Stellen Sie [1LINE] ein, wenn ein Digital- oder Analogsignalkabel am DVI-I-Eingangsanschluss (INPUT-2) angeschlossen wird. Stellen Sie [2LINES] ein - Sharp 172A-W | Operation Manual - Page 53
Tuch vorsichtig sauber. autorisierte Sharp-Kundendienstzentrum. Falls starke und wieder LCD-Panel ein. Wischen Sie Schmutz und Staub von der Oberfläche des LCD-Panels mit des LL-172G bestätigen, dass die Signal-Eingangsanschluss richtig gewählt ist. (S.46) - Wenn Sie den LL-172G verwenden, - Sharp 172A-W | Operation Manual - Page 54
Recylingfirma, die zum Recycling von Elektronikgeräten lizensiert ist. SHARP empfiehlt die Recyclingdienste von MIREC; weitere Informationen über MIREC siehe wenden Sie sich an die örtlichen Behörden oder an die Electronics Industries Alliance: http://www.eiae.org (4) Für unsere Kunden in Japan - Sharp 172A-W | Operation Manual - Page 55
English Français Deutsch Italiano Español Produktspezifikationen Modellbezeichnung LL-172A-W (Weiß)/LL-172A-B (Schwarz) LL-172G-W (Weiß)/LL-172G-B (Schwarz) LCD-Anzeige 43 cm diagonal gemessen TFT-LCD-Modul Auflösung (max.) SXGA 1280 x 1024 Pixel Anzeigbare Farben (max.) Ca. 16,19 Millionen - Sharp 172A-W | Operation Manual - Page 56
57,5 - Analogsignalkabel: ca. 1,8 m - Audiokabel: ca. 1,8 m [LL-172G] - Digitalsignalkabel: ca. 1,8 m - Analogsignalkabel, NL-C02E (separat erhältlich): Hinweis: - Bedingt durch fortlaufende technische Verbesserungen behält sich SHARP das Recht vor, das Design und die Spezifikationen ohne vorherige - Sharp 172A-W | Operation Manual - Page 57
English Français Deutsch Technische Daten Relevante Signaltakte (analog) Anzeigemodus VESA Hsync Vsync Punktfrequenz Relevante Signaltakte (digital) [LL-172G] Anzeigemodus VESA Hsync Vsync Punktfrequenz US-Text Power MacintoshSerie Sun UltraSerie - Die empfohlene Auflösung ist 1280 x 1024. - Sharp 172A-W | Operation Manual - Page 58
Management Der LL-172A basiert auf VESA DPMS. Der LL172G basiert auf sowohl VESA DPMS und DVI DMPM. Zum Monitor Power Management [LL-172G] DMPMModus EIN Bildschirm Leistungsaufnahme Anzeige ein 35 W AUS Anzeige aus 1 W Pinbelegung des DVI-I-Eingangssteckers [LL-172G] (29-poliger DVI-I-Stecker - Sharp 172A-W | Operation Manual - Page 59
ist eine Datei, in der die Farbwiedergabeeigenschaften des LCD-Monitors beschrieben sind. Durch Einsatz einer Anwendung, die auf [Next]. 3. Aktivieren Sie [Display a list of all the drivers in a specific location, so you can select the driver you want.], und klicken Sie auf [Next]. 4. Wenn [Models] - Sharp 172A-W | Operation Manual - Page 60
[Control Panel]. 3. Doppelklicken Sie auf [Display]. 4. Klicken Sie auf [Settings], [Advanced] und [Monitor]. 5. Klicken Sie auf [Properties], [Driver] und [Update Driver]. 6. Wenn [Upgrade Device Driver Wizard] angezeigt wird, klicken Sie auf [Next]. 7. Aktivieren Sie [Display a list of the known - Sharp 172A-W | Operation Manual - Page 61
Sie [Install from a list or specific location [Advanced]], und klicken Sie auf [Next]. 8. Aktivieren Sie [Don't search. I will choose the driver to install.], und klicken Sie auf [Next]. 9. Aktivieren Sie [Have Disk], bestätigen Sie, dass neben [Copy manufacturer's files from:] [D:] angezeigt - Sharp 172A-W | Operation Manual - Page 62
erkennt das System die Farbwiedergabeeigenschaften bei Verwendung mit einer kompatiblen Anwendung. Ein ColorSync-Profil beschreibt die Farbeigenschaften des LCD-Monitors. Hinweise: - Das ColorSync-Profil dieses Monitors kann zusammen mit MacOS 8.5 oder höher eingesetzt werden. - Bei Verwendung des - Sharp 172A-W | Operation Manual - Page 63
darauf. Achten Sie dabei darauf, dass der Monitor nicht beschädigt wird. - Beim LL-172G ziehen Sie den Fuß so weit wie möglich aus und sperren ihn, bevor Sie den und Verletzungen verursachen. ACHTUNG: Lagern Sie den Fuß des LL-172G in seiner am weitesten ausgestreckten Position. Wenn der Fuß ein - Sharp 172A-W | Operation Manual - Page 64
64 - Sharp 172A-W | Operation Manual - Page 65
du moniteur 70 Fixation des câbles [LL-172G 70 Raccordement du moniteur à un ordinateur 70 Inversion entre les bornes d'entrée [LL-172G 74 Désactivation de l'alimentation 74 Réglage de propos de l'environnement pour ce produit SHARP 82 Caractéristiques techniques 83 Installation des - Sharp 172A-W | Operation Manual - Page 66
pas un mauvais fonctionnement mais un phénomène courant des écrans LCD et que cela n'affecte aucunement les performances du moniteur. - Ne pas sur le moniteur avec des objets durs. - Il faut savoir que la Sharp Corporation décline toute responsabilité en cas d'erreur survenue durant l'utilisation par - Sharp 172A-W | Operation Manual - Page 67
dans l'emballage : - Moniteur LCD (1) - Câble de signal analogique (1) (nom du modèle : 0NW1738GAB01A) - [LL-172G] Câble de signal numérique carton d'emballage pour le cas où le moniteur devrait être transporté. - Sharp Corporation détient les droits d'auteur du programme Utility Disk. Ne pas le - Sharp 172A-W | Operation Manual - Page 68
d'entrée audio La borne de sortie audio d'un ordinateur peut y être connectée. Le câble audio fourni doit être utilisé. 12. Borne d'entrée DVI-I [LL-172G] ... La borne de sortie numérique RVB ou la borne de sortie analogique (INPUT-2) RVB de l'ordinateur peut être raccordée ici. Pour une entr - Sharp 172A-W | Operation Manual - Page 69
verre. Appuyer les mains sur le panneau LCD peut provoquer son endommagement. - Prendre garde de ne pas se coincer les doigts. Réglage de l'inclinaison Réglage de la hauteur [LL-172G] 1. Relâcher le verrouillage. 2. Ajuster la hauteur du support. 3. Resserrer le verrouillage. approx. 70 mm 2 [LL - Sharp 172A-W | Operation Manual - Page 70
de sortie analogique RVB de l'ordinateur. Fixation des câbles [LL-172G] Utiliser les serres-câbles fournis pour fixer les câbles connectés aux différentes. Vérifier la forme des serres avant de les fixer sur le support. ATTENTION ! - Lorsque vous réglez l'angle de vue, les câbles peuvent être - Sharp 172A-W | Operation Manual - Page 71
Raccorder le câble de signal analogique vendu séparément (nom du modèle : NL-C02E) à la borne d'entrée DVI-I (INPUT-2). Connexion numérique [LL-172G] Raccorder le câble de signal numérique (fourni en accessoire) à la borne de sortie numérique RVB de l'ordinateur. - Le moniteur est équipé d'une entr - Sharp 172A-W | Operation Manual - Page 72
Raccordement, activation et désactivation du moniteur Lors du raccordement au moyen d'un câble à 2 entrées vendu séparément [LL-172G] Le câble à 2 entrées (nom du modèle : NL-C03J), vendu séparément, permet la connexion entre la borne d'entrée DVI-I du moniteur et deux - Sharp 172A-W | Operation Manual - Page 73
s'agit de la première utilisation du moniteur. - Les paramètres système ont été modifiés en cours d'utilisation. - Quand vous utilisez le LL-172G avec une connexion numérique, le réglage automatique de l'écran n'est pas nécessaire. - En fonction du type d'ordinateur ou du système d'exploitation, il - Sharp 172A-W | Operation Manual - Page 74
Raccordement, activation et désactivation du moniteur Inversion entre les bornes d'entrée [LL-172G] Utiliser le bouton INPUT pour basculer entre les bornes d'entrée. Borne d'entrée analogique RVB Borne d'entrée DVI-I INPUT-1 INPUT INPUT-2 < > Désactivation de l'alimentation 1. - Sharp 172A-W | Operation Manual - Page 75
signal analogique 1. Effectuer tout d'abord un réglage automatique. (p.77) 2.Effectuer au besoin un réglage manuel. (p.78) Pour le signal numérique [LL-172G] Le moniteur peut généralement être utilisé sans réglage. Effectuer au besoin un réglage manuel. (p.78) Remarque : - Tous les réglages seront - Sharp 172A-W | Operation Manual - Page 76
Réglage de l'affichage du moniteur et du volume des haut-parleurs Réglage du volume des haut-parleurs 1. Sans que le menu OSD ne soit affiché, appuyer sur le bouton ou le bouton . 2. S'assurer que [VOLUME] est sélectionné. S'il n'est pas sélectionné, appuyer sur le bouton / MODE et sélectionner [ - Sharp 172A-W | Operation Manual - Page 77
automatique est à présent terminé.) Bouton MENU 1. Appuyer sur le bouton MENU. Le menu ADJUSTMENT apparaît. (Exemple : Ecran affiché sur le modèle LL-172G) Affichage à l'écran pour le réglage D'abord afficher une image qui rend la totalité de l'écran du moniteur très lumineuse. Si l'on se trouve - Sharp 172A-W | Operation Manual - Page 78
en appuyant sur le bouton / MODE. Menu ADJUSTMENT (AJUST) Quand le LL-172G est utilisé avec une connexion numérique, ce réglage de menu n'est menu OSD est désactivé. Mire de réglage Remarques : - Quand le LL-172G est utilisé avec une connexion numérique, les réglages du menu de ADJUSTMENT et - Sharp 172A-W | Operation Manual - Page 79
Réglage de l'affichage du moniteur English Français Deutsch Italiano Español Menu GAIN CONTROL (CTRL. LUMINOSIT) Quand le LL-172G est utilisé avec une connexion numérique, ce réglage de menu n'est pas nécessaire. AUTO Quand [AUTO] est sélectionné avec le bouton , les réglages de [ - Sharp 172A-W | Operation Manual - Page 80
intervenant au cours de la fabrication. OFF TIMER (Minuterie de mise hors service) L'alimentation est coupée à l'expiration de la durée prescrite. signal n'est appliqué à l'entrée, [NO SIGNAL] s'affiche.) INPUT-2 [LL-172G] Choisissez [1LINE] si vous connectez un câble de signal numérique ou - Sharp 172A-W | Operation Manual - Page 81
. Se renseigner auprès du revendeur ou du réparateur agréé Sharp le plus proche. - Au début de l'utilisation, en LCD Utiliser un chiffon doux et sec pour éliminer la poussière de la surface du panneau LCD. sous tension? - Si le modèle LL-172G est utilisé, confirmez que la borne d'entrée du signal est - Sharp 172A-W | Operation Manual - Page 82
la conception de nos produits. De même, les instructions que nous donnons à nos clients vont dans le à recycler les équipements électroniques. SHARP recommande le service de recylage MIREC. Vous trouverez des contacter les autorités locales ou l'Electronics Industries Alliance. http://www.eiae.org - Sharp 172A-W | Operation Manual - Page 83
-W (Blanc)/LL-172A-B (Noir) LL-172G-W (Blanc)/LL-172G-B (Noir) Moniteur LCD 43 cm en diagonale Module TFT à cristaux 172G] Approx. 374 mm x 236 mm x 368 - 438 mm Poids [LL-172A] Approx. 6,0 kg (approx. 4,2 kg sans le support) (Sans les câbles.) [LL-172G] Approx. 5,6 kg (approx. 4,2 kg sans le support - Sharp 172A-W | Operation Manual - Page 84
ble de signal analogique : approx. 1,8 m - Câble audio : approx. 1,8 m [LL-172G] - Câble de signal numérique : approx. 1,8 m - Câble de signal analogique, NL -C03J (à acheter séparément) : approx. 0,25 m Remarque : - SHARP se réserve le droit d'apporter des modifications à la présentation et aux - Sharp 172A-W | Operation Manual - Page 85
Caractéristiques techniques Fréquences des signaux (analogique) Mode affichage VESA Hsync Vsync Bande passante Fréquences des signaux (numérique) [LL-172G] Mode affichage VESA Hsync Vsync Bande passante Saisie de texte US Saisie de texte US Série Macintosh Série Sun Ultra - La résolution - Sharp 172A-W | Operation Manual - Page 86
LL-172A est basé sur le système VESA DPMS. Le modèle LL-172G est basé sur les deux systèmes VESA DPMS et DVI DMPM. Pour TMDS données 0+ 4 N.C. 19 Ecran TMDS data 0/5 DDC (Plug & Play) Ce moniteur supporte la norme VESA DDC (Display Data Channel). Le DDC est une norme de signal servant à exé - Sharp 172A-W | Operation Manual - Page 87
qui décrit les caractéristiques de l'affichage des couleurs du moniteur LCD. L'utilisation d'une application compatible avec un profil ICC permet de ROM d'accessoires dans le 7. Cocher la case [Display a list of all the drivers lecteur de CD-ROM de l'ordinateur. in a specific location, so you can - Sharp 172A-W | Operation Manual - Page 88
[Control Panel]. 3. Double-cliquer sur [Display]. 4. Cliquer sur [Settings], sur [Advanced], et sur [Monitor]. 5. Cliquer sur [Properties], sur [Driver], et sur [Update Driver]. 6. Lorsque [Upgrade Device Driver Wizard] apparaît, cliquer sur [Next]. 7. Cocher la case [Display a list of the known - Sharp 172A-W | Operation Manual - Page 89
ît, cocher la case [Install from a list or specific location [Advanced]] et cliquer sur [Next]. 8. Cocher la case [Don't search. I will choose the driver to install.] et cliquer sur [Next]. 9. Cliquer sur [Have disk], et s'assurer que [Copy manufacturer's files from:] est [D:] et cliquer sur [OK - Sharp 172A-W | Operation Manual - Page 90
de l'affichage de couleurs lors d'une utilisation avec une application compatible. Un profil ColorSync décrit les caractéristiques de couleur du moniteur LCD. Remarques : - Le profil ColorSync de ce moniteur fonctionne sous MacOS 8.5 ou version ultérieure. - Si vous utilisez le profil ColorSync - Sharp 172A-W | Operation Manual - Page 91
suivant ces instructions, se reporter aux instructions relatives à l'installation dans le mode d'emploi qui accompagne le bras ou le support. ATTENTION ! é vers le bas. - Pour le raccordement de LL-172G, allonger le support le plus possible et le bloquer avant de positionner le moniteur. (p.69) 4. - Sharp 172A-W | Operation Manual - Page 92
92 - Sharp 172A-W | Operation Manual - Page 93
spegnimento del monitor 98 Fissaggio dei cavi [LL-172G 98 Collegamento del monitor ad un computer 98 usa un segnale analogico 105 Regolazione manuale dello schermo 106 Cura del monitor 109 per i clienti sull'eliminazione di questo prodotto SHARP in condizioni di protezione ambientale . . . - Sharp 172A-W | Operation Manual - Page 94
Suggerimenti e precauzioni per la sicurezza - Lo schermo LCD-TFT a colori usato in questo monitor è stato mai il monitor con oggetti duri. - Per favore abbiate comprensione per il fatto che la Sharp Corporation non si assume nessuna responsabilità per errori fatti nell'uso da parte del cliente - Sharp 172A-W | Operation Manual - Page 95
Monitor LCD (1) - Cavo segnale analogico (1) (nome del modello: 0NW1738GAB01A) - [LL-172G] Cavo cui risulti necessario trasportare il monitor. - La Sharp Corporation è proprietaria dei diritti d'autore per manuale. Presentazione del manuale - Questo manuale è relativo ai modelli LL-172A e LL-172G. - Sharp 172A-W | Operation Manual - Page 96
schermo (CLOCK, PHASE, H-POS e V-POS). (p.105) Tasto INPUT [LL-172G Per commutare tra i terminali di ingresso del segnale. 2. Tasto MENU Questo usare il cavo audio accluso. 12. Terminale di ingresso DVI-I [LL-172G] ........ Qui si possono collegare il terminale di uscita RGB digitale oppure - Sharp 172A-W | Operation Manual - Page 97
di vetro. Una pressione con le mani sullo schermo LCD può causare danni. - Fare attenzione a non rimanere con le dita incastrate. Regolazione dell'angolazione [LL-172A] circa 25° circa 5° Regolazione dell'altezza [LL-172G] 1. Liberare il fermo. 2. Regolare l'altezza del supporto. 3. Regolare il - Sharp 172A-W | Operation Manual - Page 98
] Collegare il cavo accessorio del segnale analogico al terminale di uscita RGB analogica del computer. Fissaggio dei cavi [LL-172G] Utilizzare i morsetti serracavo forniti per fissare i cavi collegati ai terminali. I morsetti serracavo superiori e inferiori hanno differenti figure. Controllare le - Sharp 172A-W | Operation Manual - Page 99
-C02E) al terminale di ingresso DVI-I (INPUT-2). Terminale di ingresso DVI-I (INPUT-2) Terminale di ingresso RGB analogico (INPUT-1) Collegamento digitale [LL-172G] Collegare il cavo accessorio del segnale digitale al terminale di uscita RGB digitale del computer. - Il monitor ha un ingresso per il - Sharp 172A-W | Operation Manual - Page 100
Collegamento del monitor ed accensione e spegnimento del monitor Per il collegamento usare un cavo a 2 ingressi, venduto separatamente [LL-172G] Il cavo a 2 ingressi venduto separatamente (nome del modello: NL-C03J) consente il collegamento fra il terminale di ingresso DVI-I del monitor ed i due - Sharp 172A-W | Operation Manual - Page 101
appare la schermata. (Dopo l'accensione, per la visualizzazione della schermata bisogna attendere un piccolissimo tempo.) Nota relativa al modello LL-172G: - Se non è stato selezionato il terminale d'ingresso a cui il computer è collegato, la schermata non sarà visualizzata. Se necessario, cambiare - Sharp 172A-W | Operation Manual - Page 102
Collegamento del monitor ed accensione e spegnimento del monitor Commutare tra i terminali di ingresso [LL-172G] Utilizzate il tasto INPUT per commutare tra i terminali di ingresso del segnale. Spegnimento 1. Spegnete il computer. 2. Premete il tasto di alimentazione del monitor. Il LED - Sharp 172A-W | Operation Manual - Page 103
Italiano Español Per il segnale analogico 1. Prima di tutto eseguite una regolazione automatica. (p.105) 2. Eseguite la regolazione manuale, se necessario. (p.106) Per il segnale digitale [LL-172G] Di solito si può utilizzare il monitor senza regolarlo. Se necessario, eseguite la regolazione - Sharp 172A-W | Operation Manual - Page 104
Regolazione della visualizzazione sullo schermo e volume dell'altoparlante Regolazione del volume dell'altoparlante 1. Senza che il menu OSD sia visualizzato premete il tasto oppure il tasto . 2. Controllare che [VOLUME] sia selezionato. Se non è selezionato, premere il tasto / MODE e selezionare [ - Sharp 172A-W | Operation Manual - Page 105
, eseguite una regolazione automatica dello schermo. - La regolazione automatica dello schermo è inutile quando il LL-172G è usato con un collegamento digitale. Eseguire la regolazione manuale dello schermo se necessario. (p.106) Tasto AUTO [LL-172A] 1. Premere il tasto AUTO. 2. Premere nuovamente - Sharp 172A-W | Operation Manual - Page 106
della visualizzazione sullo schermo Regolazione manuale dello schermo 1. Prima di tutto visualizzate un'immagine che rende chiaro l'intero schermo. (p.105) 2. Visualizzare il menu OSD premendo il tasto MENU. (Esempio: schermo del modello LL-172G) Menu ADJUSTMENT Selezionare l'opzione premendo - Sharp 172A-W | Operation Manual - Page 107
Español Menu GAIN CONTROL (CTRL. GUADAGNO) Quando il LL-172G è usato con un collegamento digitale, questa impostazione del menu non sono eseguite automaticamente. Dopo la regolazione automatica, eseguire la regolazione manuale se necessario. Menu COLOR CONTROL (CONTROLLO COLORE) WHITE BALANCE 1. - Sharp 172A-W | Operation Manual - Page 108
1. Una volta selezionata la voce [INFORMATION], agire sul tasto . Le informazioni del prodotto vengono visualizzate. 2.Premere il tasto MENU. INPUT-2 [LL-172G] Se al terminale di ingresso DVI-I (INPUT-2) è stato collegato un cavo di segnale digitale o analogico, selezionare la posizione [1LINE]. In - Sharp 172A-W | Operation Manual - Page 109
la sporcizia, detergendo. Sezione schermo LCD Usate un panno morbido ed asciutto per portare . (p.102) - Quando si usa il LL-172G, verificare se [INPUT-2] è impostato correttamente nel autorizzato del Servizio Tecnico Assistenza Clienti della Sharp. Non si sente nessun suono dagli altoparlanti - Sharp 172A-W | Operation Manual - Page 110
i nostri clienti in Belgio, Olanda, Svezia e Svizzera. La SHARP partecipa nei sistemi di riciclaggio nazionale rispettivi per apparecchi elettronici, che si prega di prendere contatto con le vostre autorità locali o la Electronics Industries Alliance: http://www.eiae.org (4) Per i nostri clienti - Sharp 172A-W | Operation Manual - Page 111
del prodotto Temperatura dell'ambiente operativo Nome del modello LL-172A-W (Bianco)/LL-172A-B (Nero) LL-172G-W (Bianco)/LL-172G-B (Nero) Display LCD 43 cm misurati diagonalmente Modulo TFT LCD Risoluzione (max.) SXGA 1280 x 1024 pixel Colori visualizzabili (max.) Circa 16,19 million di colori - Sharp 172A-W | Operation Manual - Page 112
Specifiche - Cavo segnale analogico: circa 1,8 m - Cavo audio: circa 1,8 m [LL-172G] - Cavo segnale digitale: circa 1,8 m - Cavo segnale analogico, NL-C02E (da acquistato : - Per facilitare una politica di miglioramenti continui, la SHARP si riseva il diritto di cambiare il disegno e le - Sharp 172A-W | Operation Manual - Page 113
rilevanti del segnale (digitale) [LL-172G] Modalità di visualizzazione VESA Sincronismo Sincronismo sincronismo che non sono compatibili, verrà visualizzato [OUT OF TIMING]. Seguite il manuale di istruzioni del vostro computer per impostare il sincronismo in modo da renderlo compatibile con - Sharp 172A-W | Operation Manual - Page 114
di ingresso del segnale analogico (Connettore D sub mini a 15 pin) Gestione dell'energia Il modello LL-172A si basa sul VESA DPMS. Il modello LL-172G si basa sia sul VESA DPMS che sul DVI DMPM. Per attivare la funzione di gestione energetica, è necessario che anche la scheda video e il computer - Sharp 172A-W | Operation Manual - Page 115
essere differenti. Per favore seguite il manuale d'uso proprio del computer, mentre caratteristiche cromatiche di riproduzione del monitor LCD. Utilizzando un'applicazione che funziona con a list of all the drivers in a specific location, so you can select the driver you want.], quindi fate clic - Sharp 172A-W | Operation Manual - Page 116
nel lettore CD-ROM del computer. 2. Spuntate [Specify the location of the driver [Advanced]] e fate clic su [Next]. 3. Spuntate [Display a list of all the drivers in a specific location, so you can select the driver you want.], quindi fate clic su [Next]. 4. Quando viene visualizzato [Models], fate - Sharp 172A-W | Operation Manual - Page 117
[Hardware Update Wizard], spuntate [Install from a list or specific location [Advanced]], fate clic su [Next]. 8. Spuntate [Don't search. I will choose the driver to install.] e fate clic su [Next]. 9. Fate clic su [Have disk], confermate che [Copy manufacturer's files from:] è [D:], e fate clic su - Sharp 172A-W | Operation Manual - Page 118
compatibile. Un profilo ColorSync descrive le caratteristiche cromatiche del monitor LCD. Note: - Il profilo ColorSync di questo monitor funziona dei comandi ed i metodi possono essere differenti. Per favore seguite il manuale d'uso proprio del computer, mentre leggete questo. 1. Inserire il CD-ROM - Sharp 172A-W | Operation Manual - Page 119
, per favore fate riferimento anche alle istruzioni per l'installazione nel manuale d'uso accluso al braccio oppure al supporto. ATTENZIONE! - Fare ed essere causa d'infortunio. ATTENZIONE: Immagazzinare il supporto del LL-172G nella sua posizione più estesa. Quando il supporto è immagazzinato in - Sharp 172A-W | Operation Manual - Page 120
120 - Sharp 172A-W | Operation Manual - Page 121
encendido/apagado del mismo 126 Asegurando los cables [LL-172G 126 Conexión del monitor a un ordenador 126 Conexi ñal analógica 133 Ajuste de pantalla manual 134 Conservación del monitor 137 Conservación clientes acerca del desecho de este producto SHARP de forma de proteger el medio ambiente - Sharp 172A-W | Operation Manual - Page 122
ún fallo del funcionamiento, sino que es un fenómeno común de los LCDs y no afectará para nada al rendimiento del monitor. - No deje el . - No frote ni golpee jamás el monitor con objetos duros. - Sharp Corporation no asume responsabilidad alguna por las faltas cometidas durante el uso por parte - Sharp 172A-W | Operation Manual - Page 123
Monitor LCD (1) - Cable de señal analógica (1) (nombre del modelo: 0NW1738GAB01A) - [LL-172G] cartón por si necesita transportar el monitor. - Sharp Corporation es titular de los derechos de autor del manual. Contenido del manual - Este manual fue diseñado para ser utilizado con LL-172A y LL-172G - Sharp 172A-W | Operation Manual - Page 124
1. Botón AUTO [LL-172A Este botón se utiliza para hacer un ajuste automático de la pantalla (CLOCK, PHASE, H-POS y V-POS). (p.133) Botón INPUT [LL-172G Para conmutar entre los bornes de entrada de la señal. 2. Botón MENU Este botón se utiliza para ampliar, seleccionar y cerrar el menú OSD (On - Sharp 172A-W | Operation Manual - Page 125
Si presiona el panel LCD con las manos podría dañarlo. - Tenga cuidado para que sus dedos no queden atrapados. Ajuste de altura [LL-172G] 1. Suelte el seguro Ajuste de ángulo [LL-172A] aprox. 25° aprox. 5° 3 1 [LL-172G] aprox. 25° aprox. 5° ¡PRECAUCIÓN! - Asegúrese de soltar el seguro antes - Sharp 172A-W | Operation Manual - Page 126
excesivamente el cable ni utilizar cables de prolongación ya que ello podría llevar a un funcionamiento anómalo. Asegurando los cables [LL-172G] Utilice las abrazaderas para cables entregadas para asegurar los cables conectados a los bornes. Las abrazaderas para cables superior e inferior tienen - Sharp 172A-W | Operation Manual - Page 127
- Conecte el cable de señal analógica vendido separadamente (nombre del modelo: NL-C02E) en el borne de entrada DVI-I (INPUT-2). Conexión digital [LL-172G] Conecte el cable de señal digital accesoria en el borne de salida RGB digital del ordenador. - El monitor tiene una entrada para conectar a un - Sharp 172A-W | Operation Manual - Page 128
del mismo Cuando haga la conexión utilizando un Notas: cable de 2 entradas vendido separadamente - Cuando utilice el cable de 2 entradas, configure [LL-172G] la conexión del borne de entrada [INPUT-2] a El cable de 2 entradas vendido separadamente [2LINES] en el menú MODE SELECT-2. (p.136 - Sharp 172A-W | Operation Manual - Page 129
verde, y se visualizará la pantalla. (Después de conectar la alimentación, puede que la pantalla tarde en visualizarse un poco de tiempo.) Nota para LL-172G: - Si no se ha seleccionado el borne de entrada al que está conectado el ordenador, la pantalla no se visualizará. Si es necesario, haga la - Sharp 172A-W | Operation Manual - Page 130
Conexión del monitor y encendido/apagado del mismo Alternar entre bornes de entrada [LL-172G] Utilizar el botón de ENTRADA (INPUT) para conmutar entre bornes de entrada de señal. Borne de entrada RGB analógica Borne de entrada DVI-I - Sharp 172A-W | Operation Manual - Page 131
volumen del altavoz Para la señal analógica 1. En primer lugar, lleve a cabo un ajuste automático. (p.133) 2. En caso necesario, realice un ajuste manual. (p.134) Para la señal digital [LL-172G] Normalmente no es necesario ajustar el monitor antes de utilizarlo. En caso necesario, realice un ajuste - Sharp 172A-W | Operation Manual - Page 132
Ajuste de la pantalla y volumen del altavoz Ajuste del volumen del altavoz 1. Sin el menú OSD a la vista, pulse el botón o . 2. Compruebe que esté seleccionado [VOLUME]. Si no está seleccionado [VOLUME], pulse el botón / MODE y selecciónelo. 3. Realice el ajuste pulsando el botón (disminución) o el - Sharp 172A-W | Operation Manual - Page 133
automático antes de su uso. - El ajuste de pantalla automático no es necesario cuando se utiliza LL-172G con una conexión digital. Haga el ajuste de pantalla manual cuando sea necesario. (p.134) Botón AUTO [LL-172A] 1. Pulse el botón AUTO. 2. Vuelva a pulsar el botón AUTO. Aparecerá [ADJUSTING - Sharp 172A-W | Operation Manual - Page 134
Ajuste de la pantalla Ajuste de pantalla manual 1. En primer lugar aparece una imagen que pone toda la pantalla muy clara. (p.133) 2. Haga que aparezca el menú OSD pulsando el botón MENU. (Por ejemplo: Pantalla de LL-172G que se mostrará) Menú ADJUSTMENT Seleccione la opción pulsando el botón / - Sharp 172A-W | Operation Manual - Page 135
Ajuste de la pantalla Menú GAIN CONTROL Cuando se utiliza LL-172G con una conexión digital, no es necesario este ajuste de [BLACK LEVEL] y [CONTRAST]. Después del ajuste automático, haga el ajuste manual cuando sea necesario. Menú COLOR CONTROL WHITE BALANCE 1. Después de seleccionar [WHITE - Sharp 172A-W | Operation Manual - Page 136
[ON], la hora establecida aparecerá en la pantalla durante varios segundos. (Si no hay señal de entrada, se visualizará [NO SIGNAL].) INPUT-2 [LL-172G] Ponga [1LINE] cuando conecte un cable de señal digital o analógica al borne de entrada DVI-I (INPUT-2). Ponga [2LINES] cuando conecte un cable de - Sharp 172A-W | Operation Manual - Page 137
la limpieza. Sector del panel LCD Utilice un paño suave y seco para limpiar, sin proveedor o al servicio autorizado de asistencia técnica de Sharp más cercano. - Debido a las características de el ordenador encendido? - Si está utilizando LL-172G, confirme que la borne de entrada de la señal est - Sharp 172A-W | Operation Manual - Page 138
de la recolección e instalaciones de recicladoo llame a una empresa de servicio de reciclado que tenga licencia para el reciclado de equipos electrónicos SHARP recomienda los servicios de reciclado de MIREC, la información general acerca de MIREC puede obtenerse en http://www.mirec.com/. El pago de - Sharp 172A-W | Operation Manual - Page 139
172A-B (Negro) LL-172G-W (Blanco)/LL-172G-B (Negro) Display LCD 43 cm medidos en diagonal Módulo TFT LCD Resolución (máx.) SXGA 1280 Borne de señales de entrada [LL-172A] Mini D-sub 15 contactos 3 hileras [LL-172G] Analógica: Mini D-sub 15 contactos 3 hileras Digital/Analógica: DVI-I de 29 - Sharp 172A-W | Operation Manual - Page 140
Cable de señal analógica: aprox. 1,8 m - Cable de audio: aprox. 1,8 m [LL-172G] - Cable de señal digital: aprox. 1,8 m - Cable de señal analógica, NL 0,25 m Nota: - Como parte de la política de mejoras continuas, SHARP se reserva el derecho de realizar cambios en el diseño y especificaciones para la - Sharp 172A-W | Operation Manual - Page 141
Sincronizaciones de las señales correspondientes (digital) [LL-172G] Modo display VESA Hsync Vsync Frecuencia US text Series sincronización que no son compatibles, aparecerá [OUT OF TIMING]. Consulte el manual de instrucciones de su ordenador para ajustar la sincronización de forma compatible con - Sharp 172A-W | Operation Manual - Page 142
Contactos del conector de entrada RGB analógica (Conector Mini D-sub de 15 contactos) Gestión de energía LL-172A está basado en VESA DPMS. LL-172G está basado tanto en VESA DPMS como en DVI DMPM. Para activar la función de administrador de electricidad, la placa de video y el ordenador utilizado - Sharp 172A-W | Operation Manual - Page 143
seguir podrían ser diferentes. Siga el manual de funcionamiento propio del ordenador mientras lee sticas de reproducción cromática del monitor LCD. El uso de una aplicación compatible con Display a list of all the drivers in a specific location, so you can select the driver you want.] y a continuación - Sharp 172A-W | Operation Manual - Page 144
Panel]. 3. Haga doble clic en [Display]. 4. Haga clic en [Settings], [Advanced] y [Monitor]. 5. Haga clic sobre [Properties], [Driver] y [Update Driver]. 6. Cuando aparezca el Asistente [Upgrade Device Driver Wizard], haga clic sobre [Next]. 7. Coloque una tilde en [Display a list of the known - Sharp 172A-W | Operation Manual - Page 145
], compruebe [Install from a list or specific location [Advanced]], haga clic sobre [Next]. 8. Coloque una tilde en [Don't search. I will choose the driver to install.] y haga clic sobre [Next]. 9. Haga clic en [Have disk], confirme que [Copy manufacturer's files from:] es [D:] y haga clic sobre - Sharp 172A-W | Operation Manual - Page 146
. Un perfil ColorSync describe las características cromáticas del monitor LCD. Notas: - El perfil ColorSync de este monitor funciona con MacOS comandos y los procedimientos a seguir podrían ser diferentes. Siga el manual de funcionamiento propio del ordenador mientras lee esto. 1. Introduzca el CD - Sharp 172A-W | Operation Manual - Page 147
estas instrucciones, consulte también las instrucciones de instalación en el manual de funcionamiento suministrado con el brazo o el pedestal. ¡PRECAUCIÓN! el paño con la parte de la pantalla mirando hacia abajo. - Para LL-172G, alargue el pedestal lo más que sea posible y fíjelo antes de mover el - Sharp 172A-W | Operation Manual - Page 148
148 - Sharp 172A-W | Operation Manual - Page 149
149 - Sharp 172A-W | Operation Manual - Page 150
150 - Sharp 172A-W | Operation Manual - Page 151
- Sharp 172A-W | Operation Manual - Page 152
SHARP CORPORATION Printed in China Gedruckt in China Imprimé en Chine Stampato in Cina Impreso en China 0NW170184304A (1)
-
 1
1 -
 2
2 -
 3
3 -
 4
4 -
 5
5 -
 6
6 -
 7
7 -
8
-
9
-
10
-
11
-
12
-
13
-
14
-
15
-
16
-
17
-
18
-
19
-
20
-
21
-
22
-
23
-
24
-
25
-
26
-
27
-
28
-
29
-
30
-
31
-
32
-
33
-
34
-
35
-
36
-
37
-
38
-
39
-
40
-
41
-
42
-
43
-
44
-
45
-
46
-
47
-
48
-
49
-
50
-
51
-
52
-
53
-
54
-
55
-
56
-
57
-
58
-
59
-
60
-
61
-
62
-
63
-
64
-
65
-
66
-
67
-
68
-
69
-
70
-
71
-
72
-
73
-
74
-
75
-
76
-
77
-
78
-
79
-
80
-
81
-
82
-
83
-
84
-
85
-
86
-
87
-
88
-
89
-
90
-
91
-
92
-
93
-
94
-
95
-
96
-
97
-
98
-
99
-
100
-
101
-
102
-
103
-
104
-
105
-
106
-
107
-
108
-
109
-
110
-
111
-
112
-
113
-
114
-
115
-
116
-
117
-
118
-
119
-
120
-
121
-
122
-
123
-
124
-
125
-
126
-
127
-
128
-
129
-
130
-
131
-
132
-
133
-
134
-
135
-
136
-
137
-
138
-
139
-
140
-
141
-
142
-
143
-
144
-
145
-
146
-
147
-
148
-
149
-
150
-
151
-
152
 |
 |
LCD Monitor
LCD Farbmonitor
Moniteur LCD
Monitor LCD
Monitor LCD
LL-172A
LL-172G
OPERATION MANUAL
BEDIENUNGSANLEITUNG
MODE D
'
EMPLOI
MANUALE D
'
USO
MANUAL DE FUNCIONAMIENTO
LL-172A