Sharp BT421 User Manual for the
Sharp BT421 Manual
 |
View all Sharp BT421 manuals
Add to My Manuals
Save this manual to your list of manuals |
Sharp BT421 manual content summary:
- Sharp BT421 | User Manual for the - Page 1
User's Manual Large Format Display BT421 MODEL: BT421 Please find your model name in the label on the rear side of monitor. - Sharp BT421 | User Manual for the - Page 2
LAN Control...English-22 Connecting to a Network...English-22 Network Setting by Using an HTTP Browser...English-22 Features...English-24 Troubleshooting...English-25 Specifications - BT421...English-27 Manufacturer's Recycling and Energy Information...English-28 Disposing of your old NEC product - Sharp BT421 | User Manual for the - Page 3
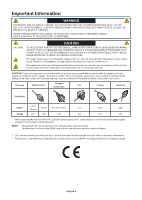
and, if not installed and used in accordance with the instruction manual, may cause harmful interference to radio communications. Operation of Commission, helpful: "How to Identify and Resolve Radio-TV Interference Problems." This booklet is available from the U.S. Government Printing Office, - Sharp BT421 | User Manual for the - Page 4
included. Therefore, it should be read carefully in order to avoid any problems. CAUTION: Please use the power cord provided with this monitor in of the AC power outlet being used. NOTE: This product can only be serviced in the country where it was purchased. Use the power cord which has BSMI - Sharp BT421 | User Manual for the - Page 5
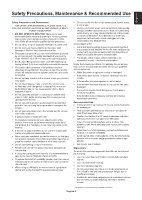
immediately disconnect your monitor from the wall outlet and refer servicing to qualified service personnel: • When the power supply cord or plug . • If the monitor does not operate normally by following operating instructions. Recommended Use • For the monitor's optimum performance, allow 20 - Sharp BT421 | User Manual for the - Page 6
For use in Japan only This color monitor is designed for use in Japan and can not be used in any other countries. Cleaning the LCD Panel • When the liquid crystal panel is dusty, please gently wipe with a soft cloth. • Please do not rub the LCD panel with hard material. • Please do not apply - Sharp BT421 | User Manual for the - Page 7
Signal Cable • Wireless Remote Control and AAA Batteries x 2 • Setup Manual • Clamp • Screw Power Cord*1 Video Signal Cable Wireless Remote Control and AAA Batteries x 2 Screw Clamp Setup Manual Setup Manual * Remember to save your original box and packing material to - Sharp BT421 | User Manual for the - Page 8
strong enough to support the weight of the unit so that the unit will be safe from harm. • For detailed information, refer to the instructions included with the or other problems that may occur with the mounting equipment. If a problem is detected, please refer to qualified personnel for service. • - Sharp BT421 | User Manual for the - Page 9
English Orientation • When using the monitor in the portrait position, it should be rotated clockwise so that the right side is moved to the top, left side is moved to the bottom. This will allow for proper ventilation and will extend the lifetime of the monitor. Improper ventilation may shorten - Sharp BT421 | User Manual for the - Page 10
Parts Name and Functions Control Panel 1 MENU button (MENU) Turns on/off the OSD menu. 2 SOURCE button (SOURCE) Acts as INPUT button within OSD menu. You can select [DVI1] or [DVI2] with the up ( )/down ( ) button. These are available input only, shown as their factory preset name. 3 PLUS button - Sharp BT421 | User Manual for the - Page 11
interface of another display. F DVI Input Connector (DVI1) G DVI Input Connector (DVI2) Connect it to a device conforming to the DVI standard of digital input interface. H Service port This port is for future software upgrades. English-9 - Sharp BT421 | User Manual for the - Page 12
Wireless Remote Control 1 2 3 4 5 6 6 7 5 8 9 10 13 11 12 14 15 16 A POWER button Switches the power on/standby. B INPUT button Selects input signal. DVI1, DVI2 3 INFO button Turns on/off the information OSD. See page 15. 4 MENU button Turns on/off the OSD menu. 5 UP/DOWN button - Sharp BT421 | User Manual for the - Page 13
English Operating Range for the Remote Control Point the top of the remote control toward the LCD monitor's remote control sensor during button operation. Use the remote control within a distance of about 5 m (16 ft.) from the remote control sensor, or at a horizontal and vertical angle of within - Sharp BT421 | User Manual for the - Page 14
the power outlet socket. A loose connection may cause image degradation. NOTE: Please refer to the "Safety Precautions and Maintenance" section of this user's manual for proper selection of an AC power cord. (Recommended Fasten Force: 139 - 189N•cm). Screw Clamp A. Press and slide to open the - Sharp BT421 | User Manual for the - Page 15
all the attached equipment and make connections. * Refer to the user's manual included with each separate piece of equipment. Wiring Diagram DVI OUT DVI1 signal output. Some display cards may not be able to support the required resolution for proper image reproduction. Your LCD monitor shows - Sharp BT421 | User Manual for the - Page 16
Basic Operation Power ON and OFF Modes The LCD monitor power indicator will turn green while powered on. NOTE: The Main Power switch must be in the ON position in order to power up the monitor using the remote control or the Power button. Main Power Switch OFF ON Power Button Using the remote - Sharp BT421 | User Manual for the - Page 17
English Power Indicator LED indicator status and lighting pattern Glowing green Glowing red Condition Recovery Normal The monitor is turned off with the scheduler function set. Turn off the monitor by the remote control or the monitor button. 1. Turn on the monitor by the remote control or the - Sharp BT421 | User Manual for the - Page 18
OSD (On-Screen-Display) Controls For this monitor, an OSD (on-screen display) function is used to allow you to easily adjust settings. You can use the OSD function to control the menu displayed on the screen and adjust the brightness and other settings. Basic Operations on the OSD Screen Make sure - Sharp BT421 | User Manual for the - Page 19
English Step Wireless Remote Control Keypad Operation 4 Press the [OK] button to determine the selected item in the sub menu. Press the [SOURCE] button to determine the selected item in the sub menu. 5 Press the left ( )/right ( ) button to select a setting and press the [OK] button to - Sharp BT421 | User Manual for the - Page 20
PICTURE Picture Mode Backlight Color Temperature Gamma Noise Reduction Adaptive Contrast Aspect Ratio Color Range Reset Picture Setting Setup Scheduler Signal Check Priority Control Setting Ethernet Setting Sleep Timer Power Save Equalizer Reset Default Select [Dynamic], [Cinema], [Custom], or [ - Sharp BT421 | User Manual for the - Page 21
English Initial Setting OSD Rotation Menu Language Time Format Clock Remote Operation Keypad Operation Anti-Image Retention Multi Display Monitor ID Power On Delay Power Lamp System Information Model Name SW Version LAN Version IP Address Select [Landscape] or [Portrait] as the orientation of the - Sharp BT421 | User Manual for the - Page 22
your supplier for details. For the pin assignment, please see "2) RS-232C input/output" on page 21. To control a monitor, please use the control command. Instructions for the control command can be found on the CD included with the monitor. The file is called "External_control.pdf". English-20 - Sharp BT421 | User Manual for the - Page 23
English 1) Interface PROTOCOL BAUD RATE DATA LENGTH PARITY STOP BIT FLOW CONTROL RS-232C 9600 [bps] 8 [bits] NONE 1 [bit] NONE This LCD monitor uses RXD, TXD and GND lines for RS-232C control. The reverse type cable (null modem cable) (not included) should be used for RS-232C control. 2) PIN - Sharp BT421 | User Manual for the - Page 24
Controlling the LCD monitor via LAN Control Connecting to a Network Using a LAN cable allows you to specify the Network Settings and the Alert Mail Settings by using an HTTP server function. To use a LAN connection you are required to assign an IP address. CAUTION: RS-232C and LAN specification are - Sharp BT421 | User Manual for the - Page 25
control command, which is listed in the "External_Control.pdf" file on the CD-ROM supplied with the monitor, but also supports common ASCII control command, which is used for controlling the NEC monitor or projector from a connected PC. For further information please visit our website. Parameter - Sharp BT421 | User Manual for the - Page 26
monitor with a uniform color profile. This ensures that the colors displayed on the monitor are exactly the same as on the color printout (with sRGB supporting operating system and sRGB printer). This allows you to adjust the colors on your screen and customise the color accuracy of your monitor to - Sharp BT421 | User Manual for the - Page 27
English Troubleshooting No picture • The signal cable should be completely connected to the ON position. • Make sure that a supported resolution has been selected on the display card or system being used. If in doubt, please refer to the user's manual of the display controller or system to change - Sharp BT421 | User Manual for the - Page 28
The SCHEDULE/Sleep Timer function is not working properly • The "SCHEDULE" function will be disabled when the "Sleep Timer" is set. • If the "Sleep Timer" function is enabled and the power to the LCD monitor is turned off when the power supply is interrupted unexpectedly, then the "Sleep Timer" will - Sharp BT421 | User Manual for the - Page 29
lbs) VESA compatible mounting interface 400 mm x 100 mm (M6, 4 Holes) Power Management VESA DPM Plug & Play VESA DDC2B Accessories Setup manual, Power Cord, Video Signal cable, Remote Control, AAA Battery x 2, Clamp, Screw NOTE: Technical specifications are subject to change without notice - Sharp BT421 | User Manual for the - Page 30
Manufacturer's Recycling and Energy Information NEC DISPLAY SOLUTIONS is strongly committed to environmental protection and sees recycling as one of the company's top priorities in trying to minimize the burden placed on the environment. We are engaged in developing environmentally-friendly products - Sharp BT421 | User Manual for the - Page 31
accordance with legislation. According to EU directive 2006/66/EC, the battery can't be disposed improperly. The battery shall be separated to collect by local service. English-29
-
 1
1 -
 2
2 -
 3
3 -
 4
4 -
 5
5 -
 6
6 -
 7
7 -
8
-
9
-
10
-
11
-
12
-
13
-
14
-
15
-
16
-
17
-
18
-
19
-
20
-
21
-
22
-
23
-
24
-
25
-
26
-
27
-
28
-
29
-
30
-
31
 |
 |

Please find your model name in the label on the rear side of monitor.
MODEL: BT421
User’s Manual
Large Format Display
BT421