Sharp MX 5500N Instructions for Use - Page 12
Note: Scan to PDF is Free - copier manual
 |
View all Sharp MX 5500N manuals
Add to My Manuals
Save this manual to your list of manuals |
Page 12 highlights
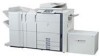
Scan a document and send via e-mail. The copiers can e-mail your (or any selected) e-mail address (or addresses) a PDF file of scanned documents. To use the Scan to PDF function do the following. Login to the device as normal with your PIN Number Press the "Image Send" button. You will now presented with a few options regarding the format and resolution of the file you wish to be attached to the e-mail. The defaults in the vast majority of cases will be fine. First step is to enter the e-mail address to which you wish to have the document sent. This can be done in one of two ways. Method a. Select "Address Entry". Choose "To" or "CC". This will then give you a full on-screen Keyboard to manually enter an address. Once you've finished typing in the address press OK to return to the main Scan to PDF screen. Method b. Select "Address Book". Choose "Global address search". Enter the first name of the Person to whom you wish to send. Press "Search". This will list everyone from the global Physics address book starting with the selected name. Once you have selected the Destination address, the "To" and "CC" buttons will become active. Select the appropriate option. At this point you can add further recipients by selecting "Next Address" and repeating the steps described here. Place your document on either the faceplate or, if you have multiple pages, into the document Feeder facing up. Hit either the Colour or Black and White copy button located to the right of the main display. Note! When using the face plate you will be prompted with a "Read-End" dialog. Press "Read-End" to send the document. If using the document feeder, the e-mail is sent immediately after all pages have been scanned. When you are finished don't forget to press the "LOGOUT" button just to the right of the main display. Note: Scan to PDF is Free!
-
 1
1 -
2
-
3
-
4
-
5
-
6
-
 7
7 -
 8
8 -
 9
9 -
 10
10 -
 11
11 -
 12
12 -
 13
13 -
 14
14
 |
 |
