Sharp XL-UH242 XL-UH242 Operation Manual
Sharp XL-UH242 Manual
 |
View all Sharp XL-UH242 manuals
Add to My Manuals
Save this manual to your list of manuals |
Sharp XL-UH242 manual content summary:
- Sharp XL-UH242 | XL-UH242 Operation Manual - Page 1
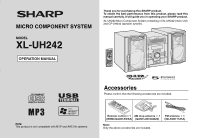
MICRO COMPONENT SYSTEM MODEL XL-UH242 OPERATION MANUAL Thank you for purchasing this SHARP product. To obtain the best performance from this product, please read this manual carefully. It will guide you in operating your SHARP product. XL-UH242 Micro Component System consisting of XL-UH242 (main - Sharp XL-UH242 | XL-UH242 Operation Manual - Page 2
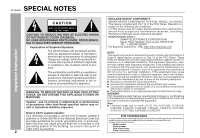
Instruction XL-UH242 SPECIAL NOTES CAUTION: TO REDUCE THE RISK OF ELECTRIC SHOCK, DO NOT REMOVE COVER (OR BACK). NO USER-SERVICEABLE PARTS INSIDE. REFER SERVICING TO QUALIFIED SERVICE DECLARATION OF CONFORMITY SHARP MICRO COMPONENT SYSTEM, MODEL XL-UH242 This device complies with Part 15 of the - Sharp XL-UH242 | XL-UH242 Operation Manual - Page 3
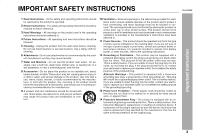
attachment plug having overload protection. This is a safety feature. See Instruction Manual for replacement or resetting of protective device. If replacement of the plug is required, be sure the service technician has used a replacement plug specified by the manufacturer that has the same overload - Sharp XL-UH242 | XL-UH242 Operation Manual - Page 4
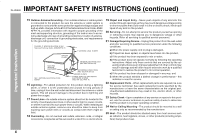
XL-UH242 IMPORTANT SAFETY INSTRUCTIONS (continued) Important Instruction 15 Outdoor Antenna Grounding - If an outside antenna or cable system is connected to the product, be sure the antenna or cable system is grounded so as to provide some protection against voltage surges and built-up static - Sharp XL-UH242 | XL-UH242 Operation Manual - Page 5
for Use System connections 10 - 12 Remote control 13 Basic Operation General control 14 Setting the clock (Remote Control only 15 Important Instruction To comply with the ENERGY STAR® standards mentioned above, please cancel the demonstration mode, as described on page 12. CD or MP3 - Sharp XL-UH242 | XL-UH242 Operation Manual - Page 6
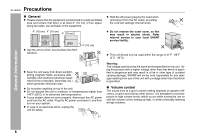
CD (TBUANNEDR) VIDEO /AUX USB OPEN/ CLOSE General Information Keep the unit away from direct turn on your system service to your local SHARP service will not be held responsible for any damage resulting from use of this unit with a voltage other than that which is specified. Volume control - Sharp XL-UH242 | XL-UH242 Operation Manual - Page 7
Controls and indicators XL-UH242 Front panel Reference page 1. Disc Trays 17 2. Timer Indicator 30 3. Remote Sensor 13 4. Disc or USB Stop Button 18 5. Disc or USB Play or Repeat Button 16, 20 6. Power ON/STANDBY Button 14 7. CD Button 16 8. Tuner (Band) Button 27 9. Video/Auxiliary/USB - Sharp XL-UH242 | XL-UH242 Operation Manual - Page 8
XL-UH242 Controls and indicators (continued) 12 3 45 67 General Information 13 14 15 16 9 10 11 8 12 3 4 ANTENNA FM GND AM 75 OHMS VIDEO/AUX IN RIGHT LEFT 5 6 SPEAKERS 7 RATED SPEAKER IMPEDANCE: 6 OHMS MIN. SPEAKERS LIGHT-UP LEFT RIGHT 8 1 AC INPUT RIGHT LEFT 9 SUBWOOFER PRE - Sharp XL-UH242 | XL-UH242 Operation Manual - Page 9
XL-UH242 General Information Remote control 1 Reference page 11 15 1. Remote Control Transmitter 13 2. Disc Number Select Buttons 16 7 12 8 13 16 3. Disc Direct Search Buttons 19 4. Equalizer Mode Select Button 14 17 5. Extra Bass/Demo CD Track Up or Fast Forward, Tuner 25 21. CD Track Down or - Sharp XL-UH242 | XL-UH242 Operation Manual - Page 10
XL-UH242 System connections Make sure to unplug the AC power cord before any connections. Antenna connection (see page 11) Right speaker FM antenna AM loop antenna Left speaker Preparation for Use SPEAKERS RATED SPEAKER IMPEDANCE: 6 OHMS MIN. AC INPUT RIGHT LEFT ANTENNA FM GND AM 75 - Sharp XL-UH242 | XL-UH242 Operation Manual - Page 11
XL-UH242 Preparation for Use Antenna connection Supplied FM antenna: Connect the FM antenna wire to the FM 75 OHMS jack and position the FM antenna wire in the direction where the strongest signal can be received. Supplied AM loop antenna: Connect the AM loop antenna to the AM and GND terminals. - Sharp XL-UH242 | XL-UH242 Operation Manual - Page 12
XL-UH242 System connections (continued) Preparation for Use AC power connection After checking all the connections have been made correctly, plug the AC power cord of this unit into the AC outlet. If you plug in the unit first, the unit will enter the demonstration mode. SPEAKERS RATED SPEAKER - Sharp XL-UH242 | XL-UH242 Operation Manual - Page 13
Remote control XL-UH242 Battery installation Use 2 "AA" size batteries (UM/SUM-3, R6, HP-7 or similar). Batteries are not included. 1 Open the battery cover. 2 Insert the batteries according to the direction indicated in the battery compartment. When inserting or removing the batteries, push them - Sharp XL-UH242 | XL-UH242 Operation Manual - Page 14
XL-UH242 General control POWER ON/STANDBY Volume control Main unit operation: When the VOLUME control is turned clockwise, the volume will increase. When it is turned counterclockwise, the volume will decrease. Remote control operation: Press the VOLUME (+ or -) button to increase or decrease the - Sharp XL-UH242 | XL-UH242 Operation Manual - Page 15
Remote Control only) XL-UH242 to turn the power on. 2 Press the CLOCK/TIMER mode] Press the CLOCK/TIMER button. The time display will will appear. (AM 12:00 - PM 11:59) The 12-hour display will appear. (AM 0:00 - PM 11:59) The 24-hour display will display) will be skipped. To change the - Sharp XL-UH242 | XL-UH242 Operation Manual - Page 16
is activated. CD / button on the remote control: The unit turns on and CD playback starts (regardless of the last function). / button on the main unit: The unit turns on and playback of the last function starts (CD,TUNER,VIDEO/AUX/USB). Auto power off function: In the stop mode of CD, MP3 or - Sharp XL-UH242 | XL-UH242 Operation Manual - Page 17
, it takes longer to read an MP3/WMA disc than a normal CD (approximately 20 to 90 seconds). 6 You can place discs on the trays 2 - 5 by following steps 3 - 5. 7 Press the / button to start playback. XL-UH242 Playback will begin from track 1 on DISC 1. After that disc finishes playing, the - Sharp XL-UH242 | XL-UH242 Operation Manual - Page 18
XL-UH242 Listening to a CD or MP3/WMA disc (continued) Various disc functions Function Play Main unit Remote control Operation Press in the stop mode. Stop Press in the playback mode. Notes for CD or MP3/WMA disc: Track up/track down is possible only within individual discs. Fast forward/ - Sharp XL-UH242 | XL-UH242 Operation Manual - Page 19
/WMA disc Playback Advanced CD or MP3/WMA disc playback XL-UH242 Direct track search By using the direct search buttons, the desired tracks on the current disc can be played. Use the direct search buttons on the remote control to select the desired track while playing the selected disc. Selected - Sharp XL-UH242 | XL-UH242 Operation Manual - Page 20
XL-UH242 Advanced CD or up to 5 discs: Press the RANDOM button on the remote control. To repeat desired tracks (CD only): Perform steps 1 - 6 in "Programmed play The beginning of the track being played will be located. In random play, the unit will select and play tracks automatically. (You - Sharp XL-UH242 | XL-UH242 Operation Manual - Page 21
Advanced CD playback XL-UH242 CD or MP3/WMA disc Playback Programmed play You can choose up to 32 selections for playback in the order you like. 1 While in the stop mode, press the MEMORY button on the remote control to enter the programming save mode. 2 Press one of the 1 - 5 buttons to select - Sharp XL-UH242 | XL-UH242 Operation Manual - Page 22
operated by the FOLDER button on the remote control. Files that are played when folder mode is set to the on position, may differ from those played back when folder mode is turned off. Folder Mode Off case: All the files starting from the selected folder or file will be played back. If file 3 inside - Sharp XL-UH242 | XL-UH242 Operation Manual - Page 23
Proceed to step 5. 4 Select desired file to be played back by pressing the or button. (Folder mode off) XL-UH242 CD or MP3/WMA disc Playback 5 Press the / (CD / ) button. Playback will start and file name will be displayed. Title, Artist & Album name is displayed if it is recorded on the disc - Sharp XL-UH242 | XL-UH242 Operation Manual - Page 24
XL-UH242 and AAC file systems. 24 When the USB memory is connected to the main unit, the device information will be displayed. Volume ID select desired playback folder. (Folder mode on) FOLDER indicator FOLDER number Total files in Folder 2 To start playback with folder mode on, go to step 5. To - Sharp XL-UH242 | XL-UH242 Operation Manual - Page 25
by pressing the or button. (Folder mode off) To remove USB memory device XL-UH242 1 Press the USB button on remote control. Wait until "UNPLUG OK" appears on FL display. 2 Disconnect USB memory device from the USB terminal. 5 Press the / (USB / ) button. Playback will start and the file name - Sharp XL-UH242 | XL-UH242 Operation Manual - Page 26
Playback XL-UH242 tracks: Press the RANDOM button on the remote control. To cancel random play: Press the / button. "R" will disappear. Notes: If you press the press the (USB ) button. Otherwise, it will play continuously. 26 Note: ( ) When folder mode is on, the selected playmode can be used - Sharp XL-UH242 | XL-UH242 Operation Manual - Page 27
ON/STANDBY XL-UH242 Tuning 1 Press the ON/STAND-BY button to turn the power on. 2 Press the TUNER (BAND) button repeatedly to select the desired frequency band (FM or AM). 3 Press the TUNING ( or ) button on the remote control to tune in to the desired station. Radio TUNER (BAND) Manual tuning - Sharp XL-UH242 | XL-UH242 Operation Manual - Page 28
XL-UH242 Listening to the radio (continued) Memorizing a station You can store 40 AM and FM stations in memory and recall them at the push of a button. (Preset tuning) 1 Perform steps 1 - 3 in "Tuning" on page 27. 2 Press the MEMORY button to enter the preset tuning saving mode number will be - Sharp XL-UH242 | XL-UH242 Operation Manual - Page 29
and sleep operation (Remote Control only) Timer playback: The unit turns on and plays the desired source (CD, TUNER, USB, AUX) at a preset time. This unit has 2 types of timer: ONCE TIMER and DAILY TIMER. XL-UH242 Once timer: Once timer play works for one time only at a preset time. Advanced - Sharp XL-UH242 | XL-UH242 Operation Manual - Page 30
XL-UH242 Timer and sleep operation (Remote Control only) (continued) 4 Within 10 seconds, press the or button to select "ONCE SET" or "DAILY SET", and press the MEMORY button. 5 Press the or button to adjust the hour and then press the MEMORY button. The illustrations show the timer - Sharp XL-UH242 | XL-UH242 Operation Manual - Page 31
XL-UH242 Advanced Features 11 When the preset time is reached, playback will start. The volume will increase gradually until it reaches the preset volume. 12 When the timer end time is reached, the system will enter the power stand-by mode automatically. Once timer: The timer will be canceled. - Sharp XL-UH242 | XL-UH242 Operation Manual - Page 32
XL-UH242 Timer and sleep operation (Remote Control only) (continued) Sleep operation The radio, compact disc and USB can be turned off automatically. 1 Play back the desired sound source. 2 Press the CLOCK/TIMER button. 3 Within 10 seconds, press the or button to select "SLEEP", and press the - Sharp XL-UH242 | XL-UH242 Operation Manual - Page 33
Enhancing your system XL-UH242 SUBWOOFER PRE-OUT The connection cord is not included. Purchase a commercially available cord as shown below. VIDEO/AUX IN RIGHT LEFT SPEAKERS RATED SPEAKER IMPEDANCE: 6 OHMS MIN. AC INPUT RIGHT LEFT ANTENNA FM GND AM 75 OHMS VIDEO/AUX IN RIGHT LEFT - Sharp XL-UH242 | XL-UH242 Operation Manual - Page 34
XL-UH242 Enhancing your system (continued) Troubleshooting chart SUBWOOFER PRE-OUT Subwoofer connection When a commercially available subwoofer with a built-in amplifier is connected to this unit, you can enjoy sound with emphasized bass. Connect an RCA cord from a commercially available speaker - Sharp XL-UH242 | XL-UH242 Operation Manual - Page 35
XL-UH242 References Remote control Symptom The remote control does not operate. Possible cause Is the AC power cord of the unit plugged in? Is the battery polarity correct? Are the batteries dead? Is the distance or angle incorrect? Does the remote control sensor receive strong light? Tuner - Sharp XL-UH242 | XL-UH242 Operation Manual - Page 36
XL-UH242 Troubleshooting chart (continued) Before transporting the unit Remove all CDs from the unit. Make sure there is no CD in the disc tray. Then, set the unit to the power stand-by mode. Carrying the unit with discs left inside can damage the unit. Care of compact discs Compact discs are fairly - Sharp XL-UH242 | XL-UH242 Operation Manual - Page 37
part of our policy of continuous improvement, SHARP tag only supports version 1.x USB supports version 2.0 CD player system 2" (5 cm) tweeter 5-1/8" (13 cm) woofer 180 W 90 W 6 ohms Width: 7-1/4" (185 mm) Height: 10-1/4" (260 mm) Depth: 9-1/16" (230 mm) 6.1 lbs. (2.8 kg/each) References XL-UH242 - Sharp XL-UH242 | XL-UH242 Operation Manual - Page 38
MEMO - Sharp XL-UH242 | XL-UH242 Operation Manual - Page 39
MEMO - Sharp XL-UH242 | XL-UH242 Operation Manual - Page 40
first consumer purchaser that this Sharp brand product (the "Product"), when shipped in its original con- tainer, will be free from defective workmanship and materials, and agrees that it will, at its option, either repair the defect or replace the defective Product or part thereof with a new or
-
 1
1 -
 2
2 -
 3
3 -
 4
4 -
 5
5 -
 6
6 -
 7
7 -
8
-
9
-
10
-
11
-
12
-
13
-
14
-
15
-
16
-
17
-
18
-
19
-
20
-
21
-
22
-
23
-
24
-
25
-
26
-
27
-
28
-
29
-
30
-
31
-
32
-
33
-
34
-
35
-
36
-
37
-
38
-
39
-
40
 |
 |
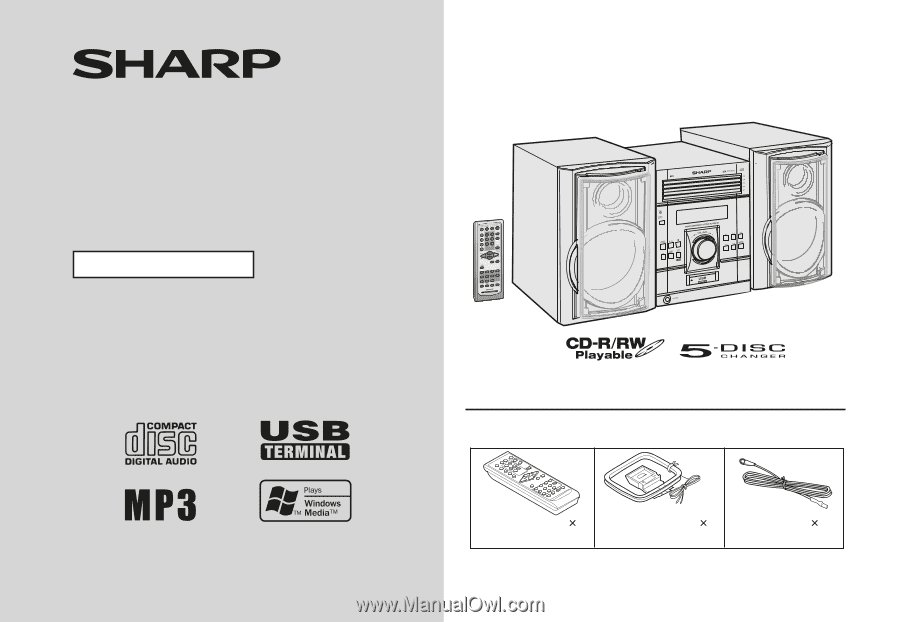
Thank you for purchasing this SHARP product.
To obtain the best performance from this product, please read this
manual carefully. It will guide you in operating your SHARP product.
MICRO COMPONENT SYSTEM
XL-UH242 Micro Component System consisting of XL-UH242 (main unit)
and CP-UH242 (speaker system).
Accessories
Please confirm that the following accessories are included.
MODEL
OPERATION MANUAL
XL-UH242
Note:
Only the above accessories are included.
Remote control
1
(RRMCGA081AWSA)
AM loop antenna
1
(QANTL0010AWZZ)
FM antenna
1
(92LFANT1535A)
Note:
This product is not compatible with MTP and AAC file systems.