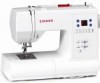
Singer 7466 Touch and Sew Instruction Manual
Singer 7466 Touch and Sew Manual
 |
View all Singer 7466 Touch and Sew manuals
Add to My Manuals
Save this manual to your list of manuals |
Singer 7466 Touch and Sew manual content summary:
- Singer 7466 Touch and Sew | Instruction Manual - Page 1
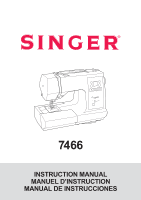
7466 INSTRUCTION MANUAL MANUEL D'INSTRUCTION MANUAL DE INSTRUCCIONES - Singer 7466 Touch and Sew | Instruction Manual - Page 2
pull or push fabric while stitching. It may deflect the needle causing it to break. 14. Switch the sewing machine off ("0") when making sewing machine from the electrical outlet when removing covers, lubricating, or when making any other user servicing adjustments mentioned in the instruction manual - Singer 7466 Touch and Sew | Instruction Manual - Page 3
. Lire les instructions en entier avant d'utiliser cette machine à coudre. DANGER machine à coudre, utilisez le modèle YC-485EC de Yamamoto Electric. Cet appareil est conforme à la directive CEE 89/336 EEC concernant les normes électromagnétiques. ® SINGER est une marque déposée de The Singer - Singer 7466 Touch and Sew | Instruction Manual - Page 4
. CONSERVE ESTE MANUAL DE INSTRUCCIONES Esta máquina de coser es para uso doméstico PEDAL Use el modelo YC-485EC de Yamamoto Electric con esta máquina de coser. Este instrumento se conforma con directivo de CEE 89/336/EEC cubriendo supresión contra interferencia de radio. ® SINGER es una marca - Singer 7466 Touch and Sew | Instruction Manual - Page 5
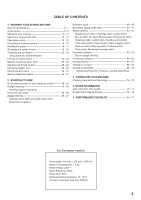
patterns Blindhem stitch 48 - 49 Multi-stitch zigzag, Shell stitch 50 - 51 Stretch stitches 52 - 61 Straight stretch patterns 64 - 65 Novelty patterns 66 - 67 Sewing on a button 66 - 67 Sewing a buttonhole 68 - 73 Using buttonhole foot, Procedure, Corded buttonholes 3. CARING FOR YOUR MACHINE - Singer 7466 Touch and Sew | Instruction Manual - Page 6
du pied presseur 28 - 29 Fonctions du panneau de commande 30 - 35 Touche de fonctionnement 36 - 37 Point invisible 48 - 49 Zigzag multi-point, de point, Point bourdon, Positionnement des motifs 3. ENTRETIEN DE VOTRE MACHINE Nettoyage des griffes et du crochet 74 - 75 4. RENSEIGNEMENTS AUTRES - Singer 7466 Touch and Sew | Instruction Manual - Page 7
INDICE DE CONTENIDOS 1. PRINCIPALES PARTES DE LA MAQUINA Identificación de la máquina 6 - 7 Accesorios 8 - 9 Preparación de la máquina 10 - 11 Porta carretes 12 - 13 Palanca pie prensatelas, Control de dientes 12 - 13 Conversion para la costura con brazo 14 - 15 Devanado de la canilla 16 - - Singer 7466 Touch and Sew | Instruction Manual - Page 8
1. KNOWING YOUR SEWING MACHINE MACHINE IDENTIFICATION 1. Thread guide 2. Thread take-up 3. Thread tension control 4. Face cover 5. Thread cutter 6. Extension table (Accessory box) 7. Bobbin winder shaft 8. Bobbin winder stop 9. Reverse stitch switch 10. Pattern reference guide 11. Horizontal spool - Singer 7466 Touch and Sew | Instruction Manual - Page 9
-griffes d'entraînement 19. Levier-poussoir boutonnière 20. Enfileur de chas d'aiguille 21. Guide-fil 22. Guide-fil 23. Vis du pied 24. Aiguille 28. Couvercle canette 26. Barre à aiguille 27. Coupe-fil 28. Touche de verrouillage du pied 29. Vis de l'aiguille 30. Pied presseur zigzag 31. Griffe - Singer 7466 Touch and Sew | Instruction Manual - Page 10
. Zipper foot 11. Satin stitch foot 12. Blind stitch foot 13. Buttonhole foot The Foot that comes on your Sewing machine is called the General Purpose Foot and will be used for the majority of your sewing. The Satin Foot (11) is another very useful foot and should be used for most decorative - Singer 7466 Touch and Sew | Instruction Manual - Page 11
COURE 1. Aiguilles 2. Canettes (total 4 - 1 dans la machine) 3. Porte-bobine auxiliaire vertical 4. Rondelle feutre 5. Chapeau pour . Prensatelas de puntada invisible 13. Prensatelas de ojales Le pied qui accompagne votre machine à coudre est appelé le pied universel et est utilisé pour la plus - Singer 7466 Touch and Sew | Instruction Manual - Page 12
operate until the power/ light switch is turned on. The same switch controls both the power and the light. When servicing the machine, or changing needles, etc., machine must be disconnected from the power supply. Power/light switch "OFF" Interrupteur moteur/lumière "OFF" Interruptor corriente/luz - Singer 7466 Touch and Sew | Instruction Manual - Page 13
de pedal en el conector de la máquina. NOTA: Cuando el control de pedal está desconectado, la máquina no funcionará. Débranchez toujours. La machine de l'alimentation électrique en retirant la fiche de la prise murale. Siempre desconecte la máquina de la fuente de alimentación retirando el enchufe - Singer 7466 Touch and Sew | Instruction Manual - Page 14
foot. 1. Lower the presser foot to sew. 2. Raise the lifter to the middle position to insert or remove fabric. 3. Lift it to its highest position thick fabric. FEED DOG CONTROL The feed dogs control the movement of the fabric that is being sewn. They should be raised for all general sewing purposes - Singer 7466 Touch and Sew | Instruction Manual - Page 15
PORTE-BOBINE PORTE-BOBINE HORIZONTAL pour la bobine normale Placez la bobine sur la broche et fixez-y un couvre-fil pour assurer un débit de fil bien régulier. Si la bobine est dotée d'une fente de retenue de fil, elle doit être placée à droite. Sélectionner la broche de couvre-fil correcte en - Singer 7466 Touch and Sew | Instruction Manual - Page 16
CONVERTING TO FREE-ARM SEWING Your machine can be used either as a flat- bed or as a free-arm model. With back into place until it clicks. With the extension table removed the machine converts into a slim free-arm model for sewing children's clothes, cuffs, trouser legs, and other awkward places. 14 - Singer 7466 Touch and Sew | Instruction Manual - Page 17
la remettre en place, faites glisser la table de rallonge à sa place jusqu'à ce qu'elle s'enclenche. Une fois la table de rallonge retirée, la machine est convertie en modèle bras libre mince pour la couture de vêtements pour enfants, de poignets, de jambes de pantalons et autres endroits difficiles - Singer 7466 Touch and Sew | Instruction Manual - Page 18
the spool pin cap. Pull the thread out from the spool and place it through thread guides as shown in illustration. 1 2. Put end of thread through the hole in bobbin as onto end of thread. 4. Start machine. Bobbin will automatically stop turning when completely filled. Push shaft to the left to - Singer 7466 Touch and Sew | Instruction Manual - Page 19
Tirez le fil hors de la bobine et faites-le passer par le guide-fil, comme montré dans l'illustration. 1. Coloque el carrete de hilo en que la canette est pleine, elle s'arrêtera de tourner. Arrêter la machine. Pousser l'ensemble axe canette vers la gauche pour pouvoir enlever la canette pleine de - Singer 7466 Touch and Sew | Instruction Manual - Page 20
cause sewing problems if it rotates clockwise. 4 4. Pull thread through the slot (A) and then to the left. A 5. With a finger held gently on top of the bobbin, pull the thread 5 until it stops in slot (B). Then pull about 6" (15 cm) of thread and lead it towards back of the machine - Singer 7466 Touch and Sew | Instruction Manual - Page 21
le fil jusqu'à ce qu'il s'arrête à la fente (B). Puis tirez environ 15 cm de fil et dirigez-le vers l'arrière de la machine au-dessus du pied presseur. REMARQUE: ceci est également une étape très importante pour assurer que le fil de la canette ne glisse pas hors - Singer 7466 Touch and Sew | Instruction Manual - Page 22
the eye of the lever. * Guide the thread into the thread guide (5). * Pass the thread through the eye of the needle (6) from front to back. (See following page for instructions on operation of the Automatic Needle Threader.) IMPORTANT: 4 To verify that the machine is threaded properly in the - Singer 7466 Touch and Sew | Instruction Manual - Page 23
guide-fil (5). * Faites passer le fil par l'orifice de l'aiguille (6) de l'avant vers l'arrière. (Reportez-vous à la page suivante pour les instructions 1.) Avec le pied presseur relevé, tirez le fil vers l'arrière de la machine. Vous ne devriez sentir qu'une légère résistance ainsi qu'une faible ou - Singer 7466 Touch and Sew | Instruction Manual - Page 24
as illustrated. 2. Pull down lever holding the end of thread. 3. Turn the lever as far as it will go. 4. Guide thread into hooked end and pull it upward. 5. Return the lever and needle will be threaded automatically. 6. Release the lever and pull thread away from - Singer 7466 Touch and Sew | Instruction Manual - Page 25
UTILISATION DE L'ENFILEUR DE CHAS D'AIGUILLE Amener l'aiguille en position haute en toumant le volant vers vous. 1. Accrocher le fil au guide-fil de la manière indiquée sur l'illustration. 2. Abaisser le levier tout en tenant l'extrémité du fil. 3. Tourner le levier au maximum. 4. Guider le - Singer 7466 Touch and Sew | Instruction Manual - Page 26
bobbin thread is, with straight stitch selected, touch and release the reverse switch. Your machine will perform one down-up cycle and stop with the needle up. Always stopping with the needle "fully up" is one of the features of your computer sewing machine. 3. Lightly pull up the top thread, and - Singer 7466 Touch and Sew | Instruction Manual - Page 27
. REMARQUE: pour faire remonter rapidement le fil de la canette, avec le point droit sélectionné, touchez et relâchez l'interrupteur de couture arrière. La machine exécute un cycle et s'arrête avec l'aiguille relevée. Le fait qu'elle s'arrête toujours avec l'aiguille "complètement relevée" est l'une - Singer 7466 Touch and Sew | Instruction Manual - Page 28
Ball-Point 2045 (With yellow band) Size 11/80,14/90, 16/100 * Do not use on stretch fabrics. * For best sewing results, always use a Singer Branded Needle. Always disconnect the machine from power supply by removing the plug from the wall-outlet. Changing the needle 1. Raise the needle bar - Singer 7466 Touch and Sew | Instruction Manual - Page 29
14/90, 16/100 * No usar sobre el material estirado. * Para los mejores resultados de costura, use siempre agujas marca Singer. Débranchez toujours. La machine de l'alimentation électrique en retirant la fiche de la prise murale. Siempre desconecte la máquina de la fuente de alimentación retirando - Singer 7466 Touch and Sew | Instruction Manual - Page 30
machine. Helpful Hint: A slight adjustment to the + or - side of AUTO will improve sewing middle of layers of the fabric you are sewing. If, when you start to sew, you find that the Touche de verrouillage du pied Boton de desprendimiento prensatelas Foot holder Support du pied Sujetador prensatelas - Singer 7466 Touch and Sew | Instruction Manual - Page 31
sur le cadran de réglage de tension en haut de la machine. Suggestion utile: Un léger ajustement sur le côté + levier du pied presseur. 1. Poussez le touche de verrouillage et enlever le pied. le pied s'enclenche de lui-même sur son support. CAMBIO DEL PIE PRENSATELAS Asegurarse de que la aguja est - Singer 7466 Touch and Sew | Instruction Manual - Page 32
Exhibición de número Direct selection button Touches de sélection directe Botones de selección width controls are for reference only and do not represent actual sewing parameters of length and width. *REMARQUE: les échelles et les pattern reference guide located at the bottom of machine. 30 - Singer 7466 Touch and Sew | Instruction Manual - Page 33
affichage numérique pour sélectionner le chiffre du coté gauche, et les touches à la droite pour le chiffre à la droite, en vous reportant au guide de référence des motifs situé en bas de la machine. FUNCIONES DEL PANEL DE CONTROL Botones de selección directa Los patrones usados más frecuentemente - Singer 7466 Touch and Sew | Instruction Manual - Page 34
opportunities for manual adjustments than others. 2. An alternate method of determining available adjustments is to move the control knobs while sewing slowly. Pattern reference guide When selecting patterns with the numerical selection buttons, refer to the pattern reference guide. Patterns in dark - Singer 7466 Touch and Sew | Instruction Manual - Page 35
Votre machine à est automatiquement exécutée aux réglages par REMARQUE: les instructions concernant le changement En cada punto de ajuste manual, el LED destellará Guide de référence des motifs Lorsque vous sélectionnez des motifs à l'aide des touches de sélection numériques, reportez-vous au guide - Singer 7466 Touch and Sew | Instruction Manual - Page 36
in the pattern reference guide cannot be selected and a beep will sound. Helpful Hints: 1. Always select the Twin Needle Mode prior to selecting a pattern. This will preclude any possibility of the twin needle breaking. 2. Turning off the machine returns the machine to normal sewing mode. Twin - Singer 7466 Touch and Sew | Instruction Manual - Page 37
ce qui évitera les risques de rupture d'aiguille et d'endommagement de la machine. Lorsque le commutateur est enfoncé et allumé en rouge, il sera impossible de sélectionner les motifs à numéro cerclé mentionnés dans le guide de référence des motifs, et un bip retentira. Suggestions utiles: 1. - Singer 7466 Touch and Sew | Instruction Manual - Page 38
long as the reverse switch button is pressed. * Tacking stitch function for tie-off of other stitches ( ) The sewing machine makes 4 tiny tacking stitches to tie off the sewing on all patterns except straight and zigzag stitches. The position of the tacking stitches will be at the exact spot in the - Singer 7466 Touch and Sew | Instruction Manual - Page 39
TOUCHE DE FONCTIONNEMENT Interrupteur de couture arrière/faufilage INTERRUPTOR DE FUNCIONAMIENTO Interruptor de costura hacia atrás/remate * Fonction couture arrière pour les points droits et zigzags ( ) La couture arrière avance lorsque l'interrupteur couture arrière reste appuyé. La machine - Singer 7466 Touch and Sew | Instruction Manual - Page 40
2. STARTING TO SEW QUICK REFERENCE TABLE OF STITCH LENGTH AND WIDTH 2. COMMENCEZ À COUDRE TABLEAU DE RÉFÉRENCE RAPIDE DES LONGUEURS ET LARGEURS DE POINTS 2. EMPEZER A COSER CUADRO DE REFERENCIA RAPIDA DE LARGO Y ANCHO DE PUNTADA 38 - Singer 7466 Touch and Sew | Instruction Manual - Page 41
IZQUIERDA - DERECHA | | -- | STITCH No. POINT Noo. PUNTADA No. LENGTH LONGUEUR (mm) LARGO AUTO AUTO AUTO MANUAL MANUEL MANUAL WIDTH LARGEUR (mm) ANCHO AUTO AUTO AUTO MANUAL MANUEL MANUAL TWIN STITCH No. NEEDLE AIGUILLE POINT Noo. DOUBLE DOS PUNTADA No. AGUJAS LENGTH LONGUEUR (mm) LARGO - Singer 7466 Touch and Sew | Instruction Manual - Page 42
DOS PUNTADA No. AGUJAS LENGTH LONGUEUR (mm) LARGO AUTO AUTO AUTO MANUAL MANUEL MANUAL WIDTH LARGEUR (mm) ANCHO AUTO AUTO AUTO MANUAL MANUEL MANUAL TWIN NEEDLE AIGUILLE DOUBLE DOS AGUJAS 11 2.0 1.0 - 3.0 6.0 3.0 - 6.0 | 26 2.0 0.75 - 3.0 5.0 1.0 - 7.0 | 12 2.5 1.5 - 3.0 5.0 2.0 - 6.0 | 27 - Singer 7466 Touch and Sew | Instruction Manual - Page 43
NEEDLE AIGUILLE POINT No. DOUBLE DOS PUNTADA No. AGUJAS LENGTH LONGUEUR (mm) LARGO AUTO AUTO AUTO MANUAL MANUEL MANUAL WIDTH LARGEUR (mm) ANCHO AUTO AUTO AUTO MANUAL MANUEL MANUAL TWIN NEEDLE AIGUILLE DOUBLE DOS AGUJAS 41 2.0 1.0 - 3.0 3.0 1.0 - 6.0 | 56 1.25 0.75 - 4.0 7.0 3.5 - 7.0 | 42 - Singer 7466 Touch and Sew | Instruction Manual - Page 44
machine. NOTE: The Needle Plate has both Metric and Inch Markings as an aid for guiding your fabric when sewing a seam. 6. First turn the handwheel toward you until the needle is at its highest position, then raise the presser foot, draw materials 6 to the rear and cut off excess thread with - Singer 7466 Touch and Sew | Instruction Manual - Page 45
de la tension peut être nécessaire. A.Réglage tension du fil supérieur B.Touche couture arrière C. Levier du pied presseur D. Commutateur de mode d'aiguilles 2. Tirez les deux fils sous le pied presseur vers l'arrière de la machine, en laissant environ 15 cm de fil. 3. Placer le tissu sous le pied - Singer 7466 Touch and Sew | Instruction Manual - Page 46
topstitching and quilting. 1. Thread bobbin with desired top stitching color. When sewing the machine will pull this thread to the top. 2. Thread machine with invisible or lightweight thread the color that matches your fabric. This thread should not show. 3. Increase thread tension a little bit at - Singer 7466 Touch and Sew | Instruction Manual - Page 47
à la main pour la couture supérieure et le matelassage. 1. Enfilez la bobine en utilisant la couleur voulue pour la couture supérieure. 2. Enfilez la machine en utilisant un fil invisible ou de même couleur que le tissu et qui ne se verra pas. 3. Augmentez légèrement la tension du fil. 4. Commencez - Singer 7466 Touch and Sew | Instruction Manual - Page 48
indicates the Auto/default value set automatically when the pattern is selected. For the Zigzag Pattern the stitch length is 2 mm and the stitch sewing machine. SATIN STITCH This is a closely spaced attractive stitch for appliqué, bartacking, etc. Slightly loosen the top thread tension and manually - Singer 7466 Touch and Sew | Instruction Manual - Page 49
ées dans le graphique sont des longueurs et des largeurs de couture actuelles et ne correspondent pas aux marques d'échelle et de nombre de la machine. NOTA: Los valores indicados en la tabla son largos y anchos de costura reales y no corresponden a las marcas de escala y números en la máquina de - Singer 7466 Touch and Sew | Instruction Manual - Page 50
fold. NOTE: For a narrower or wider blindhem, first manually adjust the length and width controls to your desired length and width. Then adjust the guide on the foot. Sew slowly, guiding the fabric carefully along the edge of the guide. B A 4. When completed, the stitching is almost invisible on - Singer 7466 Touch and Sew | Instruction Manual - Page 51
que l'aiguille aille complètement vers la gauche. Elle ne devrait percer que le pli du tissu. Si elle ne le fait pas, ajustez le guide (B) du pied invisible (A) de façon à ce que l'aiguille ne perce que le pli du tissu et que le - Singer 7466 Touch and Sew | Instruction Manual - Page 52
for overcasting all types of fabrics. It is also ideal for bartacks, mending tears, patching, sewing towelling, patch-work and attaching flat elastic. NOTE: Mending a tear or overedging as shown in illustration requires manual - Singer 7466 Touch and Sew | Instruction Manual - Page 53
y aplicación de elástico plano. NOTA: Para zurcir desgarrones o coser sobre el borde tal como se indica en la figura se requiere del ajuste manual del control de largo. POINT DE LINGERIE RÉGLAGES :Pied presseur - Pied universel :Réglage tension du fil supérieur - AUTO Retourner le bord et faire - Singer 7466 Touch and Sew | Instruction Manual - Page 54
forwards. It is particularly suitable for reinforcing the seams of sportswear in stretch and non-stretch fabrics, and for curved seams which take a lot of strain. Use neck-bands, armholes, sleeves and hems. When manually adjusted to a very narrow width it also can be used for seaming in areas of - Singer 7466 Touch and Sew | Instruction Manual - Page 55
POINTS EXTENSIBLE RÉGLAGES :Pied presseur - Pied universel ou pour point bourdon :Réglage tension du fil supérieur - AUTO Les points extensible sont généralement utilisés pour les tissus élastiques, mais peuvent ètres utilisès sur tissus tissés. POINT DROIT EXTENSIBLE Ce point est beaucoup plus - Singer 7466 Touch and Sew | Instruction Manual - Page 56
elastic and stretch lace. 1. Make several rows of gathers across the fabric that you wish to smock. 2. With a narrow strip of fabric directly under in heirloom sewing. The Entredeux stitch is most often sewn with a Wing Needle (Singer Style 2040) to create holes in the stitch pattern. Helpful Hint - Singer 7466 Touch and Sew | Instruction Manual - Page 57
Útil para puntadas decorativas de bordes y para usar en costuras antiguas. La puntada "Entre dos" es más comúnmente usada con una aguja "de ala" (Singer estilo 2040) para crear agujeros en el patrón de costura. Suggestion utile: Un léger ajustement + de la tension augmente la taille du trou lorsqu - Singer 7466 Touch and Sew | Instruction Manual - Page 58
and for seaming and overcasting in one operation. It is primarily used on slightly stretch fabrics and non-stretch fabrics such as linen, tweed, and medium to heavy-weight cotton. CRISS-CROSS STITCH Used to sew and finish stretch fabrics or for decoration especially of borders. CROSSED STITCH Use to - Singer 7466 Touch and Sew | Instruction Manual - Page 59
POINT D'ÉCHELLE Le point d'échelle est principalement utilisé pour la couture d'ourlets à fil tiré. Il peut également être utilisé pour effectuer la couture par dessus une mince bande d'une couleur opposée ou semblable. Placez le point au centre pour obtenir un effet spécial pour la décoration. Une - Singer 7466 Touch and Sew | Instruction Manual - Page 60
for hemstitching table and bed covers with an elegant touch. Picot-like stitch can also be made on sheer materials. Sew along the raw edge of fabric and trim close to the outside of the stitching. GREEK KEY STITCH A traditional pattern suited for decorative borders, hems and edge finishings - Singer 7466 Touch and Sew | Instruction Manual - Page 61
extensible, tissu en éponge extensible, jersey. Les vêtements en tricot machine ou main peuvent être assemblés avec ce point. Vous pouvez é OBLIQUE Très pratique pour faire les ourlets de table et couvre-lit avec une touche élégante. Le point ressemblant à un point picot (ourlet cocotte) peut être - Singer 7466 Touch and Sew | Instruction Manual - Page 62
THORN STITCH It is a versatile stitch used for joining fabric pieces and as a decorative touch. REINFORCED OVEREDGE STITCH Both of these stitches are perfect for attaching flat elastic when making or repairing lingerie. They can also be used for smocking and as a seam finish. 60 - Singer 7466 Touch and Sew | Instruction Manual - Page 63
POINT D'ÉPINE C'est un point polyvalent utilisé pour joindre des morceaux de tissu et de la broderie. PUNTADA "HERRINGBONE" Puntada versátil que se utiliza para unir piezas de género y bordado. POINT SURJET RENFORCÉ Convient particulièrement bien pour assembler et surfiler en une seule opération. - Singer 7466 Touch and Sew | Instruction Manual - Page 64
stitches. You can use other stitches in the same way. * You should carry out a test sewing on a cut-off strip of the fabric being sewn to check the pattern to be used. * Before starting to sew, check that there is enough thread wound onto the bobbin to make sure that the thread will not run - Singer 7466 Touch and Sew | Instruction Manual - Page 65
MOTIFS DÉCORATIFS RÉGLAGES :Pied presseur - Pied pour point bourdon :Réglage tension du fil supérieur - AUTO 20 types différents de points décoratifs sont disponibles. Voici quelques exemples d'utilisation et de couture de ces points. Vous pouvez aussi utiliser d'autres points de la même façon. * - Singer 7466 Touch and Sew | Instruction Manual - Page 66
CONTINUOUS PATTERNS SETTINGS :Presser foot - General purpose foot or Satin Stitch Foot :Thread tension control - AUTO These are the optimum patterns for sewing continuous patterns. Use whichever patterns suit your preference. 64 - Singer 7466 Touch and Sew | Instruction Manual - Page 67
MOTIFS CONTINUEL RÉGLAGES :Pied presseur - Pied universel ou pour point bourdon :Réglage tension du fil supérieur - AUTO Ces motifs conviennent parfaitement à la couture des motifs continuels. Utilisez les motifs que vous préférez. PATRONES CONTINUOS AJUSTES :Pie prensatelas - Pie universal o - Singer 7466 Touch and Sew | Instruction Manual - Page 68
Satin stitch foot :Thread tension control - AUTO These can be used for sewing single pattern and continuous patterns. SEWING ON A BUTTON SETTINGS :Presser foot - General purpose foot :Feed dog control - Position your fabric and button under the presser foot. Lower presser foot. Turn the handwheel to - Singer 7466 Touch and Sew | Instruction Manual - Page 69
RÉGLAGES :Pied presseur - Pied zigzag :Réglage tension du fil supérieur - AUTO PATRONES ACTUALES AJUSTES :Pie prensatelas - Pata para zigzag :Control tensión hilo - AUTO Estos pueden ser usados para coser patrones de una puntada y patrones continuos. POSE DE BOUTONS RÉGLAGES :Pied presseur - Pied - Singer 7466 Touch and Sew | Instruction Manual - Page 70
SEWING A BUTTONHOLE USING BUTTONHOLE FOOT Your machine offers you two different widths of bartack Make a practice buttonhole on a scrap of the fabric you are using. Then try the buttonhole with the selected button. 1. Select one of buttonhole patterns. 2. Replace the presser foot with the buttonhole - Singer 7466 Touch and Sew | Instruction Manual - Page 71
CONFECTION DES BOUTONNIÈRES UTILISATION DU PIED BOUTONNIÈRE Votre machine vous offre deux différentes largeurs de brides de boutonnières avec arrêt et à oeillet cousues au moyen d'un système qui mesure la taille - Singer 7466 Touch and Sew | Instruction Manual - Page 72
the buttonhole foot. 8. While holding the top thread, start the machine. Fabric marking Marque Marque du tissu Marca de material Mark Marque Marca * Sewing will be completed automatically in the following order. 1 2 3 4 5 6 7 8 Fabric marking Marque du tissu Marca de material 9. When - Singer 7466 Touch and Sew | Instruction Manual - Page 73
con la marca en el pie de ojaladora, y luego baje el pie de ojaladora. 8. Tout en tenant le fil supérieur, démarrez la machine. 8. Mientras sostiene el hilo superior, haga funcionar la máquina. * La couture sera complétée automatiquement dans l'ordre indiqué sur l'illustration. * La costura se - Singer 7466 Touch and Sew | Instruction Manual - Page 74
twist) over the spur and pull both ends of the cord forward under the foot and tie off the cord as shown in the illustration. Sew buttonhole so that zigzag stitches cover the cord. When completed, release the cord from foot and snip off extra length. Spur Saliente Tige 72 - Singer 7466 Touch and Sew | Instruction Manual - Page 75
BOUTONNIÈRES GANSEES (RENFORCEES) Accrocher le cordonnet (fil de passe ou fil de soie) sur la tige du pied pour boutonnière et tirer les deux extrémitès sous le pied vers le devant. Coudre la boutonnière de manière à ce que la zig-zag recouvre le cordonnet. La boutonnière terminée, détacher le - Singer 7466 Touch and Sew | Instruction Manual - Page 76
(1) 2 3. Remove the bobbin case (2). 3 4. Clean the feed dogs and hook area with the lint brush. 4 Put one drop of sewing machine oil on the hook race as indicated by the arrows. (A, B) NOTE: Singer Brand Sewing Machine Oil is suggested. DO NOT use "all purpose" oil as it is not suited for - Singer 7466 Touch and Sew | Instruction Manual - Page 77
ère, comme indiqué par les flèches (A,B). REMARQUE: l'utilisation de l'huile de machine à coudre de la marque Singer est recommandée. N'UTILISEZ PAS d'huile "universelle", elle ne convient pas à la lubrification des machines à coudre. 4. Limpiar el área del transportador y de la lanzadera con el - Singer 7466 Touch and Sew | Instruction Manual - Page 78
sewing satin stitches and as an alternative to the General Purpose Foot when sewing Stretch top stitching and decorative sewing. Use of a Singer Brand 3mm (Style pattern. This will preclude any possibility of the twin needle breaking. 2. Turning off the machine returns the machine to normal sewing - Singer 7466 Touch and Sew | Instruction Manual - Page 79
aiguilles et risquez d'abîmer votre machine. L'utilisation d'une aiguille double de 3 mm de la marque Singer (Style 2025) est fortement recommandée. comme si vous n'aviez qu'un fil jusqu'aux guides fil de l'aiguille. Passez un fil dans chaque guide fil et dans chaque aiguille d'avant en arrière. - Singer 7466 Touch and Sew | Instruction Manual - Page 80
STRAIGHT STITCH NEEDLE POSITION The position of the needle when sewing straight stitch may be adjusted to anyone of 13 different positions with the Stitch Width Control as illustrated: Toward left Vers la gauche Hacia izquierda - Singer 7466 Touch and Sew | Instruction Manual - Page 81
RÉGLAGE DE LA POSITION D'ALGUILLE POUR LE POINT DROIT 13 positions d'aiguille sont utilisables pour le matelassage, surpiqure etc. AJUSTE DE POSICION DE AGUJA PARA PUNTADA RECTA 13 posiciones de aguja disponibles para acolchados, puntadas de revestimiento, etc. 79 - Singer 7466 Touch and Sew | Instruction Manual - Page 82
is being pulled or pushed against machine feeding action. - Guide it gently. * Needle size is not correct for thread and fabric. - See page 26 - 27. * Needle is not all the way up into the needle clamp. - See page 26 - 27. THREAD PROBLEMS Thread bunches. * Top and bobbin threads are not drawn back - Singer 7466 Touch and Sew | Instruction Manual - Page 83
GENERALES Machine does not sew. * El interruptor de energía no está conectado. - Ponerio en la posición LOW o HIGH. Máquina se atasca/rechina * El hilo está enredado en la lanzadera. - Limpiar la lanzadera (vea página 74 - 75). * La aguja se rompe. - Reponer la aguja (vea página 26 - 27). Fabric - Singer 7466 Touch and Sew | Instruction Manual - Page 84
ENGLISH / FRANÇAIS / ESPAÑOL © Part No. 77235 6/05
-
 1
1 -
 2
2 -
 3
3 -
 4
4 -
 5
5 -
 6
6 -
 7
7 -
8
-
9
-
10
-
11
-
12
-
13
-
14
-
15
-
16
-
17
-
18
-
19
-
20
-
21
-
22
-
23
-
24
-
25
-
26
-
27
-
28
-
29
-
30
-
31
-
32
-
33
-
34
-
35
-
36
-
37
-
38
-
39
-
40
-
41
-
42
-
43
-
44
-
45
-
46
-
47
-
48
-
49
-
50
-
51
-
52
-
53
-
54
-
55
-
56
-
57
-
58
-
59
-
60
-
61
-
62
-
63
-
64
-
65
-
66
-
67
-
68
-
69
-
70
-
71
-
72
-
73
-
74
-
75
-
76
-
77
-
78
-
79
-
80
-
81
-
82
-
83
-
84
 |
 |
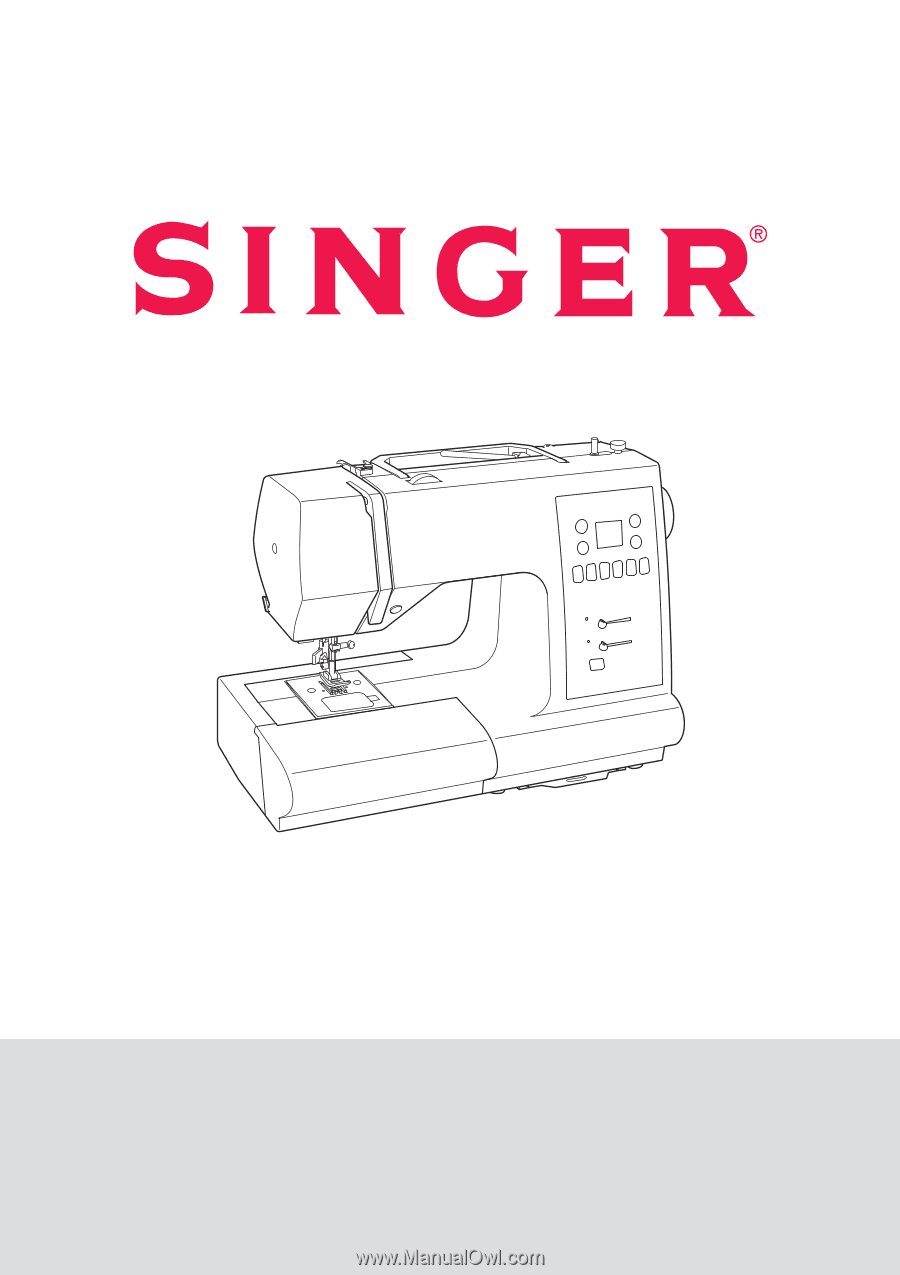
INSTRUCTION MANUAL
MANUEL D’INSTRUCTION
MANUAL DE INSTRUCCIONES
7466