Sony DAV-FX80 DAVFX80 Instructions (complete HT system)
Sony DAV-FX80 - Dvd Dream System Manual
 |
View all Sony DAV-FX80 manuals
Add to My Manuals
Save this manual to your list of manuals |
Sony DAV-FX80 manual content summary:
- Sony DAV-FX80 | DAVFX80 Instructions (complete HT system) - Page 1
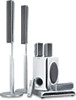
2-590-761-11(1) DVD Home Theatre System Operating Instructions DAV-FX80 ©2005 Sony Corporation - Sony DAV-FX80 | DAVFX80 Instructions (complete HT system) - Page 2
call upon your Sony dealer regarding this product. Model No. DAV-FX80 Serial No WARNING This equipment has been tested and found to comply with the limits for a Class B digital device, pursuant to Part 15 of the FCC Rules. These limits are designed to provide reasonable protection against harmful - Sony DAV-FX80 | DAVFX80 Instructions (complete HT system) - Page 3
mark. As an ENERGY STAR® partner, Sony Corporation has determined that this product meets the ENERGY STAR® guidelines for energy efficiency. Welcome! Thank you for purchasing Sony DVD Home Theatre System. Before operating this system, please read this manual thoroughly and retain it for future - Sony DAV-FX80 | DAVFX80 Instructions (complete HT system) - Page 4
Table of Contents Welcome 3 About This Manual 6 This System Can Play the Following Discs 6 Guide to the Control Menu Display...... 10 Getting Started Unpacking 13 Inserting Batteries into the Remote....... 13 Hookup Overview 14 Step 1: Speaker System Hookup........... 15 Step 2: Antenna (Aerial - Sony DAV-FX80 | DAVFX80 Instructions (complete HT system) - Page 5
Settings for the Speakers 82 [SPEAKER SETUP] Additional Information Precautions 85 Notes about the Discs 86 Troubleshooting 86 Self-diagnosis Function 89 (When letters/numbers appear in the display) Specifications 90 Glossary 91 Language Code List 94 Index to Parts and Controls 95 DVD Setup - Sony DAV-FX80 | DAVFX80 Instructions (complete HT system) - Page 6
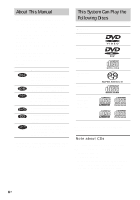
About This Manual • The instructions in this manual describe the controls on the remote. You can also use the controls on the system if they have the same or similar names as those on the remote. • The Control Menu items may be different depending on the area. • "DVD" may be used as a general term - Sony DAV-FX80 | DAVFX80 Instructions (complete HT system) - Page 7
part of CD-Extras • DVD Audios • DVD-RAMs Also, the system cannot play the following discs: • A DVD VIDEO with a different region code the operating instructions for the encoded with copyright protection technologies are marketed on PBC (Playback Control) (VIDEO CDs) This system conforms to Ver. - Sony DAV-FX80 | DAVFX80 Instructions (complete HT system) - Page 8
to the original sound. Types of Super Region code Your system has a region code printed on the back of the unit system plays DVDs and VIDEO CDs according to the disc contents the software producers designed, some playback features may not be available. Also, refer to the instructions - Sony DAV-FX80 | DAVFX80 Instructions (complete HT system) - Page 9
authorized by Macrovision. Reverse engineering or disassembly is prohibited. This system incorporates with Dolby*1 Digital and Dolby Pro Logic (II) adaptive matrix surround decoder and the DTS*2 Digital Surround System. *1 Manufactured under license from Dolby Laboratories. "Dolby," "Pro Logic," and - Sony DAV-FX80 | DAVFX80 Instructions (complete HT system) - Page 10
Guide to the Control Menu Display DISPLAY Use the Control Menu to select a function and to view related information. Press DISPLAY repeatedly to turn on or change the Control Menu display as follows: , Control Menu display 1 m Control Menu display 2 (appears for certain discs only) m Control Menu - Sony DAV-FX80 | DAVFX80 Instructions (complete HT system) - Page 11
time. Input the time code for picture and music searching CONTROL] (page 65) Sets to prohibit playback on this system . [SETUP] (page 77) [QUICK] Setup (page 33) Use Quick Setup to choose the desired language of the on-screen display, the aspect ratio of the TV, and the size of the speakers - Sony DAV-FX80 | DAVFX80 Instructions (complete HT system) - Page 12
50) Selects the effects to be used for changing slides during a slide show. [MODE (MP3, JPEG)] (page 48) Selects the data type; MP3 audio track (AUDIO), or both (AUTO) to be played when playing a DATA CD Tip • The Control Menu icon indicator lights up in green t when you select any item except [ - Sony DAV-FX80 | DAVFX80 Instructions (complete HT system) - Page 13
) (1) • Size AAA (R03) batteries (2) • Wall-mount pads • Operating Instructions • Speaker and TV connections (card) (1) Inserting Batteries into the Remote You can control the system using the supplied remote. Insert two size AAA (R03) batteries by matching the 3 and # ends on the batteries to - Sony DAV-FX80 | DAVFX80 Instructions (complete HT system) - Page 14
Perform all connections and settings by following Steps 1 to 7. "Step 1: Speaker System Hookup" (page 15) "Step 2: Antenna (Aerial) Hookup" (page ; audio signals are processed by this system and output from the speakers of this system. You can also enjoy sound of other sources, such as TV programs, in - Sony DAV-FX80 | DAVFX80 Instructions (complete HT system) - Page 15
the colors of the jacks to those of the cords. Do not connect any speakers other than those supplied with this system. To obtain the best possible surround sound, specify the speaker parameters (distance, level, etc.) on page 82. Required cords Speaker cords The connector and the color tube of the - Sony DAV-FX80 | DAVFX80 Instructions (complete HT system) - Page 16
tabletop use. Post (long) or Post (short) Screw holes Base 2 Secure the base to the post by screws. Bottom of the base Screws (3) 3 Draw the speaker cord through the hole on the base, then stand it up. Bottom of the base - Sony DAV-FX80 | DAVFX80 Instructions (complete HT system) - Page 17
Getting Started 4 Draw the speaker cord through the hole on the speaker. Hole Speaker Speaker cord , Speaker 5 Mount the speaker on the post. , Note • Do not catch the speaker cord between the speaker and the post. • Do not drop the speaker when mounting. continued 17US - Sony DAV-FX80 | DAVFX80 Instructions (complete HT system) - Page 18
6 Connect the speaker cord to the speaker, then adjust the length of the speaker cord. Adjust the length of the speaker cord. 7 Attach the terminal cover to the speaker by screws. Terminal cover Screws (2) 18US - Sony DAV-FX80 | DAVFX80 Instructions (complete HT system) - Page 19
DIGITAL IN VIDEO 2 HDMI OUT VIDEO 1 R (DVD ONLY) L AUDIO IN VIDEO 2 COMPONENT VIDEO OUT VIDEO IN (DVD ONLY) VIDEO MONITOR OUT AM COAXIAL FM 75 Surround speaker (R) Subwoofer Note • Do not set the speakers in an inclined position. Surround speaker (L) continued 19US - Sony DAV-FX80 | DAVFX80 Instructions (complete HT system) - Page 20
end of the insulation. This prevents the speaker insulation from being inserted in the speaker terminal. Note • Do not catch the speaker cord insulation in the SPEAKER jack. Avoiding short-circuiting the speakers Short-circuiting of the speakers may damage the system. To prevent this, be sure to - Sony DAV-FX80 | DAVFX80 Instructions (complete HT system) - Page 21
to the wall. The screws should protrude 7 to 8 mm (9/32 to 11/32 inch) for the front speakers, 8 to 9 mm (11/32 to 3/8 inch) for the surround speakers. For the front speakers For the surround speakers 165 mm (6 1/2 inch) 7 to 8 mm (9/32 to 11/32 inch) 8 to 9 mm (11/32 to 3/8 inch) 3 Peel - Sony DAV-FX80 | DAVFX80 Instructions (complete HT system) - Page 22
wall-mount pads on the rear side of the speaker. Front speaker Surround speaker Wall-mount pads (7 × 7 mm, 3 mm thick) (9/32 × 9/32 inch, 1/8 inch thick) Wall-mount pads (7 × 7 mm, 3 mm thick) (9/32 × 9/32 inch, 1/8 inch thick) 5 Hang the speakers on the screws. 4.6 mm (3/16 inch) 10 mm (13 - Sony DAV-FX80 | DAVFX80 Instructions (complete HT system) - Page 23
the screws securely to a beam and fasten them to the wall. Install the speakers on a vertical and flat wall where reinforcement is applied. • Contact a screw installer regarding the wall material or screws to be used. • Sony is not responsible for accident or damage caused by improper installation, - Sony DAV-FX80 | DAVFX80 Instructions (complete HT system) - Page 24
the radio. AM loop antenna (aerial) FM wire antenna (aerial) Note • To prevent noise pickup, keep the AM loop antenna (aerial) away from the system and other components. • Be sure to fully extend the FM wire antenna (aerial). • After connecting the FM wire antenna (aerial), keep it as horizontal as - Sony DAV-FX80 | DAVFX80 Instructions (complete HT system) - Page 25
Step 3: TV Hookup First, perform the video connection, and then audio connection. With your TV's audio output connected to this system, you can listen to TV sound through the system speakers. Connecting the video/HDMI* cords Sends a played back DVD image to a TV. Check the jacks of your TV, and - Sony DAV-FX80 | DAVFX80 Instructions (complete HT system) - Page 26
this connection and set the output channel of the system to progressive format (page 27). Green Blue Red sound through the HDMI OUT (high-definition multimedia interface out) jack. Note that Super Audio CD sound not HDCP (high-bandwidth digital content protection) compliant (e.g., DVI (digital visual - Sony DAV-FX80 | DAVFX80 Instructions (complete HT system) - Page 27
TV that accepts progressive signals. FUNCTION PROGRESSIVE With cover opened. "P AUTO" or "P VIDEO" appears in the front panel display when the system outputs progressive signals. 1 Press FUNCTION repeatedly to select "DVD." 2 Press PROGRESSIVE. Each time you press PROGRESSIVE, the display changes as - Sony DAV-FX80 | DAVFX80 Instructions (complete HT system) - Page 28
the audio cords Outputs TV sound through the speakers of this system. TV AUDIO OUT L R FRONT R FRONT L SURR R SURR L CENTER WOOFER SPEAKER To VIDEO 2 (AUDIO IN jacks of a TV to the VIDEO 2 (AUDIO IN) jacks of this system Connect a TV to the VIDEO 2 (AUDIO IN) jacks using an audio cord (not - Sony DAV-FX80 | DAVFX80 Instructions (complete HT system) - Page 29
make connections securely to avoid hum and noise. • If your TV does not have AUDIO OUT jacks, you cannot output the TV sound from the speakers of this system. Tip • To listen to the TV sound, select the function by pressing FUNCTION. For details, see page 62. • When you want to output the TV - Sony DAV-FX80 | DAVFX80 Instructions (complete HT system) - Page 30
another component. Connecting the system and the other component Outputs the other component through the speakers of this system. VCR COAXIAL DIGITAL OUT not supplied). When connecting a cord, be sure to match the color-coded sleeves to the appropriate jacks on the components. Yellow (Video) White - Sony DAV-FX80 | DAVFX80 Instructions (complete HT system) - Page 31
connect a digital satellite receiver without an DIGITAL OUT jack Connect the digital satellite receiver to the VIDEO 1 or VIDEO 2 AUDIO IN jacks only of the system. Note • Be sure to make connections securely to avoid hum and noise. Tip • When you connect another component to the - Sony DAV-FX80 | DAVFX80 Instructions (complete HT system) - Page 32
cord (mains lead) of this system to a wall outlet (mains), connect the speakers to the system (page 15). "/1 "/1 Step 6: Turning off the Demonstration "/1 X/x/c ENTER To turn on the system Press "/1. To turn off the system Press "/1. The system enters standby mode. While playing a disc, do not - Sony DAV-FX80 | DAVFX80 Instructions (complete HT system) - Page 33
Switch the input selector on your TV so that the signal from the system appears on the TV screen. [Press [ENTER] to run QUICK SETUP.] wide-screen mode [16:9] (page 79) 8 Press ENTER. The Setup Display for selecting the speaker distance appears. 9 Press X/x to select the front speaker distance from - Sony DAV-FX80 | DAVFX80 Instructions (complete HT system) - Page 34
SPEAKER SETUP SIZE: DISTANCE: LEVEL(FRONT): LEVEL(SURROUND): TEST TONE: OFF FRONT: CENTER: SURROUND: 3.0m 3.0m 3.0m Note • If you want to change each setting, see "Using the Setup Display" (page 77). To recall the Quick Setup display 1 Press DISPLAY when the system is in stop mode. The Control - Sony DAV-FX80 | DAVFX80 Instructions (complete HT system) - Page 35
Setup Positioning the speakers For the best possible surround sound, all the speakers other than the subwoofer should be the same distance from the listening position (A). However, this system allows you to place the center speaker up to 1.6 meters (5 ft) closer (B) and the surround speakers up to - Sony DAV-FX80 | DAVFX80 Instructions (complete HT system) - Page 36
back other discs, press DISC SKIP on the remote or DISC 1-5 of the system. Adjust the volume on the system. Tip • The DISC 1-5 indicators change color the instructions on the menu. (DVD: page 41), (VIDEO CD: page 43). To save the power in standby mode Press "/1 while the system turns on. - Sony DAV-FX80 | DAVFX80 Instructions (complete HT system) - Page 37
sound MUTING. To cancel muting, press it again or VOLUME + to adjust the sound volume. Change a disc while playing DISC SKIP another disc Play the desired disc directly DISC 1-5 on the system disc, Resume Play will work even if the system enters standby mode by pressing "/1. 1 While playing a disc - Sony DAV-FX80 | DAVFX80 Instructions (complete HT system) - Page 38
mains lead). • For DVD-RWs in VR mode, CDs, Super Audio CDs, and DATA CDs, the system remembers the resume playback point for the current You can program the track on the current disc only. 1 Press DISPLAY. The Control Menu appears. 2 Press X/x to select [PROGRAM], then press ENTER. The options for - Sony DAV-FX80 | DAVFX80 Instructions (complete HT system) - Page 39
and press ENTER. To turn off the Control Menu Press DISPLAY repeatedly until the Control Menu is turned off. To change or Program Repeat when you set to program play mode. You can only program the contents of CD, CD only) You can have the system "shuffle" tracks. Subsequent "shuffling" may produce - Sony DAV-FX80 | DAVFX80 Instructions (complete HT system) - Page 40
turn off the Control Menu Press DISPLAY repeatedly until the Control Menu is turned off. Tip • You can set Shuffle Play while the system is stopped. repeats all of the titles on the current disc. (When playing a DVDRW in VR mode, [ONE DISC] repeats all of the titles of the selected type.) • [TITLE - Sony DAV-FX80 | DAVFX80 Instructions (complete HT system) - Page 41
Discs Tip • You can set Repeat Play while the system is stopped. After selecting the [REPEAT] option, press track and JPEG image files, and their playing time are not the same, the audio sound will not match the image. • When [MODE (MP3, JPEG)] is set to [IMAGE (JPEG)] (page 48), you cannot select - Sony DAV-FX80 | DAVFX80 Instructions (complete HT system) - Page 42
a Playback Area for a Super Audio CD X/x ENTER DISPLAY SA-CD/CD MULTI/2CH With cover opened. 1 Press DISPLAY when the system is in stop mode. The Control Menu appears. 2 Press X/x to select [ORIGINAL/ PLAY LIST], then press ENTER. The options for [ORIGINAL/PLAY LIST] appear. 1 (44) 3 ( 28 - Sony DAV-FX80 | DAVFX80 Instructions (complete HT system) - Page 43
to listen to. Press SA-CD/CD when the system is in stop mode. Each time you press the button, an HD layer .2.0) (PBC Playback) With PBC (Playback Control) functions, you can enjoy simple interactive buttons. 3 Press ENTER. 4 Follow the instructions in the menu for interactive operations. Refer to - Sony DAV-FX80 | DAVFX80 Instructions (complete HT system) - Page 44
the discs must be recorded according to ISO 9660 Level 1, Level 2 or Joliet format for the system to recognize the tracks (or files). You can also play discs recorded in Multi Session. See the instructions supplied with the CD-R/ CD-RW drives and the recording software (not supplied) for details on - Sony DAV-FX80 | DAVFX80 Instructions (complete HT system) - Page 45
," ".JPG," or ".JPEG" even if they are not in MP3 or JPEG format. Playing this data may generate a loud noise which could damage your speaker system. • The system does not conform to audio in MP3PRO format. Playback order of MP3 audio tracks or JPEG image files The playback order of MP3 audio tracks - Sony DAV-FX80 | DAVFX80 Instructions (complete HT system) - Page 46
BOSSA NOVA 3 Press X/x to select the album you want and press H. The system starts playing the selected album. To stop playback Press x. To play the next or list. To play the next or previous JPEG image file Press C/c when the Control Menu is not displayed. Note that you can select the next album by - Sony DAV-FX80 | DAVFX80 Instructions (complete HT system) - Page 47
the display Press MENU. Selecting a JPEG image file 1 Load a DATA CD. The system starts playing from the first album. 2 Press MENU. The albums recorded on the . To play the next or previous JPEG image file Press C/c when the Control Menu is not displayed. Note that you can select the next album by - Sony DAV-FX80 | DAVFX80 Instructions (complete HT system) - Page 48
playing JPEG image file. You can play a slide show with sound by first placing both MP3 and JPEG files in the same album Press x. The system stops playback. 3 Press DISPLAY. The Control Menu appears. 4 Press X/x to select [MODE (MP3, JPEG)], then press ENTER. The options for [MODE (MP3, JPEG - Sony DAV-FX80 | DAVFX80 Instructions (complete HT system) - Page 49
system can recognize up to 600 MP3 and 600 JPEG files in a single album. A maximum of 200 albums can be recognized regardless of the selected mode the same time, the sound may skip. It is recommended that appear on the screen. 1 Press DISPLAY twice. The Control Menu for JPEG appears. 2 Press X/x to select [ - Sony DAV-FX80 | DAVFX80 Instructions (complete HT system) - Page 50
the effect to be used when viewing the slide show. 1 Press DISPLAY twice. The Control Menu for JPEG appears. 2 Press X/x to select [EFFECT], then press ENTER. The does not adjust. • SYNC ON: adjusts the difference between picture and sound. 4 Press ENTER or AMP MENU. The AMP menu turns off. Note - Sony DAV-FX80 | DAVFX80 Instructions (complete HT system) - Page 51
speed is faster than "1M"/"1m." Watching frame by frame (Slow-motion Play) (DVD, DVD-RW, VIDEO CD only) Press m or M when the system is in pause mode. To return to the normal playback speed, press H. Each time you press m or M during Slow-motion Play, the playback speed changes. Two speeds are - Sony DAV-FX80 | DAVFX80 Instructions (complete HT system) - Page 52
on a DVD-RW in VR mode. Searching for a Title/ Chapter Or, you can search for a scene using the time code. 52US X/x ENTER Number buttons CLEAR DISPLAY With cover opened. a DATA CD with JPEG image files, press DISPLAY twice.) The Control Menu appears. 2 Press X/x to select the search method. x - Sony DAV-FX80 | DAVFX80 Instructions (complete HT system) - Page 53
number. 5 Press ENTER. The system starts playback from the selected number. To search for a scene using the time code (DVD VIDEO only) 1 In Step and 20 seconds after the beginning, just enter [2:10:20]. Tip • When the Control Menu display is turned off, you can search for a chapter (DVD VIDEO/DVD - Sony DAV-FX80 | DAVFX80 Instructions (complete HT system) - Page 54
Searching by Scene (Picture Navigation) You can divide the screen into 9 subscreens and find the desired scene quickly. C/X/x/c ENTER DISPLAY PICTURE NAVI With cover opened. 1 Press PICTURE NAVI during playback. The following display appears. CHAPTER VIEWER ENTER 1 2 3 4 5 6 7 8 9 4 - Sony DAV-FX80 | DAVFX80 Instructions (complete HT system) - Page 55
Viewing Information About the Disc DISPLAY DISPLAY With cover opened. Viewing the Playing Time and Remaining Time in the Front Panel Display You can check disc information, such as the remaining time, total number of titles in a DVD, tracks in a VIDEO CD, Super Audio CD, CD, or MP3, using the front - Sony DAV-FX80 | DAVFX80 Instructions (complete HT system) - Page 56
the time information and text using the Control Menu. Note • If the disc does not contain text If you play a disc containing JPEG image files only and you set [MODE (MP3, JPEG)] to [AUTO] or [AUDIO (MP3)] (page Name or Frequency in the front panel display When the system is set to "TUNER AM" or "TUNER FM - Sony DAV-FX80 | DAVFX80 Instructions (complete HT system) - Page 57
can be displayed. • Depending on the type of disc being played, the system can only display a limited number of characters. Also, depending on the disc Exif* tag is recorded in the JPEG image data. Press DISPLAY twice during playback. The Control Menu appears. 1 ( 8 ) 1 ( 2 0 ) 01/ 01/ 2003 Date - Sony DAV-FX80 | DAVFX80 Instructions (complete HT system) - Page 58
can select the sound from the right or left channel and listen to the sound of the selected channel through both the right and left speakers. For example, displayed, they indicate a language code. Refer to "Language Code List" (page 94) to see which language the code represents. When the same - Sony DAV-FX80 | DAVFX80 Instructions (complete HT system) - Page 59
below. Each channel is output from a separate speaker. • Front (L) • Front (R) • Center • Surround (L) • Surround (R) • Surround (Monaural): This signal can be either the Dolby Surround Sound processed signals or the Dolby Digital sound's monaural Surround audio signals. • LFE (Low Frequency Effect - Sony DAV-FX80 | DAVFX80 Instructions (complete HT system) - Page 60
subwoofer. Using only the front speaker and subwoofer x 2 CHANNEL STEREO This mode outputs the sound from the front left and right speakers and subwoofer. Standard 2 channel (stereo) sources completely bypass the sound field processing. Multi channel surround formats are downmixed to two channels - Sony DAV-FX80 | DAVFX80 Instructions (complete HT system) - Page 61
format, such as the Dolby Digital DVD. This mode reproduces the sound characteristics of Sony Pictures Entertainment's studios. Cinema Studio EX consists of the following 3 elements. • Virtual Multi Dimension Creates 5 sets of virtual speakers surrounding the listener from a single pair of actual - Sony DAV-FX80 | DAVFX80 Instructions (complete HT system) - Page 62
surround effect off Press SOUND FIELD repeatedly until "A.F.D. AUTO" or "2CH STEREO" appears in the front panel display. Tip • The system memorizes the last sound field selected for each function mode or VCR Sound from All Speakers You can enjoy TV or VCR sound from all speakers of this system. For - Sony DAV-FX80 | DAVFX80 Instructions (complete HT system) - Page 63
until "AUDIO DRC" appears in the front panel display, then press ENTER or c. 3 Press x/X to select the setting. • DRC STD: reproduces the sound track with the kind of dynamic range that the recording engineer intended. • DRC MAX: compresses dynamic range fully. • DRC OFF: no compression of dynamic - Sony DAV-FX80 | DAVFX80 Instructions (complete HT system) - Page 64
Using Various Additional Functions Changing the Angles If various angles (multi-angles) for a scene are recorded on a DVD VIDEO, you can change the viewing angle. For example, while playing a scene of a train in motion, you can display the view from either the front of the train, the left window of - Sony DAV-FX80 | DAVFX80 Instructions (complete HT system) - Page 65
users. Scenes may be blocked or replaced with different scenes. The same password is used for both Custom Parental Control and Parental Control. 3 Press X/x to select [PARENTAL CONTROL 2 Press DISPLAY while the system is in stop mode. The Control Menu appears. PARENTAL CONTROL Enter a new 4-digit - Sony DAV-FX80 | DAVFX80 Instructions (complete HT system) - Page 66
be limited according to a predetermined level such as the age of the users. The [PARENTAL CONTROL] function allows you to set a playback limitation level. 1 Press DISPLAY while the system is in stop mode. The Control Menu appears. 66US Enter a 4-digit password using the number buttons, then press - Sony DAV-FX80 | DAVFX80 Instructions (complete HT system) - Page 67
you select [OTHERS t], select and enter a standard code in the table on page 68 using the number buttons system. • Depending on the disc, you may be asked to change the parental control level while playing the disc. In this case, enter your password, then change the level. If the Resume Play mode - Sony DAV-FX80 | DAVFX80 Instructions (complete HT system) - Page 68
2238 Italy 2254 Japan 2276 Korea 2304 Standard Code number Malaysia 2363 Mexico 2362 Netherlands 2376 New Zealand DISPLAY while the system is in stop mode. The Control Menu appears. 2 Press X/x to select [PARENTAL CONTROL], then press ENTER. The options for [PARENTAL CONTROL] appear. 3 - Sony DAV-FX80 | DAVFX80 Instructions (complete HT system) - Page 69
. Note • If you enter a new code number, the code number previously entered will be erased. • When you replace the batteries of the remote, the code number may reset itself to the default (SONY) setting. Reset the appropriate code number. Controlling TVs with the remote Press and hold TV [/1 while - Sony DAV-FX80 | DAVFX80 Instructions (complete HT system) - Page 70
may not be able to control your TV or to use some of the buttons above. • The TV mode turns off when you do not operate the remote for 10 seconds. Using the THEATRE SYNC Function THEATRE SYNC allows you to turn on your SONY TV and this system, changes the system mode to "DVD," and then - Sony DAV-FX80 | DAVFX80 Instructions (complete HT system) - Page 71
COMPONENT 3 INPUT COMPONENT 4 INPUT * Except for North American models. Operating for the THEATRE SYNC function Point the remote to the direction of TV and this system, then press THEATRE SYNC once. While transmitting the code from the remote, the TV button flashes. If this function does not work - Sony DAV-FX80 | DAVFX80 Instructions (complete HT system) - Page 72
coaxial cable (page 30) and set the digital output mode of the digital satellite tuner to AC-3. • When you connect the system and TV with the HDMI cord, this function does not apply to the sound that is output from the TV. The main sound is output from the TV. X/x/c ENTER AMP MENU With - Sony DAV-FX80 | DAVFX80 Instructions (complete HT system) - Page 73
is output from the left speaker and Sub sound is output from the right speaker. 4 Press ENTER or AMP MENU. The AMP menu 2 Press and hold TUNING + or - until the auto scanning starts. Scanning stops when the system tunes in a station. "TUNED" and "ST" (for stereo program) appear in the front panel - Sony DAV-FX80 | DAVFX80 Instructions (complete HT system) - Page 74
model) system by pressing "/1 on the system. While holding down > (on the system), press "/1 on the system manual tuning, press TUNING + or - repeatedly. For automatic tuning, press and hold TUNING + or -. Press x when you stop the automatic tuning. Tip • If an FM program is noisy, press FM MODE - Sony DAV-FX80 | DAVFX80 Instructions (complete HT system) - Page 75
until the character to be erased flashes, then press CLEAR. 7 Press ENTER. The station name is stored. Using the Sleep Timer You can set the system to turn off at a preset time, so you can fall asleep listening to music. You can preset the time in 10 minutes decrements. SLEEP Press - Sony DAV-FX80 | DAVFX80 Instructions (complete HT system) - Page 76
3 Press X/x to select the brightness of the front panel display. 4 Press ENTER or AMP MENU. The AMP menu turns off. 1 Press "/1 to turn on the system. 2 Press x, A, and "/1 on the system at the same time. "COLD RESET" appears in the front panel display and the default settings are returned. 76US - Sony DAV-FX80 | DAVFX80 Instructions (complete HT system) - Page 77
adjustments to items such as picture and sound. You can also set a language for work. X/x ENTER DISPLAY 1 Press DISPLAY when the system is in stop mode. The Control Menu appears. 2 Press X/x to select then press [SCREEN SETUP], [CUSTOM SETUP], or [SPEAKER SETUP]. Then press ENTER. The Setup item - Sony DAV-FX80 | DAVFX80 Instructions (complete HT system) - Page 78
using X/x. You can also quit the process and return to the Control Menu by selecting [NO] here. 3 Press ENTER. All the system, the guide message appears on the TV screen. To perform the Quick Setup (page 33), press ENTER, to return to normal screen, press CLEAR. Setting the Display or Sound - Sony DAV-FX80 | DAVFX80 Instructions (complete HT system) - Page 79
country model. [4:3 a wide mode function. system outputs video signals of the highest resolution acceptable for your TV. If the picture is not clear, natural or to your satisfaction, try another option that suits the disc and your TV/projector, etc. For details, refer also to the instruction manual - Sony DAV-FX80 | DAVFX80 Instructions (complete HT system) - Page 80
. x [BACKGROUND] Selects the background color or picture on the TV screen in stop mode or while playing a Super Audio CD, CD, or DATA CD (MP3 audio). [JACKET format compatible TV, change the setting on your TV, not the system. Note that this setting is effective only for HDMI connection or - Sony DAV-FX80 | DAVFX80 Instructions (complete HT system) - Page 81
the connected TV. Converts Dolby Digital, DTS (digital theater system), or 96 kHz/24 bit PCM (pulse code modulation) signals to 48 kHz/ 16 bit PCM (pulse code modulation). Note • A loud noise (or no sound) will be output if you connect the system to a TV that is not compatible with DOLBY DIGITAL - Sony DAV-FX80 | DAVFX80 Instructions (complete HT system) - Page 82
SETUP] To obtain the best possible surround sound, set for the size of the speakers you have connected and their distance from your listening position. Then use the test tone to adjust the level and the balance of the speakers to the same level. Select [SPEAKER SETUP] in the Setup Display. For - Sony DAV-FX80 | DAVFX80 Instructions (complete HT system) - Page 83
you set the distance, the sound cuts off for a moment. • If all front and surround speakers are not placed at an speakers at one time Press VOLUME +/- on the system, or press VOLUME +/- on the remote. x [TEST TONE] The speakers will emit a test tone to adjust [LEVEL (FRONT)] and [LEVEL (SURROUND - Sony DAV-FX80 | DAVFX80 Instructions (complete HT system) - Page 84
of [LEVEL (FRONT)] or [LEVEL (SURROUND)] using C/X/x/c. The test tone is emitted from only the speaker which you are adjusting. 8 Press ENTER select [OFF], then press ENTER. Note • When you adjust the speaker settings, the sound cuts off for a moment. • The test tone signals are not output - Sony DAV-FX80 | DAVFX80 Instructions (complete HT system) - Page 85
problems concerning your system, please consult your nearest Sony dealer. On cleaning discs • Do not use a commercially available CD/DVD cleaning disc. It may cause a malfunction. On your TV's color • If the speakers the system When you carry the system, use the following procedure to protect the - Sony DAV-FX80 | DAVFX80 Instructions (complete HT system) - Page 86
using the system, use this troubleshooting guide to help remedy the problem before requesting repairs. Should any problem persist, consult your nearest Sony dealer. Power The power is not turned on. • Check that the AC power cord (mains lead) is connected securely. If "PROTECT" and "UNPLUG" appears - Sony DAV-FX80 | DAVFX80 Instructions (complete HT system) - Page 87
problem (page 79). Connect the TV and the system Sound There is no sound. • The speaker cord is not connected securely. • Press MUTING on the remote if "MUTING ON" is displayed in the front panel display. • The system is in pause mode or in Slow-motion Play mode. Press H to return to normal play mode - Sony DAV-FX80 | DAVFX80 Instructions (complete HT system) - Page 88
pointed at the remote sensor on the system. • The batteries in the remote are weak. The disc does not play. • There is no disc inserted. • The disc is upside down. Insert the disc with the playback side facing down. • The system cannot play CD-ROMs, etc. (page 7). • The region code on the DVD does - Sony DAV-FX80 | DAVFX80 Instructions (complete HT system) - Page 89
(page 78). The language for the sound track cannot be changed. • Multilingual tracks system, then re-insert the disc correctly. E XX To prevent a malfunction, the (xx is a number) system has performed the selfdiagnosis function. ,Contact your nearest Sony dealer or local authorized Sony service - Sony DAV-FX80 | DAVFX80 Instructions (complete HT system) - Page 90
Surround mode (reference) music power output Front: 143 W + 143 W (with SS-TS46) Center*: 143 W (with SS-CT46) Surround*: 143 W + 143 W (with SS-TS43B) Subwoofer*: 285 W (with SS-WS42) * Depending on the sound : 1 Vpp 75 ohms Speakers Front Speaker system Speaker unit Rated impedance Dimensions ( - Sony DAV-FX80 | DAVFX80 Instructions (complete HT system) - Page 91
mode The Music mode is for use with any stereo music recordings, and provides a wide and deep sound space. Dolby Surround Pro Logic As one method of decoding Dolby Surround, Dolby Surround Pro Logic produces four channels from 2 channel sound. Compared with the former Dolby Surround system, Dolby - Sony DAV-FX80 | DAVFX80 Instructions (complete HT system) - Page 92
Logic, you should have one pair of surround speakers and a center speaker. The surround speakers output monaural sound. DTS Digital audio compression technology developed by Digital Theater Systems, Inc. This technology conforms to 5.1-channel surround. This format comprises of stereo rear channel - Sony DAV-FX80 | DAVFX80 Instructions (complete HT system) - Page 93
with the 525 progressive format. Region Code This system is used to protect copyrights. A region number is allocated on each DVD system or DVD disc according to the sales region. Each region code is shown on the system as well as on the disc packaging. The system can play discs that match its - Sony DAV-FX80 | DAVFX80 Instructions (complete HT system) - Page 94
Gaelic Galician Guarani Gujarati Hausa Hindi Croatian Hungarian Armenian Interlingua Interlingue Code 1245 1248 1253 1254 1257 1261 1269 1283 1287 1297 1298 1408 1417 1428 1435 1436 1463 1481 1482 1483 Language Code Inupiak Indonesian Icelandic Italian Hebrew Japanese Yiddish Javanese Georgian - Sony DAV-FX80 | DAVFX80 Instructions (complete HT system) - Page 95
Index to Parts and Controls For more information, refer to the pages indicated in parentheses. Front panel A Disc slot (36) B (remote sensor) (13) C Front panel display (96) D PHONES jack (36) E VOLUME +/- (36) F FUNCTION (36) G ./> (37) H x (stop) (37, 76) I X (pause) (37) J H (play) (36) K A ( - Sony DAV-FX80 | DAVFX80 Instructions (complete HT system) - Page 96
) B Current mode (DVD function sound effect (Except for Super Audio CD) (63) F Current surround format (Except for JPEG and Super Audio CD) (59) G Playing status (DVD function only) H Lights up when the HDMI OUT jack is correctly connected to a HDCP (highbandwidth digital content protection - Sony DAV-FX80 | DAVFX80 Instructions (complete HT system) - Page 97
IN VIDEO 2 HDMI OUT VIDEO 1 R (DVD ONLY) L AUDIO IN VIDEO 2 COMPONENT VIDEO OUT VIDEO IN (DVD ONLY) VIDEO MONITOR OUT AM COAXIAL FM 75 A SPEAKER jacks (15) B VIDEO 2 OPTICAL DIGITAL IN jack (30) C VIDEO 1 COAXIAL IN jack (30) D VIDEO 1 VIDEO/AUDIO IN jacks (28, 30) E COMPONENT VIDEO OUT - Sony DAV-FX80 | DAVFX80 Instructions (complete HT system) - Page 98
Remote Open the cover. A TV (69) B DISC SKIP (36) C SOUND FIELD (60) 98US D ./> PRESET -/+, TV CH -/+ (33, 37, 74) E H (play) (36) The H button has a tactile DISPLAY (74) ea DSGX (63) es PICTURE NAVI (47) ed REPEAT (40) ef FM MODE (74) eg TV CH -/+ (69) The TV CH + button has a tactile dot.* - Sony DAV-FX80 | DAVFX80 Instructions (complete HT system) - Page 99
Additional Information eh TV VOL +/- (69) ej MULTI/2CH (42) ek SA-CD/CD (42) el AMP MENU (32, 50, 63, 72) * Use the tactile dot as a reference when operating the system. 99US - Sony DAV-FX80 | DAVFX80 Instructions (complete HT system) - Page 100
want to use from the displayed language list.) (Select the language you want to use from the displayed language list.) CUSTOM SETUP PAUSE AUTO MODE FRAME TRACK SELECTION MULTI-DISC RESUME AUDIO (HDMI) OFF AUTO ON OFF OFF AUTO PCM SCREEN SAVER BACKGROUND BLACK LEVEL BLACK LEVEL (COMPONENT OUT - Sony DAV-FX80 | DAVFX80 Instructions (complete HT system) - Page 101
SPEAKER SETUP SIZE DISTANCE FRONT YES CENTER SURROUND YES NONE BEHIND SIDE NONE SUBWOOFER YES FRONT 1.0 m - 7.0 m/ 4 ft - 23 ft CENTER 0.0 m - 7.0 m/ 0 ft - 23 ft SURROUND 0.0 m - 7.0 m/ 0 ft - 23 ft LEVEL (FRONT) LEVEL (SURROUND) TEST TONE L R CENTER SUBWOOFER L R OFF ON -6 dB - 0 dB - Sony DAV-FX80 | DAVFX80 Instructions (complete HT system) - Page 102
AMP Menu List You can set the following items with AMP MENU on the remote. AMP menu AUDIO DRC DUAL MONO A/V SYNC DIMMER DEMO DRC STD DRC MAX DRC OFF MAIN SUB MAIN+SUB MAIN/SUB SYNC OFF SYNC ON DIMMER ON DIMMER OFF DEMO ON DEMO OFF 102US - Sony DAV-FX80 | DAVFX80 Instructions (complete HT system) - Page 103
37 Interlace format 92 INTERVAL 49 J JPEG 44, 46 L Language Code List 94 LANGUAGE SETUP 78 LEVEL (FRONT) 83 LEVEL (SURROUND) 83 Listening to other components 72 Listening to TV sound 62 Locating a specific point by watching the TV screen 51 M MENU 78 MODE (MP3, JPEG) 48 MP3 44, 46 Multi Session CD - Sony DAV-FX80 | DAVFX80 Instructions (complete HT system) - Page 104
75 Slide show 48 Slow-motion play 51 Sound Field 60 SPEAKER SETUP 82 Speaker setup 35 Speaker System Hookup 15 SUBTITLE 64, 78 Super Audio CD 7, 42 T TEST TONE 83 THEATRE SYNC 70 TIME/TEXT 53 TITLE 52 Title 93 TRACK 52 Track 93 TRACK SELECTION 81 Troubleshooting 86 TUNER MENU 73 TV Hookup 25
-
 1
1 -
 2
2 -
 3
3 -
 4
4 -
 5
5 -
 6
6 -
 7
7 -
8
-
9
-
10
-
11
-
12
-
13
-
14
-
15
-
16
-
17
-
18
-
19
-
20
-
21
-
22
-
23
-
24
-
25
-
26
-
27
-
28
-
29
-
30
-
31
-
32
-
33
-
34
-
35
-
36
-
37
-
38
-
39
-
40
-
41
-
42
-
43
-
44
-
45
-
46
-
47
-
48
-
49
-
50
-
51
-
52
-
53
-
54
-
55
-
56
-
57
-
58
-
59
-
60
-
61
-
62
-
63
-
64
-
65
-
66
-
67
-
68
-
69
-
70
-
71
-
72
-
73
-
74
-
75
-
76
-
77
-
78
-
79
-
80
-
81
-
82
-
83
-
84
-
85
-
86
-
87
-
88
-
89
-
90
-
91
-
92
-
93
-
94
-
95
-
96
-
97
-
98
-
99
-
100
-
101
-
102
-
103
-
104
 |
 |
©2005 Sony Corporation
2-590-761-
11
(1)
DVD Home Theatre
System
Operating Instructions
DAV-FX80