Sony DAVHDX576WF Operating Instructions
Sony DAVHDX576WF - DAV Home Theater System Manual
 |
UPC - 027242728943
View all Sony DAVHDX576WF manuals
Add to My Manuals
Save this manual to your list of manuals |
Sony DAVHDX576WF manual content summary:
- Sony DAVHDX576WF | Operating Instructions - Page 1
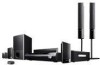
3-283-032-11(1) DVD Home Theatre System Operating Instructions DAV-HDX277WC / HDX279W / HDX576WF ©2008 Sony Corporation - Sony DAVHDX576WF | Operating Instructions - Page 2
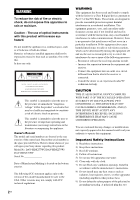
serial numbers are located at the rear exterior of the control unit. Record the serial number in the space provided below. Refer to them whenever you call upon your Sony dealer regarding this product. Model No. DAV-HDX277WC/DAV-HDX279W/ DAV-HDX576WF Serial No Date of Manufacture Marking is located - Sony DAVHDX576WF | Operating Instructions - Page 3
into your outlet, consult an electrician for replacement of the obsolete outlet. 10) Protect the power cord from being walked on or pinched . • Install this system so that the AC power cord (mains lead) can be unplugged from the wall socket immediately in the event of trouble. 13) Unplug this - Sony DAVHDX576WF | Operating Instructions - Page 4
as those on the remote. • The instructions in this manual are for DAVHDX277WC, DAV-HDX279W, and DAVHDX576WF. DAV-HDX277WC is the model used for illustration purposes. Any difference in operation is clearly indicated in the text, for example, "DAV-HDX277WC only." • The Control Menu items may vary - Sony DAVHDX576WF | Operating Instructions - Page 5
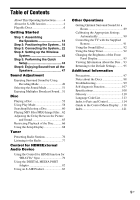
to the Default Settings ......... 95 Additional Information Precautions 97 Notes about the Discs 98 Troubleshooting 99 Self-diagnosis Function 107 Specifications 108 Glossary 110 Language Code List 113 Index to Parts and Control 114 Guide to the Control Menu Display ... 118 Index 121 5US - Sony DAVHDX576WF | Operating Instructions - Page 6
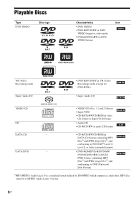
format) • DVD-ROM/DVD-R/DVD-RW/ DVD+R/DVD+RW in DATA DVD format, containing MP3 files1) and JPEG image files2), and conforming to UDF (Universal Disk Format) 1)MP3 (MPEG1 Audio Layer 3) is a standard format defined by ISO/MPEG which compresses audio data. MP3 files must be in MPEG1 Audio Layer - Sony DAVHDX576WF | Operating Instructions - Page 7
part of CD-Extra • CD Graphics disc • DVD Audio • DATA DVD that does not contain MP3 files or JPEG image files • DVD-RAM Also, the system cannot play the following discs: • A DVD VIDEO with a different region code information, refer to the operating instructions for the recording device. Note - Sony DAVHDX576WF | Operating Instructions - Page 8
by Macrovision, and is intended for home and other limited viewing uses only unless otherwise authorized by Macrovision. Reverse engineering or disassembly is prohibited. This system incorporates with Dolby* Digital and Dolby Pro Logic (II) adaptive matrix surround decoder and the DTS** Digital - Sony DAVHDX576WF | Operating Instructions - Page 9
DAV-HDX277WC • Front speakers (2) • Center speaker (1) • Surround speakers (2) • Subwoofer (1) • FM wire antenna (aerial) (1) • Foot pads (1 set) or • Speaker cords (6, red/white/ green/gray/blue/purple) • Wireless transceiver for the unit (1) • Video cord (1) • Remote commander (remote - Sony DAVHDX576WF | Operating Instructions - Page 10
DAV-HDX279W • Front speakers (2) • Center speaker (1) • Surround speakers (2) • Subwoofer (1) • FM wire antenna (aerial) (1) • Foot pads (1 set) or • Surround amplifier (1) • Speaker cords (6, red/white/ green/gray/blue/purple) • Video cord (1) • Speaker cord cover (1) • Remote commander (remote - Sony DAVHDX576WF | Operating Instructions - Page 11
DAV-HDX576WF • Front speakers (2) • Remote commander (remote) (1) • Surround amplifier (1) • Center speaker (1) • R6 (size AA) batteries (2) • Calibration mic (1) • Speaker cord cover (1) • Surround speakers (2) • Subwoofer (1) • Operating Instructions of the S-AIR receiver (AIR-SA10) 11US - Sony DAVHDX576WF | Operating Instructions - Page 12
Do not drop any foreign object into the remote casing, particularly when replacing the batteries. • Do not expose the remote sensor to direct sunlight or lighting apparatus. pads to the subwoofer Attach the foot pads (supplied) to the bottom of the subwoofer to stabilize the subwoofer and prevent it - Sony DAVHDX576WF | Operating Instructions - Page 13
DAV-HDX576WF only) Before connecting the speakers, attach the speaker stand to the speaker. (For the front speakers) Use the parts hole in the base and post. The connector and color tube of the speaker cords post. Thread the speaker cord (and the speaker system cord) into the end of the post that has - Sony DAVHDX576WF | Operating Instructions - Page 14
the post cover, then secure with the screw. Thread the speaker cord through the hole of the post cover. Speaker cord , Hole Post cover , Upper part of the post Screw (small) 3 Lay the post in the slot of the speaker, slide the post to the end of the slot, then secure - Sony DAVHDX576WF | Operating Instructions - Page 15
speaker (L): White Front speaker (R): Red Rear of the speaker 5 Attach the post to the base. Insert the post so that the slit on the lower part of the post aligns with the projection of the base, then secure the post with the two screws. Post Slit Projection Base , Screws (small) Note - Sony DAVHDX576WF | Operating Instructions - Page 16
screws, adjust the height of the speaker, then secure the screws. Adjust the speaker of one side, then adjust another speaker by checking lines as a guide. Note • When adjusting the height of the speaker, grasp the speaker so that the speaker does not fall. Lines Post Loosen two screws. , Secure - Sony DAVHDX576WF | Operating Instructions - Page 17
Getting Started Fully-assembled illustration Front speaker (L): White label Front speaker (R): Red label White Red 17US - Sony DAVHDX576WF | Operating Instructions - Page 18
7.0 meters (3 to 23 ft) (A) from the listening position. Place the system as illustrated below. DAV-HDX277WC B A A Front speaker (L (left)) B Front speaker (R (right)) C Center speaker D Surround speaker (L (left)) E Surround speaker (R (right)) F Subwoofer G Unit CF G E Top view AA A A A CB - Sony DAVHDX576WF | Operating Instructions - Page 19
E A H Top view A CB B A A C C * Not supplied. D E DAV-HDX576WF A A Front speaker (L (left)) B Front speaker (R (right)) B C Center speaker D Surround speaker (L (left)) E Surround speaker (R (right)) F Subwoofer G Unit H Surround amplifier CF G AA A D A E A H Top view A CB - Sony DAVHDX576WF | Operating Instructions - Page 20
of the speakers, Sony recommends that you change the settings. For details, see "Getting Optimal Surround Sound for a Room" ) Hole on the back of the speaker 2 Fasten the screws to the wall. DAV-HDX277WC/DAV-HDX279W For the center speaker 145 mm (5 3/4 inches) For the other speakers 8 - Sony DAVHDX576WF | Operating Instructions - Page 21
Getting Started DAV-HDX576WF For the center speaker 145 mm (5 3/4 inches) For the front speakers 8 to 10 mm (11/32 to 13/32 inch) For the surround speakers 8 to 10 regarding the wall material or screws to be used. • Sony is not responsible for accident or damage caused by improper installation - Sony DAVHDX576WF | Operating Instructions - Page 22
with a volume control, turn up the volume of the other components to a level where sound is not distorted. DAV-HDX277WC 3 DIGITAL MEDIA PORT ) 6 AC power cord (mains lead) 1 Front speaker (L) 1 Center speaker 5 Wireless transceiver 1 Subwoofer 1 Front speaker (R) 1 Surround speaker (L) S-AIR - Sony DAVHDX576WF | Operating Instructions - Page 23
etc. 4 AM loop antenna (aerial) 4 FM wire antenna (aerial) 6 AC power cord (mains lead) 1 Front speaker (L) 1 Center speaker 1 Subwoofer 5 Wireless transceiver 1 Front speaker (R) Surround amplifier 6 AC power cord (mains lead) 1 Surround speaker (L) :Signal flow 1 Surround speaker (R) 23US - Sony DAVHDX576WF | Operating Instructions - Page 24
antenna (aerial) 6 AC power cord (mains lead) 1 Center speaker 1 Front speaker (L) 5 Wireless transceiver 1 Subwoofer 5 Wireless transceiver 1 Front speaker (R) Surround amplifier 6 AC power cord (mains lead) S-AIR receiver 1 Surround speaker (L) :Signal flow 1 Surround speaker (R) 24US - Sony DAVHDX576WF | Operating Instructions - Page 25
Connector When connecting to the unit, insert the connector until it clicks. DAV-HDX277WC Rear panel SPEAKER CENTER SUBWOOFER AUDIO IN L SPEAKER CENTER SUBWOOFER To the center speaker (green) To the subwoofer (purple) To the surround speaker (L) (blue) To the surround speaker (R) (gray) - Sony DAVHDX576WF | Operating Instructions - Page 26
center speaker (green) To the subwoofer (purple) To the front speaker (R) (red) To the front speaker (L) (white) Rear panel of the surround amplifier EZW-RT10 S-AIR ID A B C PAIRING SPEAKER L SURROUND SELECTOR R SURROUND SURROUND BACK To the surround speaker (L) (blue) SPEAKER L R To the - Sony DAVHDX576WF | Operating Instructions - Page 27
center speaker (green) To the subwoofer (purple) To the front speaker (R) (red) To the front speaker (L) (white) Rear panel of the surround amplifier EZW-RT10 S-AIR ID A B C PAIRING SPEAKER L SURROUND SELECTOR R SURROUND SURROUND BACK To the surround speaker (L) (blue) SPEAKER L R To the - Sony DAVHDX576WF | Operating Instructions - Page 28
parts as follows: • Video cord (1) To listen to TV sound from the six speakers of the system, connect the TV and the system improve sound quality by connecting with the digital cord (B). DAV-HDX277WC jack of the TV SPEAKER SPEAKER CENTER SUBWOOFER TV/VIDEO DIGITAL IN COAXIAL OPTICAL FRONT - Sony DAVHDX576WF | Operating Instructions - Page 29
Getting Started DAV-HDX279W Digital optical cord (not supplied) Digital coaxial cord (not supplied) output jack of the TV To the digital optical output jack of the TV SPEAKER SPEAKER CENTER SUBWOOFER TV/VIDEO DIGITAL IN COAXIAL OPTICAL FRONT R FRONT L HDMI OUT DMPORT DC5V 0.7A MAX EZW - Sony DAVHDX576WF | Operating Instructions - Page 30
digital optical output jack of the TV SPEAKER SPEAKER CENTER SUBWOOFER TV DIGITAL IN COAXIAL OPTICAL FRONT R FRONT L HDMI signals, use this connection and set the output signal of the system to progressive format (page 46). ** HDMI (High-Definition TV (DAV-HDX277WC/DAV-HDX279W only). 30US - Sony DAVHDX576WF | Operating Instructions - Page 31
the six speakers of the system. • Portable audio source: A • DIGITAL MEDIA PORT adapter: B • VCR, digital satellite receiver, or PlayStation, etc.: C DAV-HDX277WC Stereo mini-plug cord (not supplied) To the portable audio source Front panel SPEAKER CENTER SUBWOOFER SPEAKER TV/VIDEO DIGITAL IN - Sony DAVHDX576WF | Operating Instructions - Page 32
Getting Started DAV-HDX279W Stereo mini-plug cord (not supplied) To the portable audio source Front panel SPEAKER CENTER SUBWOOFER SPEAKER TV/VIDEO DIGITAL IN COAXIAL OPTICAL FRONT R FRONT L HDMI OUT DMPORT DC5V 0.7A MAX EZW-RT10 COMPONENT VIDEO OUT VIDEO OUT ANTENNA FM AM - Sony DAVHDX576WF | Operating Instructions - Page 33
Getting Started DAV-HDX576WF Stereo mini-plug cord (not supplied) To the portable audio source Front panel SPEAKER CENTER SUBWOOFER SPEAKER TV DIGITAL IN COAXIAL OPTICAL FRONT R FRONT L HDMI OUT DMPORT DC5V 0.7A MAX DMPORT D0.C7A5VMAX DIGITAL MEDIA PORT adapter EZW-RT10 COMPONENT - Sony DAVHDX576WF | Operating Instructions - Page 34
the components as follows. TV VCR, digital satellite receiver or PlayStation, etc. System VCR, digital satellite receiver or PlayStation, etc. :Signal flow Select the component on the TV. For details, refer to the operating instructions of the TV. If the TV does not have multiple audio/video - Sony DAVHDX576WF | Operating Instructions - Page 35
Getting Started 4 Connecting the antenna (aerial) DAV-HDX277WC AM loop antenna (aerial) (supplied) A B Note • Cord (A) or cord (B) can be connected to either terminal. SPEAKER CENTER SUBWOOFER SPEAKER TV/VIDEO DIGITAL IN COAXIAL OPTICAL FRONT R FRONT L SUR R SUR L HDMI OUT DMPORT DC5V 0. - Sony DAVHDX576WF | Operating Instructions - Page 36
Getting Started DAV-HDX279W AM loop antenna (aerial) (supplied) A B Note • Cord (A) or cord (B) can be connected to either terminal. SPEAKER CENTER SUBWOOFER SPEAKER TV/VIDEO DIGITAL IN COAXIAL OPTICAL FRONT R FRONT L HDMI OUT DMPORT DC5V 0.7A MAX EZW-RT10 COMPONENT VIDEO OUT VIDEO OUT - Sony DAVHDX576WF | Operating Instructions - Page 37
DAV-HDX576WF AM loop antenna (aerial) (supplied) A B Note • Cord (A) or cord (B) can be connected to either terminal. SPEAKER CENTER SUBWOOFER (aerial) and cord away from the system or other AV components, as noise may antenna (aerial) for best AM broadcast sound. • If you have poor FM reception - Sony DAVHDX576WF | Operating Instructions - Page 38
you need to insert the wireless transceivers into the unit, surround amplifier, and S-AIR receiver. For details of the S-AIR function, see "Using an S-AIR Product" (page 83). DAV-HDX277WC Rear panel of the unit SPEAKER CENTER SUBWOOFER SPEAKER TV/VIDEO DIGITAL IN COAXIAL OPTICAL FRONT R FRONT - Sony DAVHDX576WF | Operating Instructions - Page 39
SURROUND BACK EZW-RT10 Wireless transceiver EZW-RT10 Wireless transceiver Note • Also, insert the wireless transceiver into the S-AIR receiver. For details, refer to the operating instructions of the S-AIR receiver. Note • When you insert the wireless transceiver, make sure that the AC power - Sony DAVHDX576WF | Operating Instructions - Page 40
Started 6 Connecting the AC power cords (mains leads) DAV-HDX277WC Before connecting the AC power cord (mains lead) of the unit to a wall outlet (mains), connect all the speakers to the unit. Rear panel SPEAKER SPEAKER TV/VIDEO DIGITAL IN CENTER SUBWOOFER COAXIAL OPTICAL To the wall - Sony DAVHDX576WF | Operating Instructions - Page 41
On. • "DEMO OFF": Off. 5 Press . The setting is made. 6 Press SYSTEM MENU. The system menu turns off. Tip • When you purchase the system from new, or if the system is at its factory default settings (ex., after performing "COLD RESET" (page 95)), you can turn off the demonstration simply by pressing - Sony DAVHDX576WF | Operating Instructions - Page 42
sound transmission, perform the following Steps. 1 Press "/1 on the unit. The system turns on. 2 Make sure that the SURROUND SELECTOR switch of the surround amplifier is set to SURROUND. 3 Set the S-AIR ID switch of the surround amplifier to A. 4 Press POWER on the surround amplifier. The POWER - Sony DAVHDX576WF | Operating Instructions - Page 43
the slots of the speaker cord cover, and press it into place. Speaker cord holder Surround amplifier m Surround amplifier Grooves Push the speaker cord cover down until you hear a click. Turn the surround amplifier upside down, then store the cords in the speaker cord cover. Note • When detaching - Sony DAVHDX576WF | Operating Instructions - Page 44
1 Turn on the TV. 2 (DAV-HDX277WC) Press [/1 on the unit. (DAV-HDX279W/DAV-HDX576WF) Press [/1 on the unit, and POWER on the surround amplifier. Note • Make sure that the function is set to "DVD" (page 47). 3 Switch the input selector on your TV so that the signal from the system appears on the TV - Sony DAVHDX576WF | Operating Instructions - Page 45
DAV-HDX576WF 12 Press C/c to select [YES]. Note • Make sure that the headphones are not connected to the unit or surround of the speakers, reset the speaker settings. See "Getting Optimal Surround Sound for a Room" system is in stop mode. The Control Menu display appears on the TV screen. - Sony DAVHDX576WF | Operating Instructions - Page 46
OUT jack. For details, refer also to the operating instructions supplied with the TV/projector, etc. 1 Press FUNCTION +/- repeatedly until "DVD" appears in the front panel display. 2 Press DISPLAY while the system is in stop mode. The Control Menu display appears on the TV screen. 3 Press X/x to - Sony DAVHDX576WF | Operating Instructions - Page 47
DVD, TV, or VCR sound from all the speakers in this system. FUNCTION +/- X/x/c, SYSTEM MENU 1 Press FUNCTION +/- repeatedly until the desired function appears in the front panel display. Each time you press FUNCTION +/-, the function changes as follows. x DAV-HDX277WC/DAV-HDX279W "DVD" t "TUNER - Sony DAVHDX576WF | Operating Instructions - Page 48
's speaker to enjoy surround sound of the system. Tip • When listening to audio files using a portable audio source, you can enhance the sound. Press FUNCTION +/- Press . The setting is made. 6 Press SYSTEM MENU. The system menu turns off. * DAV-HDX576WF only. ** DAV-HDX277WC/DAV-HDX279W only. 48US - Sony DAVHDX576WF | Operating Instructions - Page 49
by Using Decoding Mode You can enjoy surround sound simply by selecting one of the system's pre-programmed decoding modes. They bring exciting and powerful sound of movie theaters into your home. Sound Adjustment X/x/c, SYSTEM MENU 1 Press SYSTEM MENU. 2 Press X/x repeatedly until "DEC. MODE - Sony DAVHDX576WF | Operating Instructions - Page 50
The setting is made. 5 Press SYSTEM MENU. The system menu turns off. Effect Performs Pro subwoofer. Multi channel surround formats are downmixed to 2 channels. Outputs the sound from headphone left and right. Multi channel surround formats are downmixed to 2 channels. Outputs the sound as surround - Sony DAVHDX576WF | Operating Instructions - Page 51
depending on the disc. • "MOVIE": The system provides the sound for movies. • "MUSIC": The system provides the sound for music. Note • You cannot operate these setup items when you connect headphones to the unit or surround amplifier. • When changing the sound mode while using the S-AIR receiver - Sony DAVHDX576WF | Operating Instructions - Page 52
some operations may be different or restricted. Refer to the operating instructions supplied with your disc. Adjust the volume "/1 A H FUNCTION remote or the VOLUME control on the unit. The volume level appears on the TV screen and in the front panel display. Note • Depending on the system status - Sony DAVHDX576WF | Operating Instructions - Page 53
[CONTROL FOR HDMI] is set to [OFF] (page 79). - "S-AIR STBY" is set to "OFF" (page 85). To use the headphones Connect the headphones to PHONES jack on the unit. The sound of the system is muted. You can also connect the headphones to PHONES jack on the surround amplifier. (The sound of the system is - Sony DAVHDX576WF | Operating Instructions - Page 54
You also may not be able to turn them off. Changing the sound When the system is playing a DVD VIDEO recorded in multiple audio formats (PCM, Dolby are displayed, they indicate a language code. See "Language Code List" (page 113) to confirm which language the code represents. When the same language - Sony DAVHDX576WF | Operating Instructions - Page 55
consist of a 2 channel playback area and a multi-channel playback area. You can select the playback area you want to listen to. 1 Press DISPLAY while the system is in stop mode. The Control Menu display appears on the TV screen. 2 Press X/x to select 2CH], then press . [MULTI/ 55US - Sony DAVHDX576WF | Operating Instructions - Page 56
you cannot select the playback layer. 1 Press DISPLAY while the system is in stop mode. The Control Menu display appears on the TV screen. 2 Press X/x to ] in Step 3 may appear as [Press SELECT] in the operating instructions supplied with the disc. In this case, press H. Tip • To play without - Sony DAVHDX576WF | Operating Instructions - Page 57
when: - you eject the disc. - the system enters standby mode (DATA CD/ DATA DVD only). - you change or reset the settings on the Setup Display. - you change the parental control level. - you change the function by pressing FUNCTION +/-. - you disconnect the AC power cord (mains lead). • For a DVD-VR - Sony DAVHDX576WF | Operating Instructions - Page 58
your own program. You can program up to 99 tracks. Note • You can program the track on the current disc only. 1 Press DISPLAY. The Control Menu display appears on the TV screen. 2 Press X/x to select [PROGRAM], then press . The options for [PROGRAM] appear. 3 Press X/x to select [SET t], then - Sony DAVHDX576WF | Operating Instructions - Page 59
tracks on the current disc only. 1 Press DISPLAY during playback. The Control Menu display appears on the TV screen. 2 Press X/x to select ONE DISC]: You can repeat all of the titles on the current disc. (When the system is playing a DVD-VR, you can repeat all of the titles of the selected type.) - Sony DAVHDX576WF | Operating Instructions - Page 60
Control Menu display is turned off. Note • You cannot use Repeat Play with a VIDEO CD or Super VCD with PBC playback. • When the system is playing a DATA CD/DATA DVD which contains MP3 files and JPEG image files, and their playing time is not the same, the audio sound for the sound, select these - Sony DAVHDX576WF | Operating Instructions - Page 61
-VRs with a playlist created. 1 Press DISPLAY while the system is in stop mode. The Control Menu display appears on the TV screen. 2 Press X/x to using the time code. 1 Press DISPLAY. (When playing a DATA CD/DATA DVD with JPEG image files, press DISPLAY twice.) The Control Menu display appears - Sony DAVHDX576WF | Operating Instructions - Page 62
Press . Note • You cannot search for a scene on a DVD+RW using the time code. Playing MP3 Files/JPEG Image Files You can play the MP3 files or JPEG image files: which could damage your speaker system. • The system does not conform to audio in MP3PRO format. • The system can recognize up to 200 - Sony DAVHDX576WF | Operating Instructions - Page 63
X/x to select a file and press . The system starts playing the selected file. You can turn top JPEG image file and press X. To play the next or previous JPEG image file Press c/C when the Control Menu display is not displayed. Note that you can select the next folder by continuing to press c after - Sony DAVHDX576WF | Operating Instructions - Page 64
sound by first placing both MP3 files and JPEG image files in the same folder on a DATA CD or DATA DVD. 1 Load a DATA CD or DATA DVD. 64US 2 Press DISPLAY while the system is in stop mode. The Control file at the same time, the sound may skip. Sony recommends that you set the MP3 bit rate to 128 - Sony DAVHDX576WF | Operating Instructions - Page 65
does not match the pictures on the TV screen, you can adjust the delay between the picture and sound. 1 Press DISPLAY. The Control Menu display appears on the TV screen. 2 Press X/x to select [A/V SYNC], then press . The options for [A/V SYNC] appear. 3 Press X/x to select a setting. • [OFF - Sony DAVHDX576WF | Operating Instructions - Page 66
users. Scenes may be blocked or replaced with different scenes. You can set the playback restriction by registering a password. When you set the [PARENTAL CONTROL DISPLAY while the system is in stop mode. The Control Menu display a standard code in the table of "Parental Control Area Code List" ( - Sony DAVHDX576WF | Operating Instructions - Page 67
a new 4-digit password, replace the disc in the unit and press H. When the display for entering your password appears, enter your new password. 5 Press X/x to select [SYSTEM SETUP], then press . The options for [SYSTEM SETUP] appear. 6 Press X/x to select [PARENTAL CONTROL t], then press . The - Sony DAVHDX576WF | Operating Instructions - Page 68
adjustments of items such as picture and sound. Displayed items vary depending on the country model. Note • Playback settings stored in the AUTO Selected setting Note • When you turn the system on after resetting and no disc is in the unit, the guide message appears on the TV screen. To perform - Sony DAVHDX576WF | Operating Instructions - Page 69
DVD VIDEO only) You can switch the language of the sound track. When you select [ORIGINAL], the language given priority ], select and enter a language code from "Language Code List" (page 113) using when you connect a 4:3 screen TV. The system automatically displays the wide picture on the entire - Sony DAVHDX576WF | Operating Instructions - Page 70
jacks. You cannot select this and the setting is not effective when the system outputs progressive signal. [OFF]: You can set the black level of the output resolution. Settings for the HDMI [HDMI SETUP] HDMI SETUP HDMI RESOLUTION: CONTROL FOR HDMI: VOLUME LIMIT: YCBCR/RGB(HDMI): AUDIO(HDMI): JPEG - Sony DAVHDX576WF | Operating Instructions - Page 71
LIMIT] If you change the output method of the TV to the system speaker on the TV menu or by pressing THEATER, the System Audio Control (page 81) is activated and loud sound may be output depending on the volume level of the system. You can prevent this by limiting the maximum level of the volume - Sony DAVHDX576WF | Operating Instructions - Page 72
have the same number of channels, the system selects PCM, DTS, Dolby Digital sound, and MPEG audio in this order. Other Settings [SYSTEM SETUP] SYSTEM SETUP SCREEN SAVER: ON BACKGROUND: JACKET PICTURE PARENTAL CONTROL: MULTI-DISC RESUME: ON RESET: x [SCREEN SAVER] You can reduce the display - Sony DAVHDX576WF | Operating Instructions - Page 73
in the unit. x [RESET] You can return the [SET UP] settings other than [PARENTAL CONTROL] to the default settings. For details, see "Returning the [SETUP] settings to the default" (page 95). Settings for the speakers [SPEAKER SETUP] To obtain the best possible surround sound, set connection of the - Sony DAVHDX576WF | Operating Instructions - Page 74
6.9 meters for North American models. 2)0.0 to 6.9 meters for North American models. 3)When you perform the SUBWOOFER] +2.0 dB: Set the subwoofer level. * This item appears when you set [CENTER] to [YES] in the [CONNECTION] setting. x [LEVEL (SURROUND)] You can adjust the sound level of the surround - Sony DAVHDX576WF | Operating Instructions - Page 75
SETUP] items, the test tone is emitted from each speaker in sequence. Adjust the sound level as follows. 1 Set the [TEST TONE] to [ON]. 2 Press of all the speakers at one time, turn the VOLUME control on the unit, or press VOLUME +/- on the remote. • To return to the default setting when changing - Sony DAVHDX576WF | Operating Instructions - Page 76
band and preset number FM FM 10 : 88.00 MHz SONY RADIO Station name 1 Press FUNCTION +/- repeatedly until "TUNER FM system by pressing "/1 on the unit. While holding down > on the unit, press "/1 on the unit to turn on the power. If you change the interval, AM preset stations will be erased. To reset - Sony DAVHDX576WF | Operating Instructions - Page 77
press TUNING +/- repeatedly. For automatic tuning, press and hold TUNING +/-. The automatic tuning stops automatically when the system receives the radio station. To stop the automatic tuning manually, press TUNING +/- or x. To listen to radio stations when you know the frequencies 1 Press FUNCTION - Sony DAVHDX576WF | Operating Instructions - Page 78
CLEAR. 7 Press . "COMPLETE" appears in the front panel display, and the station name is stored. 8 Press SYSTEM MENU. The system menu turns off. x "TUNER AM" When the station name is set 1 Station name Ex. "SONY RADIO" 2 Frequency Ex. "AM1 576" When the station name is not set: 1 Frequency Ex. "AM1 - Sony DAVHDX576WF | Operating Instructions - Page 79
are convenient buttons on the system's remote for operating the TV, such as THEATER, ONE-TOUCH PLAY, TV [/1. For details, see "Controlling the TV with the Supplied Remote" (page 91) and refer to the operating instructions of the TV. ONE-TOUCH TV THEATER PLAY BRAVIA Sync Note • Depending on the - Sony DAVHDX576WF | Operating Instructions - Page 80
turn the TV off by using the POWER button on the TV's remote or TV [/1 on the system's remote, the system turns off automatically. Note • Before using the System Power Off function, set the function for TV power. For details, refer to the operating instructions of the TV. • Depending on the status - Sony DAVHDX576WF | Operating Instructions - Page 81
TV speakers. You can also operate the System Audio Control function from the TV menu. For details, refer to the operating instructions of the TV. * DAV-HDX576WF only ** DAV-HDX277WC/DAV-HDX279W only Note • If the TV is turned on before turning on the system, TV sound will not be output for a moment - Sony DAVHDX576WF | Operating Instructions - Page 82
Network Audio Adapter as far as possible from the system. 2 Start playback of the connected component. The sound and images from the connected component are played on the system or connected TV. For operation details, refer to the operating instructions of the DIGITAL MEDIA PORT adapter. Tip • When - Sony DAVHDX576WF | Operating Instructions - Page 83
is for receiving sound. - Surround amplifier: You can enjoy surround speaker sound wirelessly. - S-AIR receiver: You can enjoy system sound in another room in the front panel display. 3 Press DISPLAY while the system is in stop mode. The Control Menu display appears on the TV screen. 4 Press X/x - Sony DAVHDX576WF | Operating Instructions - Page 84
sound transmission is established, the POWER / ON LINE indicator of the surround amplifier turns green. For details of the POWER / ON LINE indicator, see "To check the transmission status" (page 42). To set the ID of the S-AIR receiver Refer to the operating instructions MODE on the remote. The S-AIR - Sony DAVHDX576WF | Operating Instructions - Page 85
the S-AIR receiver You can control the system from the S-AIR receiver by using the following buttons. Press H, X, x, ./> S-AIR CH Operation Share the same operations on the remote and unit. Change the function of the system. For details, refer to the operating instructions of the S-AIR receiver - Sony DAVHDX576WF | Operating Instructions - Page 86
pairing, sound transmission surround amplifier" (page 84). • To set the ID of the S-AIR receiver, refer to the operating instructions of the S-AIR receiver. 3 Press FUNCTION +/- repeatedly until "DVD" appears in the front panel display. 4 Press DISPLAY while the system is in stop mode. The Control - Sony DAVHDX576WF | Operating Instructions - Page 87
surround amplifier, a slim instrument, such as a paper clip, can be used. x For the S-AIR receiver Refer to the operating instructions of the S-AIR receiver. When sound be improved by changing the following "RF CHANGE" setting. 1 Press SYSTEM MENU. 2 Press X/x repeatedly until "RF CHANGE" appears in - Sony DAVHDX576WF | Operating Instructions - Page 88
channel 6 - S-AIR ID C: equivalent channel for Wi-Fi channel 11 • The transmission may be improved by changing the transmission channel (frequency) of the other wireless system(s). For details, refer to the operating instructions of the other wireless - Sony DAVHDX576WF | Operating Instructions - Page 89
install some speakers. For the better surround sound, Sony recommends that first you decide the position of the speakers. 1 Press FUNCTION +/- repeatedly until "DVD" appears in the front panel display. 2 Press DISPLAY while the system is in stop mode. The Control Menu display appears on the TV - Sony DAVHDX576WF | Operating Instructions - Page 90
Calibration) can set the appropriate surround sound automatically. Note • The system outputs a loud test sound when [AUTO CALIBRATION] starts. speakers and the calibration mic. AUDIO IN / A.CAL MIC Calibration mic E.g., DAV-HDX576WF 8 Press C/c to select [YES]. 9 Press . [AUTO CALIBRATION] starts - Sony DAVHDX576WF | Operating Instructions - Page 91
the system does not perform subwoofer calibration. Tip • You can check the distance between the listening position and each speaker. See page 73. Controlling the TV with the Supplied Remote You can control the TV (Sony only) by using following buttons. Use these buttons (other than TV [/1, THEATER - Sony DAVHDX576WF | Operating Instructions - Page 92
the sound effect Press DYNAMIC BASS again. Enjoying the sound at low volume You can enjoy sound effects or dialogue, as you would in a movie theater, in the front panel display. To set the sleep timer using the system menu 1 Press SYSTEM MENU. 2 Press X/x repeatedly until "SLEEP" appears in the front - Sony DAVHDX576WF | Operating Instructions - Page 93
and current track number 2 Track (file) name* * If an MP3 file has the ID3 tag, the system will display a folder name/track (file) name from the ID3 tag information. The system can support ID3 ver 1.0/1.1/2.2/2.3. ID3 ver 2.2/2.3 tag information display has priority when both ID3 ver 1.0/1.1 and ver - Sony DAVHDX576WF | Operating Instructions - Page 94
name or track name may not be displayed depending on the text. • Playing time of MP3 files may not be displayed correctly. Tip • When the system is playing a VIDEO CD with PBC functions, the playing time is displayed. Viewing the playing time and remaining time on the TV screen 1 Press DISPLAY - Sony DAVHDX576WF | Operating Instructions - Page 95
the unit at the same time. "COLD RESET" appears in the front panel display and the system returns to default settings. Returning the [SETUP] settings to the default You can return the [SETUP] settings (page 68) other than [PARENTAL CONTROL] to the default settings. 1 Press FUNCTION +/- repeatedly - Sony DAVHDX576WF | Operating Instructions - Page 96
] and press c. 7 Press C/c to select [YES]. You can also quit the process and return to the Control Menu display by selecting [NO] here. 8 Press . Do not press [/1 while resetting the system as it takes a few seconds to complete. Note • The [MODE (MUSIC, IMAGE)], [INTERVAL], [EFFECT], and [MULTI - Sony DAVHDX576WF | Operating Instructions - Page 97
, panel, and controls with a soft cloth slightly moistened with a mild detergent solution. Do not use any type of abrasive pad, scouring powder or solvent such as alcohol or benzine. If you have any questions or problems concerning your system, please consult your nearest Sony dealer. On cleaning - Sony DAVHDX576WF | Operating Instructions - Page 98
wireless systems at the same time. • The transmission distance differs depending on the usage environment. Find a location where transmission between the S-AIR main unit and sub unit is most effective, and install the S-AIR main unit and sub unit there. About the surround amplifier (DAV-HDX279W/DAV - Sony DAVHDX576WF | Operating Instructions - Page 99
the following difficulties while using the system, use this troubleshooting guide to help remedy the problem before requesting repairs. Should any problem persist, consult your nearest Sony dealer. Note that if service personnel changes some parts during repair, these parts may be retained. In the - Sony DAVHDX576WF | Operating Instructions - Page 100
affect picture quality. If you still experience problems even when you connect your unit directly to video input (page 28). * Depending on the country model, [720 × 576p] may appear. Even though you the TV screen. The subwoofer and the front speakers in this system are magnetically shielded to - Sony DAVHDX576WF | Operating Instructions - Page 101
system off and on again. 2 Turn the connected component off and on again. 3 Disconnect and then connect the HDMI cable again. The left and right sounds are unbalanced or reversed. • Check that the speakers and components are connected correctly and securely. There is no sound from the subwoofer - Sony DAVHDX576WF | Operating Instructions - Page 102
batteries in the remote are weak. The disc does not play. • There is no disc inserted. • The disc is upside down. Insert the disc with the playback side facing down. • The disc is skewed on the disc tray. • The system cannot play CD-ROMs, etc. (page 6). • The region code on the DVD does - Sony DAVHDX576WF | Operating Instructions - Page 103
JPEG format that conforms to UDF (Universal Disk Format). • It has an extension remote and then start playback (page 57). • The title, DVD or PBC menu automatically appears on the TV screen. The system the operating instructions supplied with the sound Sony dealer or local authorized Sony service - Sony DAVHDX576WF | Operating Instructions - Page 104
in [HDMI SETUP] to [ON] (page 71). • For details, see "Using the Control for HDMI Function for "BRAVIA" Sync" (page 79). No sound is output from the • Set the [AUDIO (HDMI)] setting in [CUSTOM SETUP] to [ON] (page 71). system and TV while using the • Make sure that the connected TV is compatible - Sony DAVHDX576WF | Operating Instructions - Page 105
sub unit. Surround amplifier operation (DAV-HDX279W/DAV-HDX576WF only) If no sound is output from the surround speakers, check the status of the POWER / ON LINE indicator on the surround amplifier. For details of the POWER / ON LINE indicator, see "Step 4: Setting up the Wireless System" (page 42 - Sony DAVHDX576WF | Operating Instructions - Page 106
Symptom Remedy "HP NO LINK" and "VOLUME • Volume becomes the minimum when you turn off the surround amplifier with MIN" appear alternately in the headphones connected before you turn off the unit or if radio reception is poor. front panel display, and - Sony DAVHDX576WF | Operating Instructions - Page 107
appear on the TV screen. Although this is not a malfunction and for Sony service use only, normal system operation will not be possible. Turn off the system, and then turn on the system again to operate. VER.X.XX First 3 characters of the service number C 13 C 31 E XX (XX is a number) Cause and/or - Sony DAVHDX576WF | Operating Instructions - Page 108
) Surround mode (reference) RMS output power FL/FR/C*: 143 watts (per channel at 3 ohms, 1 kHz, 10% THD) Subwoofer*: 285 watts (at 1.5 ohms, 80 Hz, 10% THD) * Depending on the decoding mode settings and the source, there may be no sound output. Inputs (Analog) TV/VIDEO (AUDIO IN) (DAV-HDX277WC/DAV - Sony DAVHDX576WF | Operating Instructions - Page 109
system Speaker unit Rated impedance Dimensions (approx.) Mass (approx.) Subwoofer Bass reflex 160 mm (6 3/8 in) cone type 1.5 ohms 225 mm × 395 mm × 325 mm (8 7/8 in × 15 5/8 in × 12 7/8 in) (w/h/d) 6.1 kg (14 lb 6 oz) General Power requirements 120 V AC, 60 Hz Power consumption DAV-HDX277WC - Sony DAVHDX576WF | Operating Instructions - Page 110
having to adjust frequency levels. Dolby Digital This movie theater sound format is more advanced than Dolby Surround Pro Logic. In this format, the surround speakers output stereo sound with an expanded frequency range, and a subwoofer channel for deep bass is independently provided. This format - Sony DAVHDX576WF | Operating Instructions - Page 111
sound space. Dolby Surround Pro Logic As one method of decoding Dolby Surround, Dolby Surround Pro Logic produces four channels from 2 channel sound. Compared with the former Dolby Surround system, Dolby Surround Control A function of the DVD to limit playback of the disc by the age of the users Sony - Sony DAVHDX576WF | Operating Instructions - Page 112
• Super Audio CD layer: A high-density signal layer for Super Audio CD • CD layer1): A layer that is readable by a conventional CD player Single layer disc (a disc with a single Super Audio CD layer) Super Audio CD layer Hybrid disc2) (a disc with a Super Audio CD layer and a CD layer) CD layer3) - Sony DAVHDX576WF | Operating Instructions - Page 113
1557 Ukrainian 1564 Urdu 1572 Uzbek 1581 Vietnamese 1587 Volapük 1613 Wolof 1632 Xhosa 1665 Yoruba 1684 Chinese 1697 Zulu 1703 Not specified Parental Control Area Code List Code Area 2044 Argentina 2047 Australia 2046 Austria 2057 Belgium 2070 Brazil 2079 Canada 2090 Chile 2092 China 2115 Denmark - Sony DAVHDX576WF | Operating Instructions - Page 114
Index to Parts and Control For more information, refer to the pages indicated in parentheses. Front panel A "/1 (on/standby) (44, 95) B A (open/close) (52) C Front panel display (116) D Play operation buttons (52) E (remote sensor) (12) F FUNCTION (47) G VOLUME control (52) H PHONES jack (52) I - Sony DAVHDX576WF | Operating Instructions - Page 115
Additional Information Rear panel DAV-HDX277WC SPEAKER CENTER SUBWOOFER SPEAKER TV/VIDEO DIGITAL IN COAXIAL OPTICAL FRONT R FRONT L SUR R SUR L HDMI OUT DMPORT DC5V 0.7A MAX DAV-HDX279W SPEAKER CENTER SUBWOOFER SPEAKER TV/VIDEO DIGITAL IN COAXIAL OPTICAL FRONT R FRONT L HDMI OUT - Sony DAVHDX576WF | Operating Instructions - Page 116
is inserted in the unit and the system transmits the sound. (42, 83) G Lights up when the HDMI OUT jack is correctly connected to HDCP (Highbandwidth Digital Content Protection) compliant device with HDMI or DVI (Digital Visual Interface) input. (28) H Current surround - Sony DAVHDX576WF | Operating Instructions - Page 117
Additional Information Remote control ALPHABETICAL ORDER A - O P - Z ANGLE 3 (54) AUDIO qh (54) CLEAR es NAVI qg (63) PRESET +/- wj (77) S-AIR MODE 4 SLEEP qj (92) SOUND MODE 5 (51) SUBTITLE ws (54) SYSTEM MENU wf (41, 48, 92, 93, 83) THEATER qk (79) TOOLS wh (91) TUNING +/- 0 (76) TV wl (91) TV - Sony DAVHDX576WF | Operating Instructions - Page 118
Guide to the Control Menu Display You can use the Control Menu display to select a function and to view related information. DISPLAY Press DISPLAY repeatedly. Each time you press DISPLAY, the Control Menu display changes: 1 t 2 t ... t 1 t ... 1 Control Menu display 1 2 Control Menu display 2 ( - Sony DAVHDX576WF | Operating Instructions - Page 119
Options Operation message To turn off the display Press DISPLAY. List of Control Menu items Item Item Name, Function, Relevant Disc Type [TITLE] ( time and the remaining playback time. Input the time code for picture and music searching. The system displays the DVD/Super Audio CD/CD text or the - Sony DAVHDX576WF | Operating Instructions - Page 120
[A/V SYNC] (page 65) You can adjust the delay between the picture and sound. [DISC MENU] (page 60) You can display the DVD's menu. [BROWSING] , or both to be played when playing a DATA CD/DATA DVD. Tip • The Control Menu icon indicator lights up in yellow t when you select any item except [OFF] - Sony DAVHDX576WF | Operating Instructions - Page 121
, 111 Q Quick Setup 44 R Rear panel 115 Region Code 8 Remote 12 Repeat Play 59 RESET 73, 96 Resume Play 57 RF CHANGE 87 S S-AIR 111 S-AIR SETUP 72 S-AIR STBY 85 SCREEN SAVER 72 SETUP 68, 95 Shuffle Play 59 SLEEP 92 Slide Show 64 Sound Mode 51 SPEAKER FORMATION 72, 89 SPEAKER SETUP - Sony DAVHDX576WF | Operating Instructions - Page 122
- Sony DAVHDX576WF | Operating Instructions - Page 123
- Sony DAVHDX576WF | Operating Instructions - Page 124
(1) Sony Corporation Printed in China
-
 1
1 -
 2
2 -
 3
3 -
 4
4 -
 5
5 -
 6
6 -
 7
7 -
8
-
9
-
10
-
11
-
12
-
13
-
14
-
15
-
16
-
17
-
18
-
19
-
20
-
21
-
22
-
23
-
24
-
25
-
26
-
27
-
28
-
29
-
30
-
31
-
32
-
33
-
34
-
35
-
36
-
37
-
38
-
39
-
40
-
41
-
42
-
43
-
44
-
45
-
46
-
47
-
48
-
49
-
50
-
51
-
52
-
53
-
54
-
55
-
56
-
57
-
58
-
59
-
60
-
61
-
62
-
63
-
64
-
65
-
66
-
67
-
68
-
69
-
70
-
71
-
72
-
73
-
74
-
75
-
76
-
77
-
78
-
79
-
80
-
81
-
82
-
83
-
84
-
85
-
86
-
87
-
88
-
89
-
90
-
91
-
92
-
93
-
94
-
95
-
96
-
97
-
98
-
99
-
100
-
101
-
102
-
103
-
104
-
105
-
106
-
107
-
108
-
109
-
110
-
111
-
112
-
113
-
114
-
115
-
116
-
117
-
118
-
119
-
120
-
121
-
122
-
123
-
124
 |
 |

©2008 Sony Corporation
3-283-032-
11
(1)
DVD Home Theatre
System
Operating Instructions
DAV-HDX277WC / HDX279W / HDX576WF