Sony DMXWL1 Reference Guide - Page 18
Place the Receiver Unit Stand-alone Near the TV, screws again, attach the TV Mounting bracket - wireless
 |
UPC - 027242744592
View all Sony DMXWL1 manuals
Add to My Manuals
Save this manual to your list of manuals |
Page 18 highlights
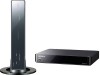
3 Slide the receiver unit onto the bracket. If the Wireless LINK LEVEL is low, the receiver unit can also be attached on the top right side of the rear TV panel which may provide better reception. In this case, attach the receiver unit by rotating 180 degrees. Remove the receiver unit from the TV Mounting bracket on the rear TV panel, remove the TV Mounting bracket/Plastic Fasteners using a Phillips Screwdriver, remove the screws holding the adapter and rotate 180 degrees, then secure the screws again, attach the TV Mounting bracket and the receiver unit. Plastic Fastener Secure the screws ~ • If no Guide Pins or screw holes are found on the rear TV panel, it is not designed to mount the receiver unit to the TV. In case of small TV, the Wall-Mount bracket of the TV might interfere with the receiver unit. If this is the case, place the receiver unit horizontally on a table or stand. Place the Receiver Unit Stand-alone Near the TV If the Wireless LINK LEVEL is still low, place the receiver unit horizontally near the TV. Find a location where all LINK LEVEL LEDs are lit. Guide Pin ~ • Be sure to remove the receiver unit from the back of the TV before moving the TV. Remove the screws Rotate 180 degrees 18
-
 1
1 -
2
-
3
-
4
-
5
-
6
-
7
-
8
-
9
-
10
-
11
-
12
-
 13
13 -
 14
14 -
 15
15 -
 16
16 -
 17
17 -
 18
18 -
 19
19 -
 20
20 -
 21
21 -
 22
22 -
 23
23 -
24
 |
 |
