Sony DSLR-A100K Read This First - Page 8
Turn the camera on/set the clock, Set the POWER, switch to ON by, sliding it in the, direction of
 |
View all Sony DSLR-A100K manuals
Add to My Manuals
Save this manual to your list of manuals |
Page 8 highlights
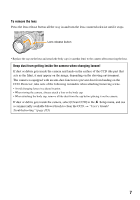
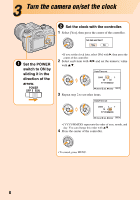
Turn the camera on/set the clock 2 Set the clock with the controller. 1 Select [Yes], then press the center of the controller. 1 Set the POWER switch to ON by sliding it in the direction of the arrow. • If you set the clock later, select [No] with B, then press the center of the controller. 2 Select each item with b/B and set the numeric value with v/V. 3 Repeat step 2 to set other items. • [YYYY/MM/DD] represents the order of year, month, and day. You can change this order with v/V. 4 Press the center of the controller. • To cancel, press MENU. 8
-
 1
1 -
2
-
 3
3 -
 4
4 -
 5
5 -
 6
6 -
 7
7 -
 8
8 -
 9
9 -
 10
10 -
 11
11 -
 12
12 -
 13
13 -
14
-
15
-
16
-
17
-
18
-
19
 |
 |

8
Turn the camera on/set the clock
1
Set the POWER
switch to ON by
sliding it in the
direction of the
arrow.
2
Set the clock with the controller.
1
Select [Yes], then press the center of the controller.
• If you set the clock later, select [No] with
B
, then press the
center of the controller.
2
Select each item with
b
/
B
and set the numeric value
with
v
/
V
.
3
Repeat step 2 to set other items.
• [YYYY/MM/DD] represents the order of year, month, and
day. You can change this order with
v
/
V
.
4
Press the center of the controller.
• To cancel, press MENU.