Sony FWD-50PX2 User Manual
Sony FWD-50PX2 Manual
 |
View all Sony FWD-50PX2 manuals
Add to My Manuals
Save this manual to your list of manuals |
Sony FWD-50PX2 manual content summary:
- Sony FWD-50PX2 | User Manual - Page 1
2-651-871-02 (1) FWD-50PX2/50PX2A Flat Panel Display JP Operating Instructions GB Mode d'emploi FR Bedienungsanleitung DE Manual de instrucciones ES Istruzioni per l'uso IT ɹ CS FWD-50PX2/50PX2A 2005 Sony Corporation - Sony FWD-50PX2 | User Manual - Page 2
you have any questions about this product, you may call; Sony Customer Information Services Center 1-800-222-7669 or http://www.sony.com/ Declaration of Conformity Trade Name: SONY Model: FWD-50PX2/50PX2A Responsible Party: Sony Electronics Inc. Address: 16450 W. Bernardo Dr, San Diego, CA - Sony FWD-50PX2 | User Manual - Page 3
the Speakers 14 (GB) Connecting the AC Power Cord 14 (GB) Cable management 15 (GB) Using On-screen Menus 16 (GB) Operating Through Menus 16 (GB) Menu Guide 16 (GB) GB Watching the Picture 22 (GB) Switching the Input Signal 22 (GB) Input Signal, Picture Mode and Display Status Information 23 - Sony FWD-50PX2 | User Manual - Page 4
an IP address automatically (DHCP) .... 42 (GB) Setting an IP address manually (Manual 42 (GB) Setting a communication speed (Speed Setup) ...... 43 (GB) Self-diagnosis Function 43 (GB) Operating a Specific Display With the Remote Commander 44 (GB) Troubleshooting 45 (GB) Specifications 48 (GB) - Sony FWD-50PX2 | User Manual - Page 5
• When you install multiple equipment with the unit, the following problems, such as malfunction of the Remote Commander, noisy picture, noisy sound, may occur depending on the position of the unit and other equipment. On the PDP (Plasma Display Panel) • You may see some bright spots of red, blue or - Sony FWD-50PX2 | User Manual - Page 6
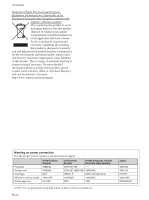
. For more detailed information about recycling of this product, please contact your local Sony office or visit Sony Europe's web site for business customers: http://www.sonybiz.net/environment Warning on power connection Use the proper power cord for your local power supply. Plug type Female - Sony FWD-50PX2 | User Manual - Page 7
For details on the control button section, see "Control Button Section (Top)" on page 8 (GB). 3 SPEAKER Socket Connects the speakers (not supplied) to this socket to output the audio matching the signal displayed on the screen. 4 - AC IN socket Connect the supplied AC power cord to this socket and - Sony FWD-50PX2 | User Manual - Page 8
1 Remote control detector Receives the signals from the Remote Commander. 2 POWER/STANDBY indicator Lights up in green when the display unit is powered on. Lights up in red in the standby mode. Lights up in orange when the display enters the power saving mode while a signal is input from a computer - Sony FWD-50PX2 | User Manual - Page 9
allows remote control of the display using the RS-232C protocol. For details, contact your authorized Sony dealers. 3 INPUT1 (DIGITAL RGB IN) connectors DVI : Connects to the digital RGB signal output of video devices. Supports HDCP copy protection. AUDIO (Stereo minijack) : Inputs an audio - Sony FWD-50PX2 | User Manual - Page 10
). These adaptors allow you to control the display unit via the network. 8 OPTION2 (VIDEO) slot This slot supports video signals. A blank panel is attached to this slot when shipped from the factory. The slot accepts optional adaptors for video signal input/output. For optional adaptors with network - Sony FWD-50PX2 | User Manual - Page 11
qd ql MONITOR RM-980 1 POWER ON switch Press to power on the display. 2 STANDBY button Press to change the display to the standby mode. 3 MUTING button Press to mute the sound. Press again to restore sound. 4 DISPLAY button Press to display information about the input signal type and picture mode - Sony FWD-50PX2 | User Manual - Page 12
you do not plan to use the Remote Commander for a fairly long time. When the Remote Commander does not work Check that the POWER/STANDBY indicator lights up and the Control Mode in the Remote menu is not set to "Display Unit Only." The Remote Commander operates the display only when both of the two - Sony FWD-50PX2 | User Manual - Page 13
that the 1 POWER switch is at the lower position. 5 (2) Units: cm (inches) Note When moving or installing the display when it is attached to the stand (not supplied), do so with at least 3 people. Units: cm (inches) Note When mounting the display vertically, you cannot use the speakers SS-SP50FW - Sony FWD-50PX2 | User Manual - Page 14
the operating manual that came with the speakers. For details on how to route the speaker cords, refer to "Using the cable holders" on page 15 (GB). Connecting the AC Power Cord 1 Plug the AC power cord into the AC IN socket. Then, attach the AC plug holder (supplied) to the AC power cord. AC IN - Sony FWD-50PX2 | User Manual - Page 15
squeezing the AC plug holder and freeing it, grasp the plug and pull out the AC power cord. Cable management Using the cable holders You can neatly bundle the cables with the cable holders (×6) provided. Attach the cable holders as shown in the - Sony FWD-50PX2 | User Manual - Page 16
36 (GB). Menu Guide Note Items that cannot be set or adjusted (depending on the setting or the type of signal input) show in dark gray. PICTURE/SOUND CONTROL menu Adjusts the quality of sound and picture. PICTURE/SOUND CONTROL Picture Mode: Adjust Picture Adjust Sound Standard Select Set ENTER - Sony FWD-50PX2 | User Manual - Page 17
set it to "Off" for underscan image display. PICTURE AND PICTURE (PAP) menu You can show two pictures from different signal sources, such as a computer and a video, side by side. PICTURE AND PICTURE(PAP) PAP: Off Active Picture Picture Size Picture Position Select Set ENTER Exit MENU For - Sony FWD-50PX2 | User Manual - Page 18
sound to be emitted from the speakers SS-SP50FW (not supplied.) Closed Caption Displays closed captions. This item is valid only for NTSC signals. Off: The caption is not displayed. CC1-4: Displays the caption superimposed on the picture. Display Select On to display the input signal information - Sony FWD-50PX2 | User Manual - Page 19
for the input through the option boards. • This unit does not support the three value sync format of composite sync and 576/60P. • When you select the video signal for the synchronous mode setting, you cannot use the PICTURE AND PICTURE function. Remote This menu is used for remote control settings - Sony FWD-50PX2 | User Manual - Page 20
input signals are switched, the original factory settings operate. Information This menu is used for displaying various information, including information on the internal status of the display unit. INITIAL SETUP/INFORMATION Information Model Name: Serial Number: Operation Time: Software Version - Sony FWD-50PX2 | User Manual - Page 21
the built-in clock, or make the unit power on/off at a predetermined time. TIMER/CLOCK Clock Set Clock Display: Off On/Off Timer Pic. Inversion Inverts the image hue. Using On-screen Menus Pic. Orbit Changes the position of a picture after a predetermined amount of time. Select Set ENTER - Sony FWD-50PX2 | User Manual - Page 22
Watching the Picture Watching the Picture Before you start • Power on the display. • Power on the connected equipment and play a video source. • To display the input signal information and Picture Mode on the screen when turning on the power or switching the input signal, set "Display" in the Custom - Sony FWD-50PX2 | User Manual - Page 23
Speaker Out: Closed Caption: Display: Color Matrix: HD Mode: RGB Mode: Sync Mode: Remote Input Setting: Standard Off Off Off OY/nPB/PR 1080i DTV H/Comp Selectable Select Set ENTER Exit MENU 4 Press M/m to set "Display" to "Off," then press ENTER. Watching the Picture To display the information - Sony FWD-50PX2 | User Manual - Page 24
of the unit's status On-screen display Significance 640×480 / 60 (e.g.) The selected input signal is computer RGB. 480 / 60i (e.g.) The selected input signal is component video. NTSC (e.g.) The selected input signal is NTSC. Not Supported Signal The input signal is out of the capture range - Sony FWD-50PX2 | User Manual - Page 25
to the PICTURE/SOUND CONTROL menu. Adjusting the Picture While watching the picture, you can adjust contrast, brightness, chroma, phase, and so on, to suit your taste. The adjustments can be carried out for each input signal separately. You can also store the adjusted levels in memory. Set the - Sony FWD-50PX2 | User Manual - Page 26
/SOUND CONTROL Adjust Picture Contrast: Brightness: Chroma: Phase: Sharpness: Noise Reduct.: Dynamic Picture: Color Temp.: 70 50 2O5ff 0Low 5Mid OHifgf h Off Neutral Select Set ENTER Exit MENU 2 Select the Noise Reduct. mode with M/m. Off: The image signal is displayed directly. Low: Sets - Sony FWD-50PX2 | User Manual - Page 27
signal is input. Adjusting the Picture Restoring the Adjust Picture Menu Items to Their Original Settings 1 In the Adjust Picture menu, press M/m to move the cursor (yellow) to "Reset" and press ENTER. The following menu appears on the screen. PICTURE/SOUND CONTROL Adjust Picture Gamma Correct - Sony FWD-50PX2 | User Manual - Page 28
from a video camera or DVD software containing aspect ratio information (ID1 type) The left and right edges of the picture are enlarged to full screen size without changing the top and bottom. Normal Ordinary pictures with a 4:3 aspect ratio (screen aspect ratio: 4:3). Pictures are displayed in - Sony FWD-50PX2 | User Manual - Page 29
entire screen without changing the top and bottom. Normal: Displays the picture without enlarging it. 3 Press ENTER. The menu returns to the SCREEN CONTROL menu. Notes • You cannot set the Aspect while using the PICTURE AND PICTURE function or the Multi Display. • If you set Aspect, the Auto Wide - Sony FWD-50PX2 | User Manual - Page 30
the information on the current input signal displayed in the upper left of the screen when you press DISPLAY on the Remote Commander. Adjusting manually (1) Select the item you want to adjust and press ENTER. The following appears on the screen. (When you select "Dot Phase") SCREEN CONTROL Adjust - Sony FWD-50PX2 | User Manual - Page 31
for an analog computer signal. H Size Select "H Size" with M/m and press ENTER. Adjust the horizontal size of the picture with M/m/ - Sony FWD-50PX2 | User Manual - Page 32
the same time You can show two pictures from different signal sources, such as a computer and a video, side by side. 1 Press MENU. The main menu appears on the screen. PICTURE/SOUND CONTROL Picture Mode: Adjust Picture Adjust Sound Standard Activating a picture or swapping the positions of two - Sony FWD-50PX2 | User Manual - Page 33
"Multi Display" is set to "Off." • You can select any of the following combinations of input signals for the PICTURE AND PICTURE function. However, Option1 and Option2 cannot be combined. Digital RGB Analog RGB Component Y/C Composite Digital RGB Supported Supported Supported Analog RGB Supported - Sony FWD-50PX2 | User Manual - Page 34
Setting up the Multi Display Setting up the Multi Display You can make settings for connecting multiple display units to form a video wall. 1 Press MENU. The main menu appears on the screen. PICTURE/SOUND CONTROL Picture Mode: Adjust Picture Adjust Sound Standard Select Set ENTER Exit MENU - Sony FWD-50PX2 | User Manual - Page 35
Sound Quality When a speaker SS-SP50FW (not supplied) is installed, you can adjust sound treble level, bass level, or balance of the speaker 50) to MAX (50), then press ENTER. M/,: Increases sound treble. m/ - Sony FWD-50PX2 | User Manual - Page 36
to "CUSTOM SETUP" and press ENTER. The CUSTOM SETUP menu appears on the screen. CUSTOM SETUP Power Saving: Speaker Out: Closed Caption: Display: Color Matrix: HD Mode: RGB Mode: Sync Mode: Remote Input Setting: Standard Off Off Off Y/PB/PR 1080i DTV H/Comp Selectable Select Set ENTER Exit MENU - Sony FWD-50PX2 | User Manual - Page 37
Clock Set: 00 : 00 Mon Controlling Power On/Off Automatically (Timer Function) Displaying the time 1 In the TIMER/CLOCK DISPLAY button on the Remote Commander, the signal currently input and the Picture Mode appear. If the information is displayed Sony dealer to have the battery replaced. 37 (GB) - Sony FWD-50PX2 | User Manual - Page 38
Controlling Power On/Off Automatically (Timer Function) On/Off Timer Function 1 In the TIMER/CLOCK menu, press M/m to move the cursor (yellow) to "On/Off Timer" and press ENTER. The following menu appears on the screen. TIMER/CLOCK Clock Set Clock Display: On/Off Timer Off Every day Day of Week - Sony FWD-50PX2 | User Manual - Page 39
displayed on a computer, is displayed for a long time, an after-image (ghosting) may be burned into the display panel. To correct or lessen the severity of this problem menu appears on the display panel. PICTURE/SOUND CONTROL Picture Mode: Adjust Picture Adjust Sound Standard SCREEN SAVER Function - Sony FWD-50PX2 | User Manual - Page 40
to "Orbit" and press ENTER. The following menu appears on the display panel. SCREEN SAVER Pic. Orbit Orbit: Orbit Range: Orbit Cycle: Off the Pic. Orbit function is actuated while the picture is reversed, the reversed picture is displayed changing position. Select Set ENTER Exit MENU 3 - Sony FWD-50PX2 | User Manual - Page 41
on both sides of the picture). You can reduce the chance of image retention and burn-in by adjusting the brightness of the background. 1 In the SCREEN SAVER menu, press M/m to move the cursor (yellow) to "Background" and press ENTER. The following menu appears on the display panel. SCREEN SAVER Pic - Sony FWD-50PX2 | User Manual - Page 42
(DHCP) 1 Press MENU. The main menu appears on the screen. PICTURE/SOUND CONTROL Picture Mode: Adjust Picture Adjust Sound Standard Select Set ENTER Exit MENU 2 Select "INITIAL SETUP/INFORMATION" with M/m and press ENTER. The INITIAL SETUP/INFORMATION menu appears on the screen. INITIAL SETUP - Sony FWD-50PX2 | User Manual - Page 43
MENU 5 Select the next item to be set manually with M/m and repeat the same procedure and press POWER/ STANDBY indicator. The flashing pattern informs you of the display's current condition. If the POWER/STANDBY indicator flashes in red, check the number of flashes and contact your authorized Sony - Sony FWD-50PX2 | User Manual - Page 44
MENU 2 Select "CUSTOM SETUP" and press ENTER. The following appears on the screen. CUSTOM SETUP Power Saving: Speaker Out: Closed Caption: Display: Color Matrix: HD Mode: RGB Mode: Sync Mode: Remote Input Setting: Standard Off Off Off Y/PB/PR 1080i DTV H/Comp Selectable Select Set ENTER Exit - Sony FWD-50PX2 | User Manual - Page 45
Before requesting service, please check the following points. If the problem persists, contact your local Sony dealer. Troubleshooting Problem 1 No picture (Power indicator is lit.) 2 Colors do not display properly. Cause A different input is selected. In this case, the power indicator lights - Sony FWD-50PX2 | User Manual - Page 46
Troubleshooting Problem 3 The screen goes dark after a short time. 4 The display power or the screen turns off after a short time. 5 The picture jumps to a different position sometimes. 6 Horizontal lines of static disturb the picture. Cause The "Auto Dimmer" screen saver is set to "On". Remedy - Sony FWD-50PX2 | User Manual - Page 47
Troubleshooting Problem 7 The remote control does not work. Cause In the remote control settings, the "Control Mode" is set to "Display Unit Only". Remedy Using the control buttons on the top of the display, check the setting by opening the main menu and then selecting "CUSTOM SETUP" t "Remote" t - Sony FWD-50PX2 | User Manual - Page 48
Specifications Video processing Preset signal See page 24 (GB). Sampling rate 13.5 MHz to 140 MHz Panel system AC-type Plasma Display Panel Display resolution 1366 dots (horizontal) × 768 lines (vertical) Pixel pitch 0.81 (horizontal) × 0.81 (vertical) mm (1⁄16 × 1⁄16 inches) Picture - Sony FWD-50PX2 | User Manual - Page 49
conversion adaptor (1) Cable holder (6) Remote Commander RM-980 (1) Size AAA (R03) batteries (2) Operating instructions (1) Optional accessories Display stand SU-50FW Speaker SS-SP50FW Option Adaptors for system expansion, BKM-FW series Design and specifications are subject to change without - Sony FWD-50PX2 | User Manual - Page 50
141-0001 6-7-35 Sony Corporation Printed in Korea
-
 1
1 -
 2
2 -
 3
3 -
 4
4 -
 5
5 -
 6
6 -
 7
7 -
8
-
9
-
10
-
11
-
12
-
13
-
14
-
15
-
16
-
17
-
18
-
19
-
20
-
21
-
22
-
23
-
24
-
25
-
26
-
27
-
28
-
29
-
30
-
31
-
32
-
33
-
34
-
35
-
36
-
37
-
38
-
39
-
40
-
41
-
42
-
43
-
44
-
45
-
46
-
47
-
48
-
49
-
50
 |
 |
FWD-50PX2/50PX2A
2-651-871-
02
(1)
2005 Sony Corporation
Operating Instructions
Mode d’emploi
Bedienungsanleitung
Manual de instrucciones
Istruzioni per l’uso
GB
FR
DE
ES
IT
取扱説明書
FWD-50PX2/50PX2A
Flat Panel Display
JP
この取扱説明書には、事故を防ぐための重要な注意事項と製品の取り扱
いかたを示してあります。
この取扱説明書をよくお読みのうえ、
製品を
安全にお使いください。お読みになったあとは、いつでも見られるとこ
ろに必ず保管してください。
お買い上げいただきありがとうございます。
電気製品は安全のための注意事項を守らないと、
火災や人身事故になることがあります。
CS