Sony HDR CX7 Operating Guide
Sony HDR CX7 - Handycam Camcorder - 1080i Manual
 |
UPC - 027242720282
View all Sony HDR CX7 manuals
Add to My Manuals
Save this manual to your list of manuals |
Sony HDR CX7 manual content summary:
- Sony HDR CX7 | Operating Guide - Page 1
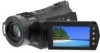
Digital HD Video Camera Recorder Operating Guide HDR-CX7/CX7K 3-214-660-11(1) For details on the advanced operations, please refer to "Handycam Handbook" (PDF). © 2007 Sony Corporation - Sony HDR CX7 | Operating Guide - Page 2
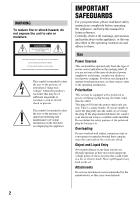
servicing) instructions in the literature accompanying the appliance. IMPORTANT SAFEGUARDS For your protection, please read these safety instructions completely before operating the appliance, and keep this manual from battery power, or other sources, refer to the operating instructions. - Sony HDR CX7 | Operating Guide - Page 3
. Accessories Do instructions. Improper adjustment of other controls may result in damage and will often require extensive work by a qualified technician to restore the set to normal operation. - When the set exhibits a distinct change in performance - this indicates a need for service. Servicing - Sony HDR CX7 | Operating Guide - Page 4
not handle damaged or leaking Lithium-Ion batteries. Owner's Record The model and serial Trade Name: SONY Model No.: HDR-CX7 Responsible Party: Sony Electronics Inc. . Notes HDR-CX7 is to be used with the Handycam Station Model DCRA instructions, may cause harmful interference to radio - Sony HDR CX7 | Operating Guide - Page 5
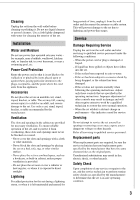
" in this manual. Using the camcorder • The camcorder is not dustproofed battery pack or AC Adaptor from the camcorder. - to apply mechanical shock or vibration to the camcorder HD (high definition) images recorded on the "Memory Stick PRO Duo" on other devices, the device must comply with the AVCHD - Sony HDR CX7 | Operating Guide - Page 6
language are used for illustrating the operating procedures. Change the screen language before using your camcorder if necessary (p. 12). About this manual • The images of the LCD screen used in this manual for illustration purposes are captured using a digital still camera, and therefore may appear - Sony HDR CX7 | Operating Guide - Page 7
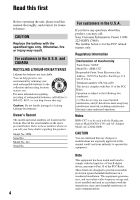
use 5 Getting Started Step 1: Checking supplied items 8 Step 2: Charging the battery pack 9 Step 3: Turning the power on, and setting the date and a computer Viewing "Handycam Handbook" (PDF 27 What you can do with a Windows computer 28 Troubleshooting Troubleshooting 32 Additional Information - Sony HDR CX7 | Operating Guide - Page 8
(1) (p. 17) A/V connecting cable (1) (p. 17) USB cable (1) (p. 29) CD-ROM "Handycam Application Software" (1) (p. 27) - Picture Motion Browser (Software) - Picture Motion Browser Guide - Handycam Handbook (PDF) "Operating Guide" (This manual) (1) HDR-CX7K "Memory Stick PRO Duo" 4 GB (1) (p. 13) 8 - Sony HDR CX7 | Operating Guide - Page 9
, all the way to the bottom. The /CHG (charge) lamp lights up and charging starts. The /CHG (charge) lamp turns off when the battery pack is fully charged. Remove the camcorder from the Handycam Station. 3 Slide the POWER switch in the direction of the arrow to OFF (CHG) (the default setting). 9 - Sony HDR CX7 | Operating Guide - Page 10
charged battery pack. 10 "HD" stands for high definition image quality, and "SD" stands for standard image quality. (Unit:min.) HD SD will not be supplied from the battery as long as the AC Adaptor is connected to the DC IN jack of your camcorder or the Handycam Station, even when the power cord - Sony HDR CX7 | Operating Guide - Page 11
, such as between a wall and furniture. • Do not short-circuit the DC plug of the AC Adaptor or battery terminal with any metallic objects. This may cause a malfunction. • Even if your camcorder is turned off, AC power (house current) is still supplied to it while connected to the wall outlet via - Sony HDR CX7 | Operating Guide - Page 12
Step 3: Turning the power on, and setting the date and time Touch the button on the LCD screen. POWER switch When using the camcorder for the first time, the [CLOCK SET] screen appears on the LCD screen. 1 While pressing the green button, slide the POWER switch repeatedly in the - Sony HDR CX7 | Operating Guide - Page 13
is reading/writing data. To prevent image data from being damaged, do not: - eject the "Memory Stick PRO Duo" - remove the battery pack or AC Adaptor - shake or knock your camcorder • Do not open the Memory Stick Duo cover during recording. • If you force the "Memory Stick PRO Duo" into the slot - Sony HDR CX7 | Operating Guide - Page 14
Start recording. Movies Still Images Press START/STOP D (or B). To stop recording, press START/STOP again. • See "Handycam Handbook" (PDF) to display the image of SD (standard definition) image quality. Press PHOTO E lightly to adjust the focus A (a beep sounds), then press it fully B (a shutter - Sony HDR CX7 | Operating Guide - Page 15
time of Sony "Memory Stick PRO Duo" is as follows with recording mode [HD SP] Handycam operation, press EASY again. b Notes • You cannot use some buttons/functions during Easy Handycam operation. Adjusting the LCD panel Open the LCD panel 90 degrees to the camcorder (1), then rotate it to the best - Sony HDR CX7 | Operating Guide - Page 16
4 Returns to the recording screen 5 HD (high definition) image quality movie tab* 6 Still image tab 7 (OPTION) 8 Searches for images by date * appears for movies with SD (standard definition) image quality. 1 Slide the POWER switch A to turn on your camcorder. 2 Press the (VIEW IMAGES) B (or - Sony HDR CX7 | Operating Guide - Page 17
to the instruction manuals of the TV. r Connect your camcorder and TV referring to [TV CONNECT Guide]. Touch (HOME) t (OTHERS) t [TV CONNECT Guide]. r Make the required output settings on your camcorder. HDMI OUT A/V OUT Open the jack cover. Handycam Station b Notes • Only the Handycam Station is - Sony HDR CX7 | Operating Guide - Page 18
Names and functions of parts and controls Handycam Station 18 1 Power zoom lever To use the 14) 4 START/STOP button (p. 14) 5 Battery pack (p. 9) 6 (Movie)/ (Still) mode lamps (p. 14) 7 /CHG (charge) lamp Lights up while charging your camcorder, or flickers while charging the flash, and remains - Sony HDR CX7 | Operating Guide - Page 19
panel To record in mirror mode, open the LCD screen 90 degrees to the camcorder (1), then rotate it 180 degrees to the lens side (2). qf (HOME) button during recording. Flashes when remaining "Memory Stick PRO Duo" space or battery power is low. es Remote sensor/Infrared port Receive the signal from - Sony HDR CX7 | Operating Guide - Page 20
a video light, a flash, or a microphone. The accessory can be turned on or off as you operate the POWER switch on your camcorder. eg DISC BURN button Create a disc by connecting the camcorder to a computer. For details, see "Picture Motion Browser Guide." eh Interface connector ej (USB) jack Connect - Sony HDR CX7 | Operating Guide - Page 21
recording/playback Recording movies Recording still images Viewing movies Viewing still images A Recording quality (HD/SD) and Recording mode (XP/HQ/SP/LP) B HOME button C Remaining battery (approx.) D Recording status ([STBY] (standby) or [REC] (recording)) E Counter (hour/minute/second) F OPTION - Sony HDR CX7 | Operating Guide - Page 22
appear during recording/playback to indicate the settings of your camcorder. Upper left Center Upper right Bottom Upper left Indicator Center Meaning FADER LCD backlight off Meaning Picture effect Digital effect Manual focus SCENE SELECTION . n Backlight White balance SteadyShot off EXPOSURE - Sony HDR CX7 | Operating Guide - Page 23
the mouse on a computer. Various functions are displayed in the context of the operation. For details, see "Handycam Handbook" (PDF). 1 While using your camcorder, touch (OPTION) on the screen. 4 Follow the guide on the screen for further operation. z Tips • If the item is not on the screen, touch - Sony HDR CX7 | Operating Guide - Page 24
of your camcorder at the time. • Some items appear without a tab. • The OPTION MENU cannot be used during Easy Handycam operation ERASE ALL], MOVE] PRINT 24 COMPUTER [ COMPUTER], [DISC BURN] TV CONNECT Guide*1 (MANAGE MEMORY STICK) category FORMAT*1 INFO REPAIRIMG.DB F. (SETTINGS) category MOVIE - Sony HDR CX7 | Operating Guide - Page 25
[DEMO MODE], [REC LAMP], [CALIBRATION], [A.SHUT OFF], [REMOTE CTRL] *1 You can set these items also during Easy Handycam operation (p. 15). *2 The menu name is changed to [SOUND SETTINGS] during Easy Handycam operation (p. 15). Items of the OPTION MENU Items you can set only on the OPTION MENU will - Sony HDR CX7 | Operating Guide - Page 26
"Picture Motion Browser Guide." Creating a disc with One Touch (One Touch Disc Burn) You can save images recorded on the camcorder directly to a Saving images by connecting your camcorder to other devices You can dub images to VCR or DVD/HDD devices. For details, see "Handycam Handbook" (PDF). 1 On - Sony HDR CX7 | Operating Guide - Page 27
Handbook" (PDF) For advanced use of your camcorder, see "Handycam Handbook" (PDF). To view "Handycam Handbook" (PDF), you need to install Adobe Reader on your computer. For Windows users 1 Turn on the computer. 2 Place the CD-ROM (supplied) in the - Sony HDR CX7 | Operating Guide - Page 28
For details on the functions of "Picture Motion Browser," see "Picture Motion Browser Guide" (p. 30). b Notes • This camcorder captures high definition footage in the AVCHD format. Using the enclosed PC software, high definition footage can be copied onto DVD media. However, DVD media containing - Sony HDR CX7 | Operating Guide - Page 29
Motion Browser" does not support 5.1ch surround sound reproduction. The sound is reproduced in 2ch sound. • If you use a Notebook PC, connect it to the AC Adaptor as the power source when you view or edit movies recorded in HD (high definition) format. Otherwise, the software will not work properly - Sony HDR CX7 | Operating Guide - Page 30
-click to start "Picture Motion Browser Guide." x Connecting your camcorder to a computer To connect your camcorder to a computer, follow the steps below. 1 Connect the AC Adaptor to the Handycam Station and a wall outlet. 2 Set the camcorder onto the Handycam Station, then slide the POWER switch to - Sony HDR CX7 | Operating Guide - Page 31
Recommended USB cable connection To assure the proper functioning of your camcorder, connect your camcorder to a computer as below. • Connect the USB ports of the Handycam Station and a computer using the USB cable. Do not connect anything to other USB ports of a computer. • When connecting to a - Sony HDR CX7 | Operating Guide - Page 32
any problems using your camcorder, use the following table to troubleshoot the problem. If the problem persists, disconnect the power source and contact your Sony dealer. Menu items are grayed out. • There are some functions you cannot activate simultaneously. For details, see "Handycam Handbook - Sony HDR CX7 | Operating Guide - Page 33
Sony service facility. C:04:00 C:(or E:) ss:ss (Self-diagnosis display) C:04:ss • The battery pack is not an "InfoLITHIUM" battery pack (H series). Use an "InfoLITHIUM" battery pack (H series) (p. 9). • Connect the DC plug of the AC Adaptor to the DC IN jack of the Handycam Station or your camcorder - Sony HDR CX7 | Operating Guide - Page 34
-shake warning) • The amount of light is not sufficient, so camera-shake easily occurs. Use the flash. • The camcorder is unsteady, so camerashake easily occurs. Hold the camcorder steady with both hands and record the image. However, note that the camera-shake warning indicator does not disappear - Sony HDR CX7 | Operating Guide - Page 35
to direct sunlight. This damages the LCD screen. • Operate your camcorder on DC 6.8 V/7.2 V (battery pack) or DC 8.4 V (AC Adaptor). • For DC or AC operation, use the accessories recommended in these operating instructions. • Do not let your camcorder get wet, for example, from rain or sea water. If - Sony HDR CX7 | Operating Guide - Page 36
battery Your camcorder has a pre-installed rechargeable battery to battery becomes weak, the operating distance of the Remote Commander may shorten, or the Remote Commander may not function properly. In this case, replace the battery with a Sony CR2025 lithium battery. Use of another battery - Sony HDR CX7 | Operating Guide - Page 37
1080/60i specification Recording format Movie (HD): AVCHD 1080/60i Movie (SD): MPEG2-PS camcorder's setting information at the time of recording. *2 The unique pixel array of Sony 220) General Power requirements DC 6.8 V/7.2 V (battery pack) DC 8.4 V (AC Adaptor) Average power consumption - Sony HDR CX7 | Operating Guide - Page 38
450 g (15 oz) including the NP-FH60 rechargeable battery pack, and a "Memory Stick PRO Duo" Handycam Station DCRA-C191 Input/Output connectors Audio/Video output 10 pin and specifications are subject to change without notice. • Your camcorder is produced under the license of Dolby Laboratories. 38 - Sony HDR CX7 | Operating Guide - Page 39
" is a trademark of Sony Corporation. • "InfoLITHIUM" is a trademark of Sony Corporation. • Dolby and the double-D symbol are trademarks of Dolby Laboratories. • Dolby Digital 5.1 Creator is a trademark of Dolby Laboratories. • HDMI, the HDMI logo and High-Definition Multimedia Interface are - Sony HDR CX7 | Operating Guide - Page 40
US Additional information on this product and answers to frequently asked questions can be found at our Customer Support Website. Printed on 70% or more recycled paper using VOC (Volatile Organic Compound)free vegetable oil based ink. Printed in Japan
-
 1
1 -
 2
2 -
 3
3 -
 4
4 -
 5
5 -
 6
6 -
 7
7 -
8
-
9
-
10
-
11
-
12
-
13
-
14
-
15
-
16
-
17
-
18
-
19
-
20
-
21
-
22
-
23
-
24
-
25
-
26
-
27
-
28
-
29
-
30
-
31
-
32
-
33
-
34
-
35
-
36
-
37
-
38
-
39
-
40
 |
 |
3-214-660-
11
(1)
© 2007 Sony Corporation
Digital HD Video Camera Recorder
Operating Guide
HDR-CX7/CX7K
For details on the advanced operations, please refer to
“Handycam Handbook” (PDF).