Sony HDR CX7 Operating Guide - Page 13
Step 4: Inserting a “Memory Stick PRO Duo - format
 |
UPC - 027242720282
View all Sony HDR CX7 manuals
Add to My Manuals
Save this manual to your list of manuals |
Page 13 highlights
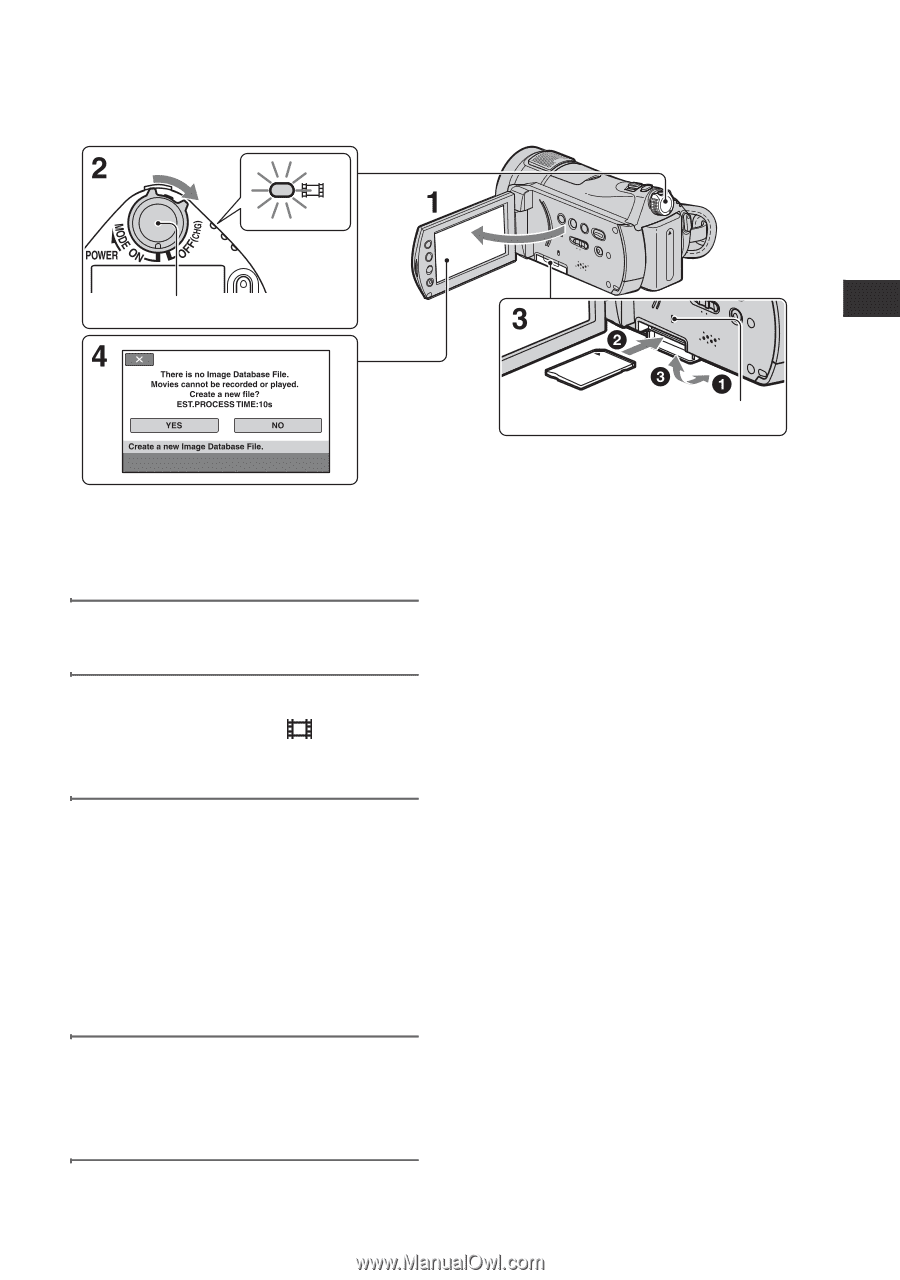
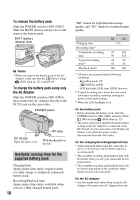
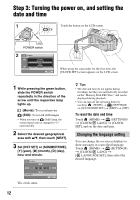
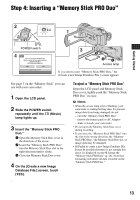
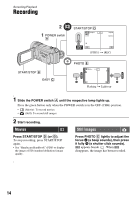
Step 4: Inserting a "Memory Stick PRO Duo" Getting Started POWER switch Access lamp If you insert a new "Memory Stick PRO Duo," the [Create a new Image Database File.] screen appears. See page 5 on the "Memory Stick" you can use with your camcorder. 1 Open the LCD panel. 2 Slide the POWER switch repeatedly until the (Movie) lamp lights up. 3 Insert the "Memory Stick PRO Duo." 1 Open the Memory Stick Duo cover in the direction of the arrow. 2 Insert the "Memory Stick PRO Duo" into the Memory Stick Duo slot in the right direction until it clicks. 3 Close the Memory Stick Duo cover. 4 On the [Create a new Image Database File.] screen, touch [YES]. To eject a "Memory Stick PRO Duo" Open the LCD panel and Memory Stick Duo cover, lightly push the "Memory Stick PRO Duo" in once. b Notes • When the access lamp is lit or flashing, your camcorder is reading/writing data. To prevent image data from being damaged, do not: - eject the "Memory Stick PRO Duo" - remove the battery pack or AC Adaptor - shake or knock your camcorder • Do not open the Memory Stick Duo cover during recording. • If you force the "Memory Stick PRO Duo" into the slot in the wrong direction, the "Memory Stick PRO Duo," the Memory Stick Duo slot, or image data may be damaged. • If [Failed to create a new Image Database File. It may be possible that there is not enough free space.] is displayed on step 4, format the "Memory Stick PRO Duo" (p. 26). Note that formatting will delete all data recorded on the "Memory Stick PRO Duo." 13
-
 1
1 -
2
-
3
-
4
-
5
-
6
-
7
-
 8
8 -
 9
9 -
 10
10 -
 11
11 -
 12
12 -
 13
13 -
 14
14 -
 15
15 -
 16
16 -
 17
17 -
 18
18 -
19
-
20
-
21
-
22
-
23
-
24
-
25
-
26
-
27
-
28
-
29
-
30
-
31
-
32
-
33
-
34
-
35
-
36
-
37
-
38
-
39
-
40
 |
 |