Sony VGX-TP20EB User Guide - Page 26
CONNECT, The connect indicator
 |
View all Sony VGX-TP20EB manuals
Add to My Manuals
Save this manual to your list of manuals |
Page 26 highlights
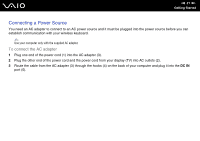
3 Insert the supplied four AA batteries into the battery compartment as illustrated below: n 26 N Getting Started 4 Turn on the computer. 5 Slide the power switch (2) on the keyboard to the ON position. 6 Press the CONNECT button (3) on the front of the computer. 7 Press the CONNECT button (4) on the bottom of the keyboard. The connect indicator turns on in the LCD window on the keyboard when connection is established between the computer and the keyboard. If not, repeat the procedure. ! Steps 6 and 7 must be completed within 10 seconds of each other. If the wireless keyboard is left unused for 20 minutes or longer, the connect indicator will turn off. This could indicate that the connection between your computer and the keyboard is lost. Press the Fn key to check that the connect indicator turns on before using the keyboard.
-
 1
1 -
2
-
3
-
4
-
5
-
6
-
7
-
8
-
9
-
10
-
11
-
12
-
13
-
14
-
15
-
16
-
17
-
18
-
19
-
20
-
 21
21 -
 22
22 -
 23
23 -
 24
24 -
 25
25 -
 26
26 -
 27
27 -
 28
28 -
 29
29 -
 30
30 -
 31
31 -
32
-
33
-
34
-
35
-
36
-
37
-
38
-
39
-
40
-
41
-
42
-
43
-
44
-
45
-
46
-
47
-
48
-
49
-
50
-
51
-
52
-
53
-
54
-
55
-
56
-
57
-
58
-
59
-
60
-
61
-
62
-
63
-
64
-
65
-
66
-
67
-
68
-
69
-
70
-
71
-
72
-
73
-
74
-
75
-
76
-
77
-
78
-
79
-
80
-
81
-
82
-
83
-
84
-
85
-
86
-
87
-
88
-
89
-
90
-
91
-
92
-
93
-
94
-
95
-
96
-
97
-
98
-
99
-
100
-
101
-
102
-
103
-
104
-
105
-
106
-
107
-
108
-
109
-
110
-
111
-
112
-
113
-
114
-
115
-
116
-
117
-
118
-
119
-
120
-
121
-
122
-
123
-
124
-
125
-
126
-
127
-
128
-
129
-
130
-
131
-
132
-
133
-
134
-
135
-
136
-
137
-
138
-
139
-
140
-
141
-
142
-
143
-
144
-
145
-
146
-
147
-
148
-
149
-
150
-
151
-
152
-
153
-
154
-
155
-
156
-
157
-
158
-
159
-
160
-
161
-
162
-
163
-
164
-
165
-
166
-
167
-
168
-
169
-
170
-
171
-
172
-
173
-
174
-
175
 |
 |
