Sony XAV-9000ES Help Guide - Page 13
Performing Initial Settings
 |
View all Sony XAV-9000ES manuals
Add to My Manuals
Save this manual to your list of manuals |
Page 13 highlights
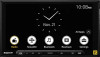
Help Guide In-Car Receiver XAV-9000ES Performing Initial Settings You need to perform initial settings before operating the unit for the first time, after replacing the car battery, or changing connections. If the initial settings screen does not appear when you turn on the unit, perform the factory reset to initialize the unit. 1 Touch [Language], then set the display language. To return to the previous display, touch (back). 2 Touch [Demo Mode] repeatedly to select [Off] to disable the demonstration mode. 3 Touch [Set Date/Time], then set the date and time. To return to the previous display, touch (back). 4 Touch [Speaker Configuration], then select the speaker system. To return to the previous display, touch (back) or [Cancel]. When connecting the iDataLink Maestro module (not supplied) and you are using the factory amplifier, set [Speaker Configuration] to [Front & Rear]. (XAV-9000ES(UC)) 5 Touch [Radio Tuning Steps], then set the radio frequency depending on the receiving area. (XAV9000ES(E)/XAV-9000ES(E17)) 6 Touch [OK]. The startup caution appears. 7 Read through the startup caution, then if you accept all conditions, touch [Close]. The setting is complete. This setting can be further configured in the setting menu. Related Topic Device Connection Sound Customize Application System 5-046-248-11(1) Copyright 2023 Sony Corporation 13
-
 1
1 -
2
-
3
-
4
-
5
-
6
-
7
-
 8
8 -
 9
9 -
 10
10 -
 11
11 -
 12
12 -
 13
13 -
 14
14 -
 15
15 -
 16
16 -
 17
17 -
 18
18 -
19
-
20
-
21
-
22
-
23
-
24
-
25
-
26
-
27
-
28
-
29
-
30
-
31
-
32
-
33
-
34
-
35
-
36
-
37
-
38
-
39
-
40
-
41
-
42
-
43
-
44
-
45
-
46
-
47
-
48
-
49
-
50
-
51
-
52
-
53
-
54
-
55
-
56
-
57
-
58
-
59
-
60
-
61
-
62
-
63
-
64
-
65
-
66
-
67
-
68
-
69
-
70
-
71
-
72
-
73
-
74
-
75
-
76
-
77
-
78
-
79
-
80
-
81
-
82
-
83
-
84
-
85
-
86
-
87
-
88
-
89
-
90
-
91
-
92
-
93
-
94
-
95
-
96
-
97
-
98
-
99
-
100
-
101
-
102
-
103
-
104
-
105
-
106
-
107
-
108
-
109
-
110
-
111
-
112
-
113
-
114
-
115
-
116
-
117
-
118
-
119
-
120
-
121
-
122
-
123
-
124
 |
 |
