Sony XAV C1 Installation/Connections - Page 13
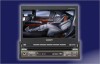
Nissan cars, Toyota cars illustration shows an example for a Toyota car, Notes - car stereo
 |
UPC - 027242693678
View all Sony XAV C1 manuals
Add to My Manuals
Save this manual to your list of manuals |
Page 13 highlights
Toyota cars (illustration shows an example for a Toyota car) Align the brackets of the factory-installed car stereo with the mounting holes marked "T" on the side of the main unit, and use the supplied screws to fasten the brackets. For Toyota cars, the supplied screws 6 should be used. 6 XAV-A1 XAV-C1 Bracket of factory-installed car stereo Notes • Do not press the front panel buttons of the unit during installation and do not apply strong force. • Do not place any objects on top of the unit. • If a salient of the genuine bracket touches the unit due to its figure, and makes attachment hard, process the bracket by scraping the salient off. Screws of factoryinstalled car stereo bracket Nissan cars Align the brackets of the factory-installed car stereo with the mounting holes marked "N" on the side of the main unit, and use the supplied pan-head screws 6 to fasten the brackets. 6 XAV-A1 XAV-C1 Bracket of factory-installed car stereo Screws of factoryinstalled car stereo bracket * Be sure to use only the supplied pan-head screws 6 for installation. If any other screws are used, make sure they conform to the requirements shown below. Using longer screws can cause internal damage to the unit. 5 mm 6 mm Damage can also occur if the screws are used directly on the unit without the brackets of the factory-installed car stereo. 13
-
 1
1 -
2
-
3
-
4
-
5
-
6
-
7
-
 8
8 -
 9
9 -
 10
10 -
 11
11 -
 12
12 -
 13
13 -
 14
14 -
 15
15 -
 16
16 -
 17
17 -
 18
18 -
19
-
20
-
21
-
22
-
23
-
24
-
25
-
26
-
27
-
28
-
29
-
30
-
31
-
32
-
33
-
34
-
35
-
36
-
37
-
38
-
39
-
40
-
41
-
42
-
43
-
44
 |
 |
