Stihl BR 550 Product Instruction Manual - Page 7
THE USE OF THE POWER TOOL, Transporting the Power Tool, Fueling Instructions, Toolless cap with grip - manual
 |
View all Stihl BR 550 manuals
Add to My Manuals
Save this manual to your list of manuals |
Page 7 highlights
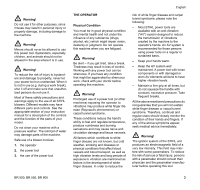
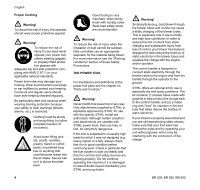
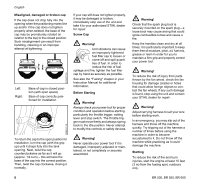
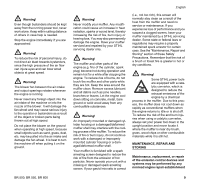
THE USE OF THE POWER TOOL Transporting the Power Tool Warning! Always switch off the engine before taking the machine off your back and putting it down. When transporting it in a vehicle, properly secure it to prevent turnover, fuel spillage and damage to the unit. Fuel Your STIHL power tool uses an oilgasoline mixture for fuel (see the chapter on "Fuel" of your instruction manual). Warning! Gasoline is an extremely flammable fuel. If spilled and ignited by a spark or other ignition source, it can cause fire and serious burn injury or property damage. Use extreme caution when handling gasoline or fuel mix. Do not smoke or bring any fire or flame near the fuel or the power tool. Note that combustible fuel vapor may escape from the fuel system. Fueling Instructions Warning! To reduce the risk of serious injury from burns, never attempt to refuel the unit until it has been completely removed from the operator. Warning! Fuel your power tool in well-ventilated areas, outdoors. Always shut off the engine and allow it to cool before refueling. Gasoline vapor pressure may build up inside the fuel tank depending on the fuel used, the weather conditions and the tank venting system. In order to reduce the risk of burns and other personal injury from escaping gas vapor and fumes, remove the fuel filler cap on your power tool carefully so as to allow any pressure build-up in the tank to release slowly. Never remove the fuel filler cap while the engine is running. Select bare ground for fueling and move at least 10 feet (3 m) from the fueling spot before starting the engine. Wipe off any spilled fuel before starting your machine. Warning! Check for fuel leakage while refueling and during operation. If fuel leakage is found, do not start or run the engine until the leak is fixed and any spilled fuel has been wiped away. Take care not to get fuel on your clothing. If this happens, change your clothing immediately. Different models may be equipped with different fuel caps. English Warning! In order to reduce the risk of fuel spillage and fire from an improperly tightened fuel cap, correctly position and tighten the fuel cap in the fuel tank opening. Toolless cap with grip To do this with this STIHL cap, raise the grip on the top of the cap until it is upright at a 90° angle. Insert the cap in the fuel tank opening with the raised positioning marks on the grip of the cap and on the fuel tank opening lining up. Using the grip, press the cap down firmly while turning it clockwise as far as it will go (approx. 1/4 turn). Fold the grip flush with the top of the cap. Grip the cap and check for tightness. If the grip does not lie completely flush with the cap and the detent on the grip does not fit in the corresponding recess in the filler opening, or if the cap is loose in the filler opening, the cap is not properly seated and tightened and you must repeat the above steps. 452BA116 KN BR 500, BR 550, BR 600 5
-
 1
1 -
 2
2 -
 3
3 -
 4
4 -
 5
5 -
 6
6 -
 7
7 -
 8
8 -
 9
9 -
 10
10 -
 11
11 -
 12
12 -
13
-
14
-
15
-
16
-
17
-
18
-
19
-
20
-
21
-
22
-
23
-
24
-
25
-
26
-
27
-
28
-
29
-
30
-
31
-
32
-
33
-
34
-
35
-
36
-
37
-
38
-
39
-
40
-
41
-
42
-
43
-
44
-
45
-
46
-
47
-
48
-
49
-
50
-
51
-
52
-
53
-
54
-
55
-
56
-
57
-
58
-
59
-
60
-
61
-
62
-
63
-
64
-
65
-
66
-
67
-
68
-
69
-
70
-
71
-
72
-
73
-
74
-
75
-
76
-
77
-
78
-
79
-
80
-
81
-
82
-
83
-
84
-
85
-
86
-
87
-
88
 |
 |
