TP-Link AC1350 Archer C58EU V1 User Guide - Page 11
Method 1: Wired, Method 2: Wirelessly, Method 3: Use the WPS button
 |
View all TP-Link AC1350 manuals
Add to My Manuals
Save this manual to your list of manuals |
Page 11 highlights
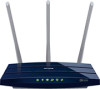
Chapter 2 Smart Device 5 ) Verify that the hardware connection is correct by checking these LEDs. Power 2.4G 5G Internet On On On On Tips: If 2.4GHz LED and 5GHz LED are off, press the Wi-Fi button for about 2 seconds, and then check the LEDs again in a few seconds. 2. Connect your computer to the router. • Method 1: Wired Turn off the Wi-Fi on your computer and connect the devices as shown below. Ethernet Cable • Method 2: Wirelessly 1 ) Find the SSID (Network Name) and Wireless Password/PIN printed on the label at the bottom of the router. 2 ) Click the network icon of your computer or go to Wi-Fi Setting of your smart device, and then select the SSID to join the network. Computer Connections are available Smart Device < Settings Wi-Fi Wireless Network Connection TP-LINK_XXXX TP-LINK_XXXX_5G √ Connect automatically Connect Wi-Fi CHOOSE A NETWORK... TP-LINK_XXXX TP-LINK_XXXX_5G Other... • Method 3: Use the WPS button Wireless devices that support WPS, including Android phones, tablets, most USB network cards, can be connected to your router through this method. (WPS is not supported by iOS devices.) Note: The WPS function cannot be configured if the wireless function of the router is disabled. Also, the WPS function will be disabled if your wireless encryption is WEP. Please make sure the wireless function is enabled and is configured with the appropriate encryption before configuring the WPS. 1. Tab the WPS icon on the device's screen. 8
-
 1
1 -
2
-
3
-
4
-
5
-
 6
6 -
 7
7 -
 8
8 -
 9
9 -
 10
10 -
 11
11 -
 12
12 -
 13
13 -
 14
14 -
 15
15 -
 16
16 -
17
-
18
-
19
-
20
-
21
-
22
-
23
-
24
-
25
-
26
-
27
-
28
-
29
-
30
-
31
-
32
-
33
-
34
-
35
-
36
-
37
-
38
-
39
-
40
-
41
-
42
-
43
-
44
-
45
-
46
-
47
-
48
-
49
-
50
-
51
-
52
-
53
-
54
-
55
-
56
-
57
-
58
-
59
-
60
-
61
-
62
-
63
-
64
-
65
-
66
-
67
-
68
-
69
-
70
-
71
-
72
-
73
-
74
-
75
-
76
-
77
-
78
-
79
-
80
-
81
-
82
-
83
-
84
-
85
-
86
-
87
-
88
-
89
-
90
-
91
-
92
 |
 |
