TP-Link TD-W8951ND User Guide - Page 44
TD-W8951ND, Firewall, Advanced Setup, Routing, ADD ROUTE, Destination IP Address, IP Subnet Mask, - dmz
 |
View all TP-Link TD-W8951ND manuals
Add to My Manuals
Save this manual to your list of manuals |
Page 44 highlights
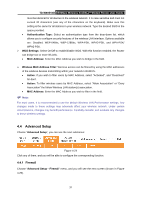
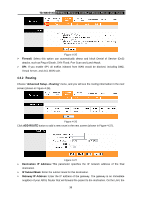
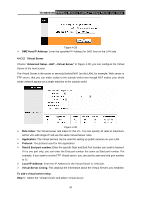
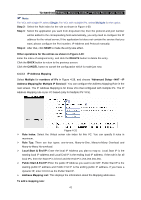
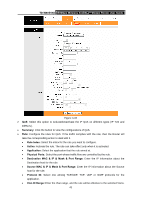
TD-W8951ND 150Mbps Wireless N ADSL2+ Modem Router User Guide Figure 4-25 ¾ Firewall: Select this option can automatically detect and block Denial of Service (DoS) attacks, such as Ping of Death, SYN Flood, Port Scan and Land Attack. ¾ SPI: If you enable SPI, all traffics initiated from WAN would be blocked, including DMZ, Virtual Server, and ACL WAN side. 4.4.2 Routing Choose "Advanced Setup→Routing" menu, and you will see the routing information in the next screen (shown in Figure 4-26). Figure 4-26 Click ADD ROUTE button to add a new route in the next screen (shown in Figure 4-27). Figure 4-27 ¾ Destination IP Address: This parameter specifies the IP network address of the final destination. ¾ IP Subnet Mask: Enter the subnet mask for this destination. ¾ Gateway IP Address: Enter the IP address of the gateway. The gateway is an immediate neighbor of your ADSL Router that will forward the packet to the destination. On the LAN, the 38
-
 1
1 -
2
-
3
-
4
-
5
-
6
-
7
-
8
-
9
-
10
-
11
-
12
-
13
-
14
-
15
-
16
-
17
-
18
-
19
-
20
-
21
-
22
-
23
-
24
-
25
-
26
-
27
-
28
-
29
-
30
-
31
-
32
-
33
-
34
-
35
-
36
-
37
-
38
-
 39
39 -
 40
40 -
 41
41 -
 42
42 -
 43
43 -
 44
44 -
 45
45 -
 46
46 -
 47
47 -
 48
48 -
 49
49 -
50
-
51
-
52
-
53
-
54
-
55
-
56
-
57
-
58
-
59
-
60
-
61
-
62
-
63
-
64
-
65
-
66
-
67
-
68
-
69
-
70
-
71
 |
 |
