TP-Link TD-W8951ND User Guide - Page 47
Public Start & End IP - user manual
 |
View all TP-Link TD-W8951ND manuals
Add to My Manuals
Save this manual to your list of manuals |
Page 47 highlights
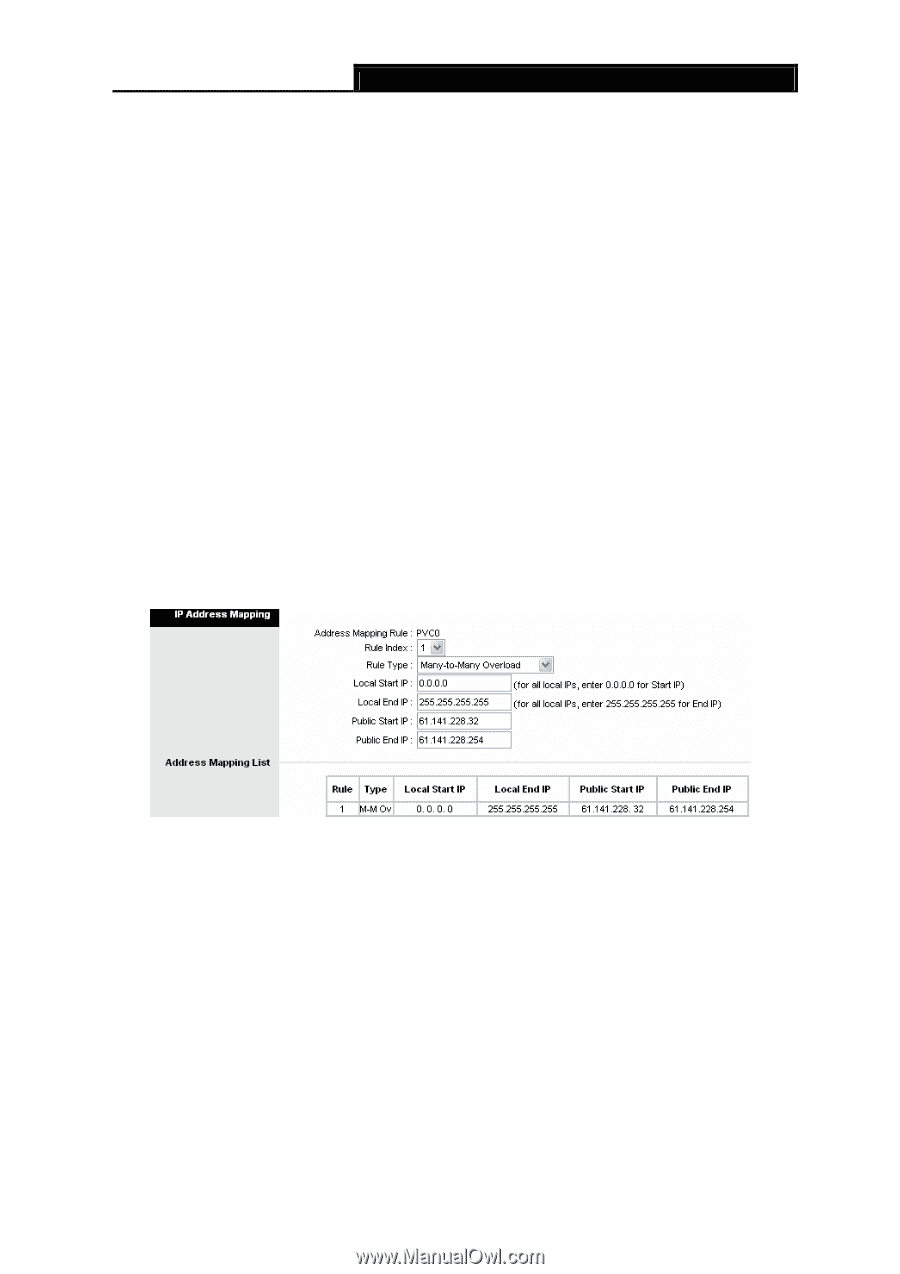
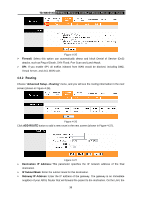
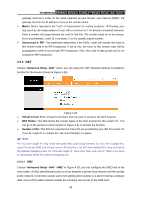
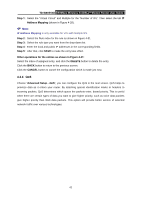
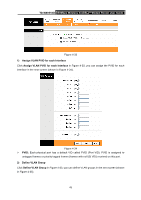
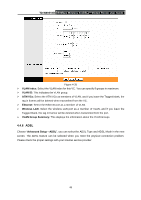
TD-W8951ND 150Mbps Wireless N ADSL2+ Modem Router User Guide ) Note: For VCs with single IP, select Single; For VCs with multiple IPs, select Multiple for the option. Step 2: Select the Rule index for the rule as shown in Figure 4-30. Step 3: Select the application you want from drop-down list, then the protocol and port number will be added to the corresponding field automatically, you only need to configure the IP address for the virtual server; If the application list does not contain the service that you want, please configure the Port number, IP Address and Protocol manually. Step 4: After that, click SAVE to make the entry take effect. Other operations for the entries as shown in Figure 4-30: Enter the index of assigned entry, and click the DELETE button to delete the entry. Click the BACK button to return to the previous screen. Click the CANCEL button to cancel the configuration which is made just now. 4.4.3.3 IP Address Mapping Select Multiple for numbers of IPs in Figure 4-28, and choose "Advanced Setup→NAT→IP Address Mapping(for Multiple IP Service)". You can configure the Address Mapping Rule in the next screen. The IP Address Mapping is for those VCs that configured with multiple IPs. The IP Address Mapping rule is per-VC based (only for Multiple IPs' VCs). Figure 4-31 ¾ Rule Index: Select the Virtual server rule index for this VC. You can specify 8 rules in maximum. ¾ Rule Typ: There are four types: one-to-one, Many-to-One, Many-to-Many Overload and Many-to-Many No-overload. ¾ Local Start & End IP: Enter the local IP Address you plan to map to. Local Start IP is the starting local IP address and Local End IP is the ending local IP address. If the rule is for all local IPs, then the Start IP is 0.0.0.0 and the End IP is 255.255.255.255. ¾ Public Start & End IP: Enter the public IP Address you want to do NAT. Public Start IP is the starting public IP address and Public End IP is the ending public IP address. If you have a dynamic IP, enter 0.0.0.0 as the Public Start IP. ¾ Address Mapping List: This displays the information about the Mapping addresses. To add a mapping rule: 41
-
 1
1 -
2
-
3
-
4
-
5
-
6
-
7
-
8
-
9
-
10
-
11
-
12
-
13
-
14
-
15
-
16
-
17
-
18
-
19
-
20
-
21
-
22
-
23
-
24
-
25
-
26
-
27
-
28
-
29
-
30
-
31
-
32
-
33
-
34
-
35
-
36
-
37
-
38
-
39
-
40
-
41
-
 42
42 -
 43
43 -
 44
44 -
 45
45 -
 46
46 -
 47
47 -
 48
48 -
 49
49 -
 50
50 -
 51
51 -
 52
52 -
53
-
54
-
55
-
56
-
57
-
58
-
59
-
60
-
61
-
62
-
63
-
64
-
65
-
66
-
67
-
68
-
69
-
70
-
71
 |
 |