Toshiba 32AF62 Owners Manual - Page 25
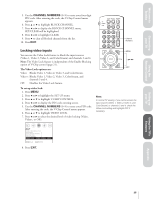
Locking Video Inputs, The Video Lock options are, To set up video lock
 |
View all Toshiba 32AF62 manuals
Add to My Manuals
Save this manual to your list of manuals |
Page 25 highlights
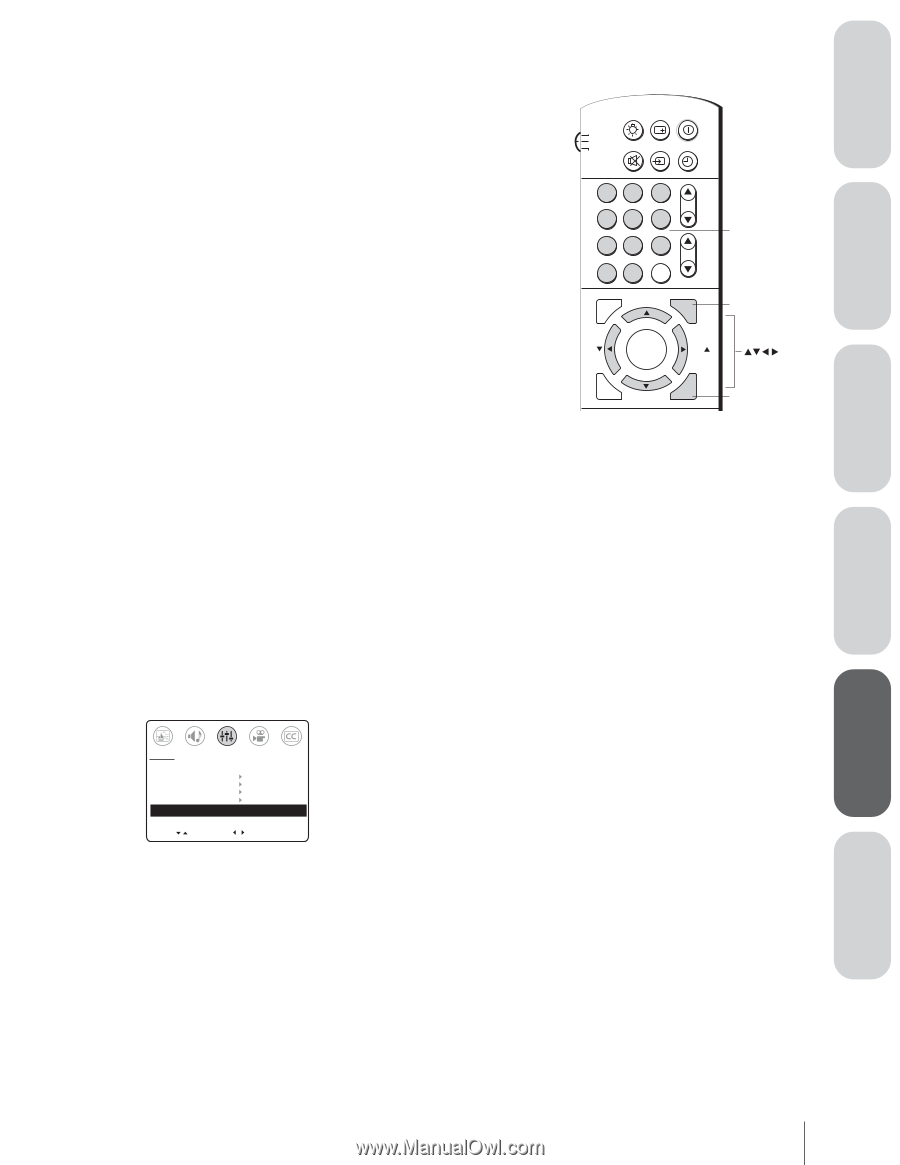
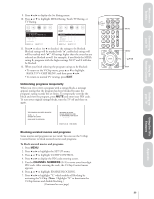
Welcome to Toshiba Connecting your TV Using the Remote Control 5. Use the CHANNEL NUMBERS (0-9) to enter your four-digit PIN code. After entering the code, the V-Chip Control menu appears. 6. Press y or z to highlight BLOCK CHANNEL. 7. Press x or • to display the BLOCK CHANNEL menu. SET/CLEAR will be highlighted. 8. Press x or • to highlight CLEAR. 9. Press z to clear all blocked channels from the list. 10. Press EXIT. Locking video inputs You can use the Video Lock feature to block the input sources (Video 1, Video 2, Video 3, and ColorStream) and channels 3 and 4. Note: The Video Lock feature is independent of the Enable Blocking option of V-Chip control (page 21). The Video Lock options are: Video: Blocks Video 1, Video 2, Video 3, and ColorStream. Video+: Blocks Video 1, Video 2, Video 3, ColorStream, and channels 3 and 4. Off: Disables the Video Lock feature. To set up video lock: 1. Press MENU. 2. Press x or • to highlight the SET UP menu. 3. Press y or z to highlight V-CHIP CONTROL. 4. Press x or • to display the PIN code entering screen. 5. Use the CHANNEL NUMBERS (0-9) to enter your PIN code. After entering the code, the V-Chip Control menu appears. 6. Press y or z to highlight VIDEO LOCK. 7. Press x or • to select the desired level of video locking (Video, Video+, or Off ). LIGHT RECALL POWER TV CABLE VCR MUTE TV/VIDEO TIMER 12 45 3 CH 6 78 9 VOL CH RTN 100 0 ENT ADV/ PIP CH Channel Numbers MENU FAV ENTER FAV C.CAPT EXIT MENU RESET ADV/ PIP CH EXIT Note: In normal TV viewing, if you cannot access the input sources (Video 1, Video 2, Video 3, and ColorStream) or channels 3 and 4, check the Video Lock setting and highlight OFF if necessary. SET UP ENABLE BLOCKING [Y] N SET RATING SET BLOCKING OPTIONS NEW PIN CODE BLOCK CHANNEL VIDEO LOCK VIDEO VIDEO+ [OFF] MOVE [ ] SELECT [ ] 8. Press EXIT. Setting up your TV Using the TV's Features Appendix 25
-
 1
1 -
2
-
3
-
4
-
5
-
6
-
7
-
8
-
9
-
10
-
11
-
12
-
13
-
14
-
15
-
16
-
17
-
18
-
19
-
 20
20 -
 21
21 -
 22
22 -
 23
23 -
 24
24 -
 25
25 -
 26
26 -
 27
27 -
 28
28 -
 29
29 -
 30
30 -
31
-
32
-
33
-
34
-
35
-
36
-
37
-
38
-
39
-
40
-
41
 |
 |