Toshiba 40RV52U Owners Manual
Toshiba 40RV52U Manual
 |
View all Toshiba 40RV52U manuals
Add to My Manuals
Save this manual to your list of manuals |
Toshiba 40RV52U manual content summary:
- Toshiba 40RV52U | Owners Manual - Page 1
Owner's Manual Integrated High Definition LCD Television HIGH-DEFINITION TELEVISION 40RV52R 40RV525R 46RV525R For an overview of steps for setting up your new TV, see page 9. Note: To display a High Definition picture, the TV must be receiving a High Definition signal (such as an over-the-air High Defi - Toshiba 40RV52U | Owners Manual - Page 2
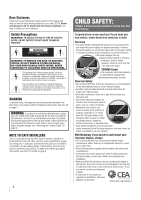
children. Wall Mounting: If you decide to wall mount your flat panel display, always: • Use a mount that has been recommended by the display manufacturer and/or listed by an independent laboratory (such as UL, CSA, ETL). • Follow all instructions supplied by the display and wall mount manufacturers - Toshiba 40RV52U | Owners Manual - Page 3
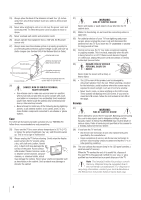
, take the following precautions: • ALWAYS turn off the TV and unplug the power cord to avoid possible electric shock or fire. • NEVER allow your body to come in contact with any broken glass or liquid from the damaged television. The LCD panel inside the TV contains glass and a toxic liquid. If - Toshiba 40RV52U | Owners Manual - Page 4
injury. Refer all servicing not specified in this manual to a Toshiba Authorized Service Center. 38) If you have the TV serviced: • Ask the service technician to use only replacement parts specified by the manufacturer. • Upon completion of service, ask the service technician to perform routine - Toshiba 40RV52U | Owners Manual - Page 5
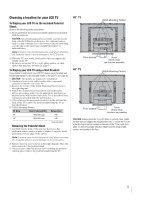
instructions provided with the wall bracket. 5) After attaching the appropriate bracket(s) to the wall and the back of the TV, remove the pedestal stand from the TV as described below. 6) VESA Mounting Pattern TV Size Hole Pattern(VxH) Screw Size 40" 300x400 mm M6 46" 300x500 mm M6 (unit - Toshiba 40RV52U | Owners Manual - Page 6
FCC Declaration of Conformity Compliance Statement (Part 15): The Toshiba 40RV52U, 40RV525U, and 46RV525U Televisions comply with Part 15 of the FCC rules. Operation is subject to the following two conditions: (1) this device may not cause harmful interference, and (2) this device must accept - Toshiba 40RV52U | Owners Manual - Page 7
other devices 25 Remote control codes 26 Chapter 4: Menu layout and navigation 28 Main menu layout 28 Setup/Installation menu layout 29 Navigating the menu system 29 Chapter 5: Setting up your TV 30 Selecting the menu language 30 TOSHIBA Logo LED 30 Configuring the antenna input source for - Toshiba 40RV52U | Owners Manual - Page 8
Toshiba widescreen, integrated HD, LCD TV: • Integrated digital tuning (8VSB ATSC and QAM) eliminates the need for a separate digital converter set-top box (in most cases). • 1080p output resolution. • Three HDMI™ digital, high-definition multimedia interfaces 1080p input support ( page 17). • HDMI - Toshiba 40RV52U | Owners Manual - Page 9
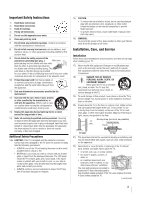
and service information. Keep this manual for future reference. 2 Observe the following when choosing a location for the TV: • Read "Important notes about your LCD TV" ( page 6). • Place the TV on the floor or a sturdy, level, stable surface that can support the weight of the unit. Secure the TV to - Toshiba 40RV52U | Owners Manual - Page 10
TV front and side panel controls and connections Model 40RV525U is used in this manual for illustration purposes. 1 Green LED and TOSHIBA Logo LED Power LED(Green) = Power indicator TOSHIBA Logo LED= On or Off ( page 30). 2 Remote sensor - Point the remote control toward this remote sensor - Toshiba 40RV52U | Owners Manual - Page 11
from a DVI device. Also see item 3. HDMI connection is necessary to receive 1080p signals. 2 Service port - For service use only. Used for updating the television's firmware. 3 PC/HDMI-1 (AUDIO) IN - PC audio input terminals are shared with HDMI-1 analog audio input terminals, and their use can be - Toshiba 40RV52U | Owners Manual - Page 12
representative of typical device connections only. The input/output terminals on your devices may differ from those illustrated herein. For details on connecting and using your specific devices, refer to each device's owner's manual. Component video cables come in sets of three and are for use with - Toshiba 40RV52U | Owners Manual - Page 13
press INPUT on the remote control ( page 22). To program the TV remote control to operate other devices, see Chapter 3. The unauthorized recording, use, distribution, or revision of television programs, videotapes, DVDs, and other materials is prohibited under the Copyright Laws of the United States - Toshiba 40RV52U | Owners Manual - Page 14
press INPUT on the remote control ( page 22). To program the TV remote control to operate other devices, see Chapter 3. The unauthorized recording, use, distribution, or revision of television programs, videotapes, DVDs, and other materials is prohibited under the Copyright Laws of the United States - Toshiba 40RV52U | Owners Manual - Page 15
press INPUT on the remote control ( page 22). To program the TV remote control to operate other devices, see Chapter 3. The unauthorized recording, use, distribution, or revision of television programs, videotapes, DVDs, and other materials is prohibited under the Copyright Laws of the United States - Toshiba 40RV52U | Owners Manual - Page 16
panel. Camcorder VIDEO AUDIO OUT L R VIDEO 2 inputs on TV side panel To view the camcorder video: Select the VIDEO 2 video input source on the TV.* * To select the video input source, press INPUT on the remote control ( page 22). To program the TV remote control to operate other devices, see Chapter - Toshiba 40RV52U | Owners Manual - Page 17
or DVD player with HDMI or DVI output). The HDMI input can accept and display VGA, SVGA, XGA, WXGA, SXGA, 480i (60Hz), 480p (60Hz), 720p (60Hz), 1080i (60Hz) and 1080p (24Hz/60Hz) signal formats. For detailed signal specifications, see page 58. Supported Audio format: Linear PCM, sampling rate 32/44 - Toshiba 40RV52U | Owners Manual - Page 18
devices using the TV's remote control if you connect a HDMI Control compatible audio receiver or playback device. For an explanation of setup and operations, see page 50. TV back panel VIDEO AUDIO L R IN OUT L R Audio receiver HDMI IN HDMI OUT Playback device (HDMI Control DVD player,etc - Toshiba 40RV52U | Owners Manual - Page 19
the audio: 1 Turn on the TV and the digital audio device. 2 Press on the TV's remote control and open the Audio menu. 3 Highlight Audio Setup and press . Audio Digital Audio Selector Audio Settings Advanced Audio Settings Audio Setup 4 In the Optical Output Format field, select either Dolby - Toshiba 40RV52U | Owners Manual - Page 20
specifications ( page 58). Other formats or non-standard signals will not be displayed correctly. • To display the optimum picture, use the PC setting feature ( "Using the PC settings feature" on page 49). Note: • The PC audio input terminals on the TV are shared with the HDMI-1 analog audio input - Toshiba 40RV52U | Owners Manual - Page 21
range For optimum performance, aim the remote control directly at the TV and make sure there is no obstruction between the remote control and the TV. Point remote control toward remote sensor on front of TV. 16.4 ft (5m) Squeeze tab and lift cover. 2 Install two "AAA" size batteries, making - Toshiba 40RV52U | Owners Manual - Page 22
Chapter 3: Using the remote control Learning about the remote control The buttons used for operating the TV only are described here. For a complete list of the remote control's functions, see the remote control functional key chart ( page 24). 1 POWER turns the TV on and off. When the TV is on, - Toshiba 40RV52U | Owners Manual - Page 23
after the TV remote control is programmed, it may not operate certain features on any other devices. If this happens and you wish to use those features, you will need to use the device's original remote control. Point the remote control directly at the device. 16 17 18 19 1 POWER Turns the selected - Toshiba 40RV52U | Owners Manual - Page 24
TV. REMOTE CONTROL KEY Toshiba TV CABLE SAT (satellite) POWER Power Power Power SLEEP Sleep timer TV TV PIC SIZE Picture size TV TV FREEZE FREEZE TV TV 1-9 Digit 1-9 Digit 1-9 Digit 1-9 0 Digit 0 Digit 0 Digit 0 100/-/+10 - (sub CH) --- - (sub CH) INPUT TV/Video - Toshiba 40RV52U | Owners Manual - Page 25
the remote control that came with the device. 5 Remember to set the MODE SELECT switch back to "TV" to control the TV. 6 For future reference, write down the code(s) you used: DEVICE CODE DEVICE CODE Note: • In addition to POWER, confirm that all necessary keys on the TV remote control operate - Toshiba 40RV52U | Owners Manual - Page 26
TV remote control. Your other device may use a code that is not recognized by the TV remote control. If this happens, use the device's remote control Texscan Tocom U. S. Electronics United Cable Universal Wards 061, Samsung Sony Star Choice Star Trak STS Toshiba Uniden Zenith 020, 040, 044, 046 - Toshiba 40RV52U | Owners Manual - Page 27
010 009 010, 049, 065 031 Chapter 3: Using the remote control Orion Panasonic Pentax Pentex Research Philco Philips Pioneer Portland Proscan Proton Singer Sony STS Sylvania Symphonic Tandy Tashiko Tatung Teac Technics Teknika Toshiba Totevision Unitec Unitech Vector Research 054, 057, 062, 065, - Toshiba 40RV52U | Owners Manual - Page 28
on the remote control or TV control panel. Icon Video Audio Preferences Locks Setup Item Mode Picture Settings Noise Reduction Game Mode Theater Settings Digital Audio Selector Audio Settings Advanced Audio Settings Audio Setup CC Selector Base CC Mode Digital CC Settings Input Labeling Channel - Toshiba 40RV52U | Owners Manual - Page 29
remote control or TV control panel, open the Setup menu, select Installation, and press . Icon Terrestrial System Status Item Input (STWX) on the remote control or TV control panel to move in the corresponding direction in the menu. • Press to save your menu settings or select a highlighted item - Toshiba 40RV52U | Owners Manual - Page 30
Mode Auto Time Zone Signal Meter 4 Press W or X to select the input source (Cable or Antenna) for the ANT/CABLE input on the TV. Setup Installation HDMI Control Setup Sleep Timer PC Settings Logo LED Off Off On 5 To save your new settings, highlight Done and press . To revert to your original - Toshiba 40RV52U | Owners Manual - Page 31
Cable TV service lineup changes significantly. To program channels automatically: 1 Configure the antenna input source, if you have not already done so ( page 30). 2 Press and open the Setup menu. 3 Highlight Installation and press . Setup Installation HDMI Control Setup Sleep Timer PC Settings - Toshiba 40RV52U | Owners Manual - Page 32
Chapter 5: Setting up your TV To manually add digital subchannels on a physical channel: Use the Channel Numbers and the Dash ( ) on the remote control to enter the channel number (for example, 56-1). If the channel is found, the number will be added to the list and the box will - Toshiba 40RV52U | Owners Manual - Page 33
Format Dolby Digital Dynamic Range Control Reset No Auto Stereo English Dolby Digital Compressed Done Mode Auto Digital Analog Description When viewing the HDMI 1 input, if digital audio from the HDMI input is available, it will be output. If not, the TV will automatically detect and output - Toshiba 40RV52U | Owners Manual - Page 34
menu bar to select Factory Defaults. 5 Enter your PIN code (or 0000 if no PIN code has been set). 6 Highlight Yes and press . The TV will turn off automatically after a few seconds. After the TV turns off, unplug the TV power cord and then plug it in again to complete the reset process. To cancel - Toshiba 40RV52U | Owners Manual - Page 35
press on the remote control or TV control panel to change the input. The current signal source displays in the top right corner of the Input Selection screen. Input Selection 0 ANT/CABLE 1 Video 1 2 Video 2 3 ColorStream HD1 4 ColorStream HD2 5 HDMI 1 HDMI Control 6 HDMI 2 7 HDMI 3 8 PC ANT/CABLE - Toshiba 40RV52U | Owners Manual - Page 36
on the remote control. 5 To save the new input labels, highlight Done and press . To revert to the factory default labels, highlight Reset and press . Input labeling example: The screen below left shows the default Input Selection screen (with none of the inputs labeled as a specific device). The - Toshiba 40RV52U | Owners Manual - Page 37
to factory defaults, highlight Reset and press . To open the Channel Browser™: • Press W or Xon the remote control. • Press W to surf backward through the previously tuned 32 channels in the History list, the channels in the ANT/ CABLE channel list, the inputs in the Inputs list, the HDMI Control - Toshiba 40RV52U | Owners Manual - Page 38
list when a new channel or input is tuned. • Turning off the TV will clear the History List. Setting the Channel Tuning Mode This feature remote control or TV control panel. Note: This feature will not work unless you program channels into the TV's channel memory ( page 31). Tuning to a specific - Toshiba 40RV52U | Owners Manual - Page 39
watching. Select the picture size that displays the current program the way that looks best to you. You can save separate picture size preferences for each input on your TV. To select the picture size using the remote control: 1 Press on the remote control. 2 While the Picture Size screen is - Toshiba 40RV52U | Owners Manual - Page 40
or PC graphics. Note: • This mode is supported only for HDMI (1080p,1080i, 720p, 480p, and 480i), ColorStream (1080i and 720p), and ANT/ CABLE (digital) inputs (1080p,1080i, and 720p). • Depending on the input signals, the border of the picture may be hidden, displayed in black, or noisy. Dot by Dot - Toshiba 40RV52U | Owners Manual - Page 41
on page 40. Note: The auto aspect ratio feature is not applicable to PC input. Selecting the cinema mode When you view a DVD (3:2 pulldown processed) from a DVD player connected to the VIDEO 1, VIDEO 2, ColorStream HD-1, ColorStream HD-2 (component video), or HDMI inputs on the TV, smoother motion - Toshiba 40RV52U | Owners Manual - Page 42
Quality Bright and dynamic picture (factory setting) Standard picture settings (factory setting) Lower contrast for darkened room (factory setting) Designed for viewing of PC tables and documents Your personal preferences Note: PC mode is available for HDMI and PC inputs only (grayed out for other - Toshiba 40RV52U | Owners Manual - Page 43
happens, set the Base CC Mode to Off. • To turn off the closed caption mode: Select Off in step 3 above. Note: A closed caption signal may not display in below). 4 To save the new settings, highlight Done and press . To revert to the factory defaults, highlight Reset and press . Caption Size Auto, - Toshiba 40RV52U | Owners Manual - Page 44
Chapter 6: Using the TV's features Adjusting the audio Muting the sound Press on the remote control to partially reduce (1/2 MUTE) or turn off (MUTE) the sound. Each time you press , the mute mode will change in the following order: 1/2 Mute Mute Volume If the closed caption mode is set to Off when - Toshiba 40RV52U | Owners Manual - Page 45
compression. 4 To save the new settings, highlight Done and press . To revert to the factory defaults, highlight Reset and press . Note: • This item will be grayed out for NTSC signals, Video, ColorStream, and PC inputs. • The Dolby Digital Dynamic Range Control will function in relation to Optical - Toshiba 40RV52U | Owners Manual - Page 46
Rating Blocking Off Edit Rating Limits Channels Block Input Lock Off Control Panel Lock Off GeawmePTINimCerode Off New PIN Code 2 Press T, which displays new PIN code is now active. Blocking TV programs and movies by rating (V-Chip) Some TV programs and movies include signals that classify - Toshiba 40RV52U | Owners Manual - Page 47
be blocked. • To display the rating of the program you are watching, press on the remote control. If it is rated "None," the word "NONE" appears in the RECALL screen (as shown below right). If rating information is not provided, no rating will appear in the RECALL screen. TV - PG L V NONE - Toshiba 40RV52U | Owners Manual - Page 48
TV to a program that exceeds the rating limits you set, the TV TV is turned off, and will be enabled when the TV is turned on again. Using the input lock feature You can use the Input Lock feature to lock the video inputs (VIDEO 1, VIDEO 2, ColorStream HD-1, ColorStream HD-2, HDMI 1, HDMI 2, HDMI - Toshiba 40RV52U | Owners Manual - Page 49
the Input Lock (as described above). Using the control panel lock feature You can lock the control panel to prevent your settings from being changed accidentally (by children, for example). When the control panel lock is On, none of the controls on the TV control panel will operate except POWER. To - Toshiba 40RV52U | Owners Manual - Page 50
the HDMI Control Setup item you want to use, and press W or X to select On or desired mode. • TV Auto Input Switch: On/Off • TV Auto Power: On/Off • Device Auto Standby: On/Off 5 To save the new settings, highlight Done and press . To revert to the factory defaults, highlight Reset and press - Toshiba 40RV52U | Owners Manual - Page 51
HDMI input mode, Dolby Digital or PCM) • Video resolution • Aspect ratio of incoming video signal (4:3 or 16:9) • V-Chip rating status • Game Timer (if set) ANT 123-456 ABCHD Stereo SAP 1080i 16:9 TV-PG L V 9:00pm . Understanding the auto power off feature The TV will automatically turn itself - Toshiba 40RV52U | Owners Manual - Page 52
, highlight Done and press . To revert to the factory defaults, highlight Reset and press . Note: If you select one of the factory-set picture modes (Sports, Standard, Movie or PC) and then change the dynamic contrast setting, the picture mode automatically changes to Preference. Using the static - Toshiba 40RV52U | Owners Manual - Page 53
then press X. 3 Press S or T to select On and then press . To turn off Game Mode: Select Off in step 2 above, change the video input, or turn the TV off and then on again. Note: You can change the video input by pressing remote control ( page 35). on the Using MPEG noise reduction The MPEG noise - Toshiba 40RV52U | Owners Manual - Page 54
regular stereo speakers. To adjust the QSound® settings: 1 Put the TV in STEREO mode ( "Selecting stereo/SAP turn the QSound effect On or Off. Advanced Audio Settings QSound Reset On Done 5 To save the new settings, highlight Done and press . To revert to the factory defaults, highlight Reset - Toshiba 40RV52U | Owners Manual - Page 55
your TV's problem is not addressed in this Troubleshooting section or the recommended solution has not worked, use the Restore Factory Defaults procedure ( page 34). TV will not turn on • Make sure the power cord is plugged in, and then press . • The remote control batteries may be dead. Replace the - Toshiba 40RV52U | Owners Manual - Page 56
changed settings of the device, turn off your TV and unplug the power cord, then plug and turn on again. • If several devices are connected, HDMI Control feature may not operate properly. • Read the instruction manual furnished with the connected HDMI Control device. HDMI problems For HDMI - Toshiba 40RV52U | Owners Manual - Page 57
(Weight) 40RV52U : 42.2 lbs (19.1 kg) 40RV525U: 42.2 lbs (19.1 kg) 46RV525U: 55.3 lbs (25.1 kg) Operating conditions Temperature: 32ºF - 95ºF (0ºC - 35ºC) Humidity: 20 - 80% (no moisture condensation) Supplied Accessories • Remote control with two size "AAA" batteries • Owner's manual (this book - Toshiba 40RV52U | Owners Manual - Page 58
HDMI terminals PC IN signal formats Note: Depending on the connected PC, the following status may occur; incorrect display, false format detection, picture position failure, blur, or judder. But this is not a malfunction of your TV × 1080i 1920 × 1080p 1920 × 1080p V. Frequency 59.940Hz 60 40. - Toshiba 40RV52U | Owners Manual - Page 59
only if this LCD Television is purchased and operated in the Continental U.S.A. or Puerto Rico. (4) Labor service charges for set installation, setup, adjustment of customer controls, and installation or repair of antenna systems are not covered by this warranty. Reception problems caused by - Toshiba 40RV52U | Owners Manual - Page 60
to the Television; h. Service of a Television on which the TOSHIBA label or logo, rating label or serial number have been defaced or removed; i. On-site service and repair of the Television; and j. Damage to the Television caused by failure to follow the specifications, User manuals or guides as to - Toshiba 40RV52U | Owners Manual - Page 61
OF SALE DISPLAY, ETC.). YOU MUST READ AND FOLLOW ALL SET-UP AND USAGE INSTRUCTIONS IN THE APPLICABLE USER GUIDES AND/OR MANUALS. IF YOU FAIL TO DO SO, THIS TELEVISION MAY NOT FUNCTION PROPERLY AND YOU MAY SUFFER DAMAGE. THIS WARRANTY WILL NOT COVER ANY SERVICE THAT IS REQUIRED, IN PART OR IN WHOLE - Toshiba 40RV52U | Owners Manual - Page 62
Chapter 9: Appendix A copy of the GPL source code in this product may be obtained by contacting Toshiba Consumer Solutions at (800)631-3811. There will be a charge to cover the costs of providing the source code. 62 - Toshiba 40RV52U | Owners Manual - Page 63
Notes 62 - Toshiba 40RV52U | Owners Manual - Page 64
: 82 TOTOWA ROAD, WAYNE, NJ 07470, U.S.A. NATIONAL SERVICE DIVISION: 1420-B TOSHIBA DRIVE, LEBANON, TN 37087, U.S.A. TOSHIBA OF CANADA LTD. HEAD OFFICE: 191 McNABB STREET, MARKHAM, ONTARIO, L3R 8H2, CANADA - TEL: (905) 470-5400 SERVICE CENTERS: TORONTO: 191 McNABB STREET, MARKHAM, ONTARIO L3R
-
 1
1 -
 2
2 -
 3
3 -
 4
4 -
 5
5 -
 6
6 -
 7
7 -
8
-
9
-
10
-
11
-
12
-
13
-
14
-
15
-
16
-
17
-
18
-
19
-
20
-
21
-
22
-
23
-
24
-
25
-
26
-
27
-
28
-
29
-
30
-
31
-
32
-
33
-
34
-
35
-
36
-
37
-
38
-
39
-
40
-
41
-
42
-
43
-
44
-
45
-
46
-
47
-
48
-
49
-
50
-
51
-
52
-
53
-
54
-
55
-
56
-
57
-
58
-
59
-
60
-
61
-
62
-
63
-
64
 |
 |
HIGH
-DEFINITION TELEVISION
VX3A00041800
40RV525
R
46RV525
R
40RV52
R
Owner’s Manual
Integrated High Definition
LCD Television
For an overview of steps for setting up your new TV, see page 9.
Note: To display a High Definition picture, the TV must be receiving
a High Definition signal (such as an over-the-air High Definition
TV broadcast, a High Definition digital cable program, or a High
Definition digital satellite program). For details, please contact
your TV antenna installer, cable provider, or satellite provider.
© 2008 TOSHIBA CORPORATION
All Rights Reserved
Owner’s Record
The model number and serial number are on the back
of your TV. Record these numbers in the spaces below.
Refer to these numbers whenever you communicate
with your Toshiba dealer about this TV.
Model number:
Serial number: