Toshiba 62HMX95 Owner's Manual - English
Toshiba 62HMX95 - 62" Rear Projection TV Manual
 |
UPC - 022265251171
View all Toshiba 62HMX95 manuals
Add to My Manuals
Save this manual to your list of manuals |
Toshiba 62HMX95 manual content summary:
- Toshiba 62HMX95 | Owner's Manual - English - Page 1
on-screen. This is a property of DLP TV lamp technology and is NOT a sign of malfunction. For details, see "IMPORTANT NOTICE ABOUT HOT LAMP RESTART" on page 5. 52HMX95 62HMX95 © 2005 TOSHIBA CORPORATION All Rights Reserved RICA CONSUMER PR O 14001 FILE No. A96 Owner's Record The model number and - Toshiba 62HMX95 | Owner's Manual - English - Page 2
OF ELECTRIC SHOCK, DO NOT REMOVE COVER (OR BACK). NO USERSERVICEABLE PARTS INSIDE. REFER SERVICING TO QUALIFIED SERVICE PERSONNEL. (This does not apply to "Lamp unit replacement and care" on pages 129-131 of this manual.) The lightning flash with arrowhead symbol, within an equilateral triangle, is - Toshiba 62HMX95 | Owner's Manual - English - Page 3
14 does not apply to "Lamp unit replacement and care" on pages 129-131 of this manual. 14b) CAUTION: If the TV is dropped and the cabinet or enclosure surface has been damaged or the TV does not operate normally, take the following precautions: • ALWAYS turn off the TV and unplug the power cord to - Toshiba 62HMX95 | Owner's Manual - English - Page 4
and contact a Toshiba Authorized Service Center. 35) Special care for DLP™ (Digital Light Processing) units: The lamp unit in this product has a limited service life. The length of service life varies depending on product use or user settings. If you use the lamp beyond its service life: • you - Toshiba 62HMX95 | Owner's Manual - English - Page 5
Restart™ feature to stop the fans as soon as the TV is powered off. See "Setting the Quick Restart™ feature" on page 56. 8) The green and red LED lights on the TV's front control touchpad indicate the TV's current status. If either light flashes, see "LED indications" on page 125 for details - Toshiba 62HMX95 | Owner's Manual - English - Page 6
remote control device codes 38 Chapter 4: Menu layout and navigation 40 Main menu layout 40 Setup/Installation menu layout 41 Navigating the menu system 41 Chapter 5: TV Guide On Screen® setup 42 Setting up the TV Guide On Screen® system 42 TV Guide On Screen® Reminder 45 Turning off the TV - Toshiba 62HMX95 | Owner's Manual - English - Page 7
119 Chapter 12: Troubleshooting 120 General troubleshooting 120-124 LED indications 125 TV Guide On Screen® FAQ 126-128 Chapter 13: Appendix 129 Lamp unit replacement 129-131 Specifications 132 Limited United States Warranty 133 Index 135 Copyright © 2005 TOSHIBA CORPORATION. All rights - Toshiba 62HMX95 | Owner's Manual - English - Page 8
is to guide you through setting up and operating your TV as quickly as possible. See "Important notes about your DLP™ projection TV" on page 5. • This manual applies to models 52HMX95 and 62HMX95. Before you start reading, check the model number on the back of your TV. • Instructions in this - Toshiba 62HMX95 | Owner's Manual - English - Page 9
is usable. When the green LED stops blinking, press POWER to turn on the TV. See "LED indications" on page 125. 12. See "Menu layout and navigation" for a quick overview of navigating the TV's menu system (pages 40-41). 13. See Chapter 5 for details on setting up the TV Guide On Screen® system (if - Toshiba 62HMX95 | Owner's Manual - English - Page 10
screen, these buttons function as left/right menu navigation buttons. 9 Green and Red LEDs When the red LED lights solid (not blinking), it indicates that the TV power cord is plugged in. When the green LED lights solid (not blinking), it indicates that recording is in progress. See "LED indications - Toshiba 62HMX95 | Owner's Manual - English - Page 11
29. 7 PC IN/VIDEO- For connecting video from a personal computer when using the TV screen as the display for the connected PC. See page 29. 8 TheaterNet™ (IR) OUT 1 and OUT 2 - For controlling infrared remote-controlled devices through the TV. You can connect up to two devices with either one of the - Toshiba 62HMX95 | Owner's Manual - English - Page 12
of the enclosed IR blaster/ G-LINK® cables to enable the TV Guide On Screen® recording features. See page 28. 4 TheaterNet IEEE1394 1 and TV to a home network. See page 30. *THINC™ system (Toshiba Home Interactive Network Connection) The RJ-45 (Ethernet) port allows your Toshiba Cinema Series TV - Toshiba 62HMX95 | Owner's Manual - English - Page 13
will be unacceptable. ● Component video cables come in sets of three and are for use with video devices with component video output. (ColorStream® is Toshiba's brand of component video.) These cables are typically color-coded red, green, and blue. Separate audio cables are required for a complete - Toshiba 62HMX95 | Owner's Manual - English - Page 14
device's owner's manual. Connecting services (such as video-on-demand, a cable operator's enhanced program guide, and data-enhanced television services) will not work with the use of a CableCARD™ and may require the use of a separate set /or TV. Such damage is NOT covered under your Toshiba warranty. - Toshiba 62HMX95 | Owner's Manual - English - Page 15
instructions on page 28. 2. Make sure the VCR is connected to the A/V OUT terminals on the TV (see illustration). 3. Set the VCR to the appropriate line input (refer to your VCR owner's manual for details), and then turn OFF the VCR. 4. See Chapter 5 for details on setting up the TV Guide On Screen - Toshiba 62HMX95 | Owner's Manual - English - Page 16
instructions on page 28. 2. Make sure the VCR is connected to the A/V OUT terminals on the TV (see illustration). 3. Set the VCR to the appropriate line input (refer to your VCR owner's manual for details), and then turn OFF the VCR. 4. See Chapter 5 for details on setting up the TV Guide On Screen - Toshiba 62HMX95 | Owner's Manual - English - Page 17
instructions on page 28. 2. Make sure the VCR is connected to the A/V OUT terminals on the TV (see illustration). 3. Set the VCR to the appropriate line input (refer to your VCR owner's manual for details), and then turn OFF the VCR. 4. See Chapter 5 for details on setting up the TV Guide On Screen - Toshiba 62HMX95 | Owner's Manual - English - Page 18
instructions on page 28. 2. Make sure the VCR is connected to the A/V OUT terminals on the TV (see illustration). 3. Set the VCR to the appropriate line input (refer to your VCR owner's manual for details), and then turn OFF the VCR. 4. See Chapter 5 for details on setting up the TV Guide On Screen - Toshiba 62HMX95 | Owner's Manual - English - Page 19
to the appropriate line input (refer to your VCR owner's manual for details), and then turn OFF the VCR. 4. See Chapter 5 for details on setting up the TV Guide On Screen® system. 5. See Chapter 7 for details on using the TV Guide On Screen® system. Copyright © 2005 TOSHIBA CORPORATION. All rights - Toshiba 62HMX95 | Owner's Manual - English - Page 20
instructions on page 28. 2. Make sure the VCR is connected to the A/V OUT terminals on the TV (see illustration). 3. Set the VCR to the appropriate line input (refer to your VCR owner's manual for details), and then turn OFF the VCR. 4. See Chapter 5 for details on setting up the TV Guide On Screen - Toshiba 62HMX95 | Owner's Manual - English - Page 21
861/861B-compliant[4] consumer electronic devices (such as a set-top box or DVD player with HDMI or DVI turning on your electronic components, turn on the TV first, and then the HDMI or DVI device. • When turning off your electronic components, turn off the HDMI or DVI device first, and then the TV - Toshiba 62HMX95 | Owner's Manual - English - Page 22
cable for IR pass-through device control You can use the TV's TheaterNet OUT* infrared terminal (IR pass-through) to remotely operate-through the TV-many infrared remote-controlled devices (such as Toshiba infrared remote-controlled VCRs or DVD players) enclosed within an entertainment center or - Toshiba 62HMX95 | Owner's Manual - English - Page 23
. You can use this feature to control many IR remote-controlled devices and IEEE1394 devices using the on-screen control icons. Toshiba Video 3 TOP MENU ENTER EXIT TV/VIDEO EXIT CHANNEL VOLUME MENU POWER See pages 50-54 for details on setting up and using TheaterNet. See pages 25-27 for - Toshiba 62HMX95 | Owner's Manual - English - Page 24
-in speakers (see "Turning off the built-in speakers" on page 93). Note: To hear sound when using an external audio amplifier, the volume of both the TV and the amplifier must be set to a reasonable listening level. Analog audio amplifier LINE IN LR TV 24 Copyright © 2005 TOSHIBA CORPORATION. All - Toshiba 62HMX95 | Owner's Manual - English - Page 25
50 for details on setting up and using the TheaterNet feature. Note: If the TheaterNet feature does not control your IEEE1394 device, you can either use the device's remote control or try using IR pass-through with the TV's remote control (page 22). Copyright © 2005 TOSHIBA CORPORATION. All rights - Toshiba 62HMX95 | Owner's Manual - English - Page 26
is prohibited under the Copyright Laws of the United States and other countries, and may subject you to civil and criminal liability. *To enjoy the full benefits of your Symbio AVHD Recorder, you must first set up the TV Guide On Screen® system (see Chapter 5). Full Symbio AVHD Recorder benefits - Toshiba 62HMX95 | Owner's Manual - English - Page 27
. If your device is not marked with an "S" number, look in the device's user manual or call the device manufacturer's technical support number. • If your IEEE1394 device has a two-position power switch, always place the device at the end of the chain and turn ON the power switch when any device is - Toshiba 62HMX95 | Owner's Manual - English - Page 28
details on using the TV Guide On Screen® interactive program guide: See Chapter 7. *If you cannot locate the device's infrared sensor: 1. Turn OFF the device. 2. Starting at the lower left corner of the device, place the end of the device's remote control (with the infrared emitter) so it touches - Toshiba 62HMX95 | Owner's Manual - English - Page 29
on the TV screen. When connecting a PC to the TV, use an analog RGB (15-pin) computer cable and a PC audio cable. - To use a PC, set the monitor output resolution on the PC before connecting it to the TV. The during multi-angle scenes. Copyright © 2005 TOSHIBA CORPORATION. All rights reserved. 29 - Toshiba 62HMX95 | Owner's Manual - English - Page 30
e-mail address). - A compatible recording device. • Contact your ISP (Internet Service Provider) to obtain and set up Internet/e-mail service. • See Chapter 2 for recording device connection instructions. Note: • The TV's home network feature is compatible only with Microsoft® Windows® 2000 and the - Toshiba 62HMX95 | Owner's Manual - English - Page 31
of the buttons that operate the TV Guide On Screen® system, see page 59. POWER turns the TV on and off. Press POWER to turn on the TV. The red LED indicator on the TV front touchpad will be illuminated. Press POWER again to turn off the TV. Note: The Quick Restart™ setting will affect the amount of - Toshiba 62HMX95 | Owner's Manual - English - Page 32
displays TV setting information on-screen (page 96). MUTE reduces or turns off the sound (page 90). TV/VCR selects TV mode to view one program while recording another. SKIP SS| and |TT jump forward and backward one day in the TV Guide On Screen® listings (Chapter 7). LIST displays the Toshiba - Toshiba 62HMX95 | Owner's Manual - English - Page 33
1) TV Toshiba TV 2) CBL/SAT 3) VCR/PVR 4) DVD Multi-brand video/audio devices 5) AUDIO 1 6) AUDIO 2 You can directly select the device mode by pressing the corresponding number button (1-6) while pressing the MODE button. Number (1-6) MODE Note: Although the TV remote control includes codes - Toshiba 62HMX95 | Owner's Manual - English - Page 34
key chart REMOTE CONTROL KEY TV (Toshiba TV) REMOTE CONTROL DEVICE MODE CBL/SAT CBL/SAT DVD AUDIO 1 or 2 AUDIO 1 or 2 (Cable Box) (Satellite Box) (LD) (Receiver) (CD Player) VCR/PVR (VCR) VCR/PVR (PVR) MODE Toggles among the remote control device modes LIGHT Lights the remote key, and - Toshiba 62HMX95 | Owner's Manual - English - Page 35
/VCR DISC/AM/FM STOP REC LIST FAV CH yz HOME SPLIT PIC MODE FAV SCAN FREEZE REMOTE CONTROL DEVICE MODE TV CBL/SAT CBL/SAT DVD AUDIO 1 or 2 AUDIO 1 or 2 VCR/PVR VCR/PVR (Toshiba TV) (Cable Box) (Satellite Box) (LD) (Receiver) (CD Player) (VCR) (PVR) Sound mute*2 Sound mute*2 Sound mute - Toshiba 62HMX95 | Owner's Manual - English - Page 36
your device brand in the remote control device code table on pages 38-39. If more than one code is listed, try each one separately until you find one that works. 2. Press MODE until the mode indicator for the device (CBL/SAT, VCR/PVR, DVD, AUDIO 1, or AUDIO 2) lights up. 3. While holding down the - Toshiba 62HMX95 | Owner's Manual - English - Page 37
"Device code setup" and resets the volume lock to the "TV" device mode. To reset the remote control: While holding down the RECALL button, press 8, 9, 0, 0. The mode indicator will blink two times, pause, and then blink two more times. Numbers MODE VOL yz RECALL Copyright © 2005 TOSHIBA CORPORATION - Toshiba 62HMX95 | Owner's Manual - English - Page 38
remote control Multi-brand remote control device codes , 0176, 0183 REALISTIC 0124, 0105, 0136, 0109, 0140, 0127 Replay TV 7102 SAMSUNG 0137, 0102, 0104, 0133 SAMTRON 0163 SANSUI 0139, 0126, TOCOM TOSHIBA UNIKA UNIVERSAL VIDEOWAY VIEWSTAR ZENITH ZENITH/DRAKE SATELLITE Code 1124 1132 - Toshiba 62HMX95 | Owner's Manual - English - Page 39
3: Using the remote control Multi-brand remote control device codes (continued) CD players Brand Code ADMIRAL 6126 AIWA MITSUBISHI NEC PANASONIC PHILIPS PIONEER PROSCAN QUASAR RCA SAMSUNG SANYO SHARP SONY TEAC TOSHIBA YAMAHA Code 5114 5100 5102, 5103 5101 5114 5114, 5118, 5119 5114 5104 - Toshiba 62HMX95 | Owner's Manual - English - Page 40
system. Main menu layout To open the main menus (illustrated below), press MENU on the remote control or TV front panel. Applications ➞ TV Guide On Screen® ➞ Opens the TV Guide On Screen® system ➞ Audio Player ➞ Launches the MP3 Audio Player ➞ Picture Viewer ➞ Launches the JPEG Picture Viewer - Toshiba 62HMX95 | Owner's Manual - English - Page 41
• To close a menu instantly, press EXIT. TV front panel touchpad EXIT z y x • MENU (ENTER*) * The MENU button on the TV front panel touchpad functions as the ENTER button when a menu is on-screen. Copyright © 2005 TOSHIBA CORPORATION. All rights reserved. Remote control MENU ENTER y x • z EXIT 41 - Toshiba 62HMX95 | Owner's Manual - English - Page 42
area. The listings are automatically updated several times a day. Note: • You must first set up your TV according to the applicable connection instructions in Chapter 2. • If you connected a Toshiba Symbio™ AVHD Recorder, you must perform the following TV Guide On Screen® system setup in order to - Toshiba 62HMX95 | Owner's Manual - English - Page 43
5: TV Guide On Screen® setup Setting up the TV Guide On Screen® system (continued) Screen 5: Which TV input is your cable box plugged into? If you select ANT 1, screen 6 appears. If you select Video 1, screen 7 appears. Screen 9: To allow the TV Guide On Screen® system to find the correct code - Toshiba 62HMX95 | Owner's Manual - English - Page 44
21 appears. Screen 19: The TV Guide On Screen® system will test the code for the brand of VCR you selected. Do not press any keys on the TV, remote control, or VCR until the testing process is completed. When testing is completed, screen 20 appears. 44 Copyright © 2005 TOSHIBA CORPORATION. All - Toshiba 62HMX95 | Owner's Manual - English - Page 45
. Turning off the TV Guide On Screen® automatic display feature After you set up the TV Guide On Screen® system, the program guide will display automatically (by default) when you turn on the TV. To turn off the automatic program guide: 1. Press TV GUIDE on the remote control to open the TV Guide On - Toshiba 62HMX95 | Owner's Manual - English - Page 46
6 Setting up your TV For menu navigation instructions, see Chapter 4. Selecting the menu language You can choose from three different languages (English, French and Spanish) for the on-screen display of menus and messages. Note: The TV Guide On Screen® menus are in English, regardless of the - Toshiba 62HMX95 | Owner's Manual - English - Page 47
found channels to the existing set of programmed channels. To remove a channel from the memory, you must manually delete it (see next page). • To tune the TV to a channel not programmed in the channel memory, you must use the Channel Number buttons on the remote control. • Programming channels for - Toshiba 62HMX95 | Owner's Manual - English - Page 48
add, and then press ENTER to check the box. To manually add digital subchannels on a physical channel: Use the Channel Numbers and the Dash (-/100) on the remote control to enter the channel number (for example, 56-1). If the channel is found, the number will be added to the list and the box will be - Toshiba 62HMX95 | Owner's Manual - English - Page 49
nine favorite channels per 11 Done input, an error message will appear. You will need to delete favorite channel settings in the selected input. (This will not change the TV's current input Numbers 100 y x • z FAV CH yz FAV SCAN Copyright © 2005 TOSHIBA CORPORATION. All rights reserved. 49 - Toshiba 62HMX95 | Owner's Manual - English - Page 50
Instrum... 0000 0000 Test Reset Done Select device type, brand, and IR code from owners manual. Using the x • buttons, select the Input the device is connected to. Note: When the input is changed, all unsaved settings will be lost. 6. Press z and then x • to select the device Type. 7. Press - Toshiba 62HMX95 | Owner's Manual - English - Page 51
on the remote control to display the device control selection screen. The following are examples of the TheaterNet on-screen control icons for various devices. Toshiba Symbio™ AVHD Recorder control* * If you connected a Toshiba Symbio™ AVHD Recorder, you must set up the TV Guide On Screen® system - Toshiba 62HMX95 | Owner's Manual - English - Page 52
Setting up your TV TheaterNet™ IR device codes Code 0078, 0013, 0211 0354, 0133 Code 0003, 0008, 0014, 0007, cont.) Brand Code RadioShack 0015 Toshiba 0000 Tusa 0015 United Artists 0007 Zenith 0000, 0525, 0899 CD players Brand Code cont.) Brand Code Proton 0157 Brand Code Aiwa Code - Toshiba 62HMX95 | Owner's Manual - English - Page 53
Chapter 6: Setting up your TV TheaterNet™ IR device codes (continued) Video accessory (HDTV decoder) Brand Code Panasonic 1120 Pioneer 1010 Princeton 0113, 0295 Samsung 1190 Sensory Science 1126 Sharp 1010 Receivers Brand Code ADC 0531 Aiwa 1089, 1405, 0121, 0158, 0189, 0405, - Toshiba 62HMX95 | Owner's Manual - English - Page 54
Chapter 6: Setting up your TV TheaterNet™ IR device codes (continued) VCRs (cont.) Brand Magnavox Magnin Marantz Marta Technics 0035, 0162 Teknika 0035, 0037, 0000 Thomas 0000 Tivo 0618, 0636 Toshiba 0045, 0043, 0845 Totevision 0037, 0240 Unitech 0240 Vector 0045 Vector Research - Toshiba 62HMX95 | Owner's Manual - English - Page 55
lose the time and date settings when the power is restored. • If you manually set the time and date and then perform TV Guide On Screen® setup, the manual time and date settings will be overridden by the TV Guide On Screen® settings. Copyright © 2005 TOSHIBA CORPORATION. All rights reserved. 55 - Toshiba 62HMX95 | Owner's Manual - English - Page 56
seconds for the picture to appear when you turn on the TV again. See "Important notice about hot lamp restart," below. If Quick Restart is set to ON and you turn off the TV, the following will occur for a few minutes: • the screen (lamp) will light dimly; and • the fans will continue to run. This is - Toshiba 62HMX95 | Owner's Manual - English - Page 57
GUID: Toshiba 52HMX95 00003914-28343803 Software Version 0.3.0 Mar 9 2005 - 12:37:10 FW:0.12 Sub:47 Done Done To close the screen and return to the Installation menu: Highlight Done and press ENTER. To return to normal viewing: Press EXIT. Restore Factory Defaults To restore all settings - Toshiba 62HMX95 | Owner's Manual - English - Page 58
To turn off this feature, see page 45. Setting up the TV Guide On Screen® system Follow these instructions to set up the TV Guide On Screen® system so it can receive current program data for your area. Note: If you move the TV to a different ZIP/postal code, you must perform the TV Guide On Screen - Toshiba 62HMX95 | Owner's Manual - English - Page 59
® service to your TV. • The TV Guide On Screen® interactive program guide supports cable-ready, cable box, and digital cable services, as well as over-the-air broadcasts, but does not provide listings for satellite services. TV Guide On Screen® remote control functions BUTTON TV GUIDE Numbers - Toshiba 62HMX95 | Owner's Manual - English - Page 60
the TV Guide On Screen® system (continued) Video Window • When you open the TV Guide On Screen® system, the current program appears in the Video Window. • As you scroll through the listings, the Video Window will change to display the selected program. • The lock/unlock icon indicates the - Toshiba 62HMX95 | Owner's Manual - English - Page 61
the TV Guide On Screen® interactive program guide Navigating the TV Guide On Screen® system (continued) Info Box • An Info Box contains information about a show, Service, or Panel Ad, or provides general help (for example, for a panel menu). • An Info Box for a program in the LISTINGS screen can - Toshiba 62HMX95 | Owner's Manual - English - Page 62
is available. Be sure to follow the instructions under "TV Guide On Screen® Reminder" on page 45. LISTINGS screen • When you open the TV Guide On Screen® system, LISTINGS is always the first service displayed. • Use the Number keys on the remote control to jump to a specific channel's listings - Toshiba 62HMX95 | Owner's Manual - English - Page 63
TV Guide On Screen® interactive program guide TV Guide On Screen® Services (continued) SEARCH screen • SEARCH allows you to find shows by keyword, alphabetically, or by category (HDTV, Movies, Sports, Children, Educational, News, Variety, Series © 2005 TOSHIBA CORPORATION. All rights reserved. 63 - Toshiba 62HMX95 | Owner's Manual - English - Page 64
TV Guide On Screen® interactive program guide TV Guide On Screen® Services (continued) SEARCH screen (continued) Example: Keyword search Keyword search lets you enter a word(s) to find a particular show by category or for every show title that matches. 1. From the SEARCH screen choose to set a - Toshiba 62HMX95 | Owner's Manual - English - Page 65
TV Guide On Screen® interactive program guide TV Guide On Screen® Services (continued) RECORDINGS screen The RECORDINGS service screen displays a list of shows that were previously recorded or are currently recording on an IEEE1394 recording device connected to the TV Screen Screen A Screen B United - Toshiba 62HMX95 | Owner's Manual - English - Page 66
Chapter 7: Using the TV Guide On Screen® interactive program guide TV Guide On Screen® Services (continued) SCHEDULE screen The SCHEDULE service screen allows you to review, edit, or delete Record and Remind events you set previously. • With SCHEDULE highlighted in the Service Bar, press INFO to - Toshiba 62HMX95 | Owner's Manual - English - Page 67
TV Guide On Screen® interactive program guide TV Guide On Screen® Services (continued) Recording features (continued) 3) Manually set a show to Record 1. Highlight SCHEDULE in the Service Bar, and press MENU to display the Schedule Options panel menu. 2. Highlight NEW MANUAL United States and other - Toshiba 62HMX95 | Owner's Manual - English - Page 68
TV Guide On Screen® interactive program guide TV Guide On Screen® Services (continued) Reminder features You can set a Reminder to perform the following functions: • Automatically turn on the TV (if off ) at the scheduled reminder time, and tune the TV Manual reminders are listed by channel number. - Toshiba 62HMX95 | Owner's Manual - English - Page 69
TV Guide On Screen® interactive program guide TV Guide On Screen® Services (continued) Reminder features (continued) Reminder notification banner Based on your option settings, a notification banner will appear on-screen if your TV set for a show set to Remind. • displays for manual reminders only. - Toshiba 62HMX95 | Owner's Manual - English - Page 70
options Note: You must complete the TV Guide On Screen® setup (as described in Chapter 5) before you can change these settings. With SETUP highlighted in the Service Bar, highlight the settings you want to change, press ENTER, and follow the on-screen instructions. With SETUP highlighted in the - Toshiba 62HMX95 | Owner's Manual - English - Page 71
on the remote control when the TV Guide On Screen® system is GUIDE: Automatic entry into the TV Guide On Screen® system when the TV is powered on. Choices are On (default) and Off. Note: Set the AUTO GUIDE to Off if you do not want the TV Guide On Screen® system to open every time you turn on the TV - Toshiba 62HMX95 | Owner's Manual - English - Page 72
4 ColorStream HD1 5 ColorStream HD2 6 HDMI 1 7 HDMI 2 8 PC 9 ANT 2 ANT 1 0 - 9 / INPUT to Select Numbers INPUT TheaterNet DEVICE y z Note: • When the Input Selection screen is open, you also can use the yz buttons on the remote control (or the Channel yz buttons on the front panel) to change the - Toshiba 62HMX95 | Owner's Manual - English - Page 73
set set up a cable box in VIDEO 1, that input will be labeled automatically and cannot be relabeled until you remove the device from the TV Guide On Screen remote screen. screen below left shows the default Input Selection screen (with none of the inputs labeled). The screen Selection screen with set - Toshiba 62HMX95 | Owner's Manual - English - Page 74
Turning off the TV Set a "HOME" channel remote instructions green. Note: The Channel Browser banner opens in Browse mode by default. To tune to a channel in Browse mode: 1. While watching TV number has a yellow background. Press ENTER to tune to the channel. 74 Copyright © 2005 TOSHIBA CORPORATION. - Toshiba 62HMX95 | Owner's Manual - English - Page 75
TV to the channel you would like to set as the Home channel for the current antenna input. 2. Press and hold the HOME ( ) button on the remote control for 3 seconds. When the Home channel is saved, the Channel Browser banner will appear at the bottom of the screen with the home icon flashing green - Toshiba 62HMX95 | Owner's Manual - English - Page 76
remote control or TV front panel. Note: • This feature will not work unless you program channels into the TV message "Channel Memorized" appears on the screen. The channel has been programmed into the Numbers - (dash) 76 CH RTN Copyright © 2005 TOSHIBA CORPORATION. All rights reserved. CHANNEL yz - Toshiba 62HMX95 | Owner's Manual - English - Page 77
Done and press ENTER. Theater Settings Picture Size Picture Scroll Cinema Mode Auto Aspect Ratio Reset Natural -- Film On Done Conventional picture on a conventional TV screen Conventional picture in Natural size on your wide-screen TV Copyright © 2005 TOSHIBA CORPORATION. All rights reserved - Toshiba 62HMX95 | Owner's Manual - English - Page 78
TV's features Selecting the picture size (continued) TheaterWide 1 picture size (For 4:3 format program) • The center of the picture remains close to its original proportion, but the left and right edges are stretched wider to fill the screen screen, United the screen, screen, but not stretched - Toshiba 62HMX95 | Owner's Manual - English - Page 79
the Freeze mode is active, or the TV Guide On Screen® system is open. To turn on the auto aspect ratio feature: 1. Press MENU and open the Video menu. 2. Highlight Theater Settings and press ENTER. Video Picture Settings Advanced Picture Settings Theater Settings Navigate Select CH RTN Back EXIT - Toshiba 62HMX95 | Owner's Manual - English - Page 80
highlight Reset and press ENTER. Note: If you set the lamp mode to Low Power, each time you turn on the TV, the lamp will start out in High Bright mode but will switch to Low Power mode in approximately 1 minute. You will notice a change in screen brightness when this happens. This is normal and is - Toshiba 62HMX95 | Owner's Manual - English - Page 81
highlighted, the window will have a green border. 4. Press INPUT to open window: Press SPLIT or EXIT. Numbers INPUT • ENTER SPLIT Notes about recording screen if you try to do so. • It is recommended that you use the TV's remote control to start recording. If you use a device other than the TV's remote - Toshiba 62HMX95 | Owner's Manual - English - Page 82
(main or POP) that is output from the TV speakers (and also from the VARIABLE AUDIO OUT terminals). The window with the active sound is outlined with a green border. Example: Press x Example: Press • x to height of the picture. 82 Copyright © 2005 TOSHIBA CORPORATION. All rights reserved. - Toshiba 62HMX95 | Owner's Manual - English - Page 83
channel number) to highlight the window; Or... Use the y z x • buttons to highlight the window. The highlighted window will display as a moving picture. 3. Press ENTER to tune the TV to the highlighted channel and close the multi-window. 2 4-1 4-2 6 11 13 18 31 36 Copyright © 2005 TOSHIBA - Toshiba 62HMX95 | Owner's Manual - English - Page 84
(factory setting) Standard picture settings (factory setting) Lower contrast for darkened room (factory setting) Your personal preferences To select the picture mode using the remote control: Press PIC MODE on the remote control. The following popup menu appears on-screen. Picture Settings Mode - Toshiba 62HMX95 | Owner's Manual - English - Page 85
Highlight Advanced Picture Settings and press ENTER. Video Picture Settings Advanced Picture Settings Theater Settings 3. Highlight Color Management and press ENTER. Advanced Picture Settings Dynamic Contrast MPEG Noise Reduction CableClear Color Temperature Lamp Mode Color Management Reset On - Toshiba 62HMX95 | Owner's Manual - English - Page 86
to reduce visible interference in your TV picture. This may be useful when Settings Advanced Picture Settings Theater Settings 3. In the CableClear/DNR field, select your desired setting. Advanced Picture Settings Dynamic Contrast MPEG Noise Reduction CableClear Color Temperature Lamp Mode Color - Toshiba 62HMX95 | Owner's Manual - English - Page 87
Settings and press ENTER. Using dynamic contrast When dynamic contrast is set to "On," the TV will detect changes in the picture quality that affect the appearance of your contrast settings Picture Settings Dynamic Contrast MPEG Noise Reduction CableClear Color Temperature Lamp Mode Color Management - Toshiba 62HMX95 | Owner's Manual - English - Page 88
screen display of the dialogue, narration, and sound effects of TV programs and videos that are closed captioned (usually marked "CC" in program guides). • Text-An on-screen 4. To save the new settings, highlight Caption Text Edge Caption Text Color Background Color Reset Auto Auto Auto Done Done - Toshiba 62HMX95 | Owner's Manual - English - Page 89
TV Guide On Screen Audio Player Picture Viewer Digital CC/Audio Selector CableCARD Navigate Select CH RTN Back EXIT Exit 3. Press y or z to select Closed Caption, and then press x or • to select the desired service. Audio Closed Caption CC 1 Service 1 4. Press ENTER. Copyright © 2005 TOSHIBA - Toshiba 62HMX95 | Owner's Manual - English - Page 90
TV's features Adjusting the audio Muting the sound Press MUTE to partially reduce (1/2 MUTE) or turn off (MUTE) the sound. Each time you press MUTE, the mute mode will change in the following order: → 1/2 Mute → Mute → Volume → If the closed caption mode is set Applications TV Guide On Screen Audio - Toshiba 62HMX95 | Owner's Manual - English - Page 91
StableSound feature: Select Off in step 3 above. 5. To save the new settings, highlight Done and press ENTER. To reset the settings to the factory defaults, highlight Reset and press ENTER. To turn off the SBS: Select Off in step 3. Copyright © 2005 TOSHIBA CORPORATION. All rights reserved. 91 - Toshiba 62HMX95 | Owner's Manual - English - Page 92
sources. Your TV's audio will sound fuller, richer, and wider. To adjust the WOW™ settings: 1. Put the TV in STEREO mode work. • WOW: Focus - To turn the vocal emphasis effect On or Off. • WOW: TruBass - To select the desired bass expansion level (High, Low, or Off ). 5. To save the new settings - Toshiba 62HMX95 | Owner's Manual - English - Page 93
TV (see "Connecting a digital audio system" and "Connecting an analog audio system" on page 24). To turn off the built-in speakers: 1. Press MENU and open the Audio menu. 2. Highlight Audio Setup and press ENTER. 3. In the Speakers field, select Off. Audio Audio Settings new settings, highlight Done - Toshiba 62HMX95 | Owner's Manual - English - Page 94
Turn TV ON: Day Not Set You can set the sleep timer to turn off the TV after a set length of time (maximum of 3 hours). The sleep timer turns off the TV one time only, as opposed to the On/Off Timer, which turns off the TV on a recurring basis. To set the sleep timer: Press SLEEP on the remote - Toshiba 62HMX95 | Owner's Manual - English - Page 95
TV screen. The PC must be connected to the TV's PC IN terminals. (See page 29 for connection details.) You can use the PC Settings Selection screen and Setup menu. To adjust the PC settings: Settings and press ENTER. Setup Installation Sleep Timer On/Off Timer PC Settings PC Settings Horizontal - Toshiba 62HMX95 | Owner's Manual - English - Page 96
Chapter 8: Using the TV's features Displaying TV setting information on-screen using RECALL Understanding the auto power off feature To display TV setting information on-screen: Press RECALL on the remote control. The following information will display on-screen (if applicable): • Current - Toshiba 62HMX95 | Owner's Manual - English - Page 97
CH RTN Back EXIT Exit 2. Press z, which displays the PIN code entry screen. • The Lock System screen (below) appears if a PIN code has not been stored. Press the Channel Number buttons to enter a new four-digit code, enter the code a second time to confirm, and press ENTER. Lock System Please - Toshiba 62HMX95 | Owner's Manual - English - Page 98
Game Timer Off New PIN Code Navigate Select CH RTN Back remote control. If it is rated "None," the word "NONE" appears in the RECALL screen (as shown below right). If rating information is not provided, no rating will appear in the RECALL screen. TV - PG L V NONE 98 Copyright © 2005 TOSHIBA - Toshiba 62HMX95 | Owner's Manual - English - Page 99
limits you set, the TV will enter program lock mode and the following message will appear on-screen: You can either temporarily unlock the program or select an unlocked program to watch. To temporarily unlock the program: 1. Press MUTE. Locks Active 2. Enter your four-digit PIN code and press - Toshiba 62HMX95 | Owner's Manual - English - Page 100
the GameTimer is activated, the TV enters VIDEO LOCK mode and locks out the input source for the video game device. To set the GameTimer™: 1. Press MENU and highlight the Locks menu icon. 2. Press z to display the PIN code entering screen. 3. Enter your four-digit PIN code and press ENTER. 4. Press - Toshiba 62HMX95 | Owner's Manual - English - Page 101
TV's screen. You can use the Audio Player to play compatible MP3 files on the TV. The TV or turn off the TV while TV. SUCH DAMAGE IS NOT COVERED BY YOUR TOSHIBA WARRANTY. See "Memory card care and handling" on page 106. • The technical criteria set out in this owner's manual are meant as a guide - Toshiba 62HMX95 | Owner's Manual - English - Page 102
be in a format that is not compatible with the TV. - MP3 files must be in the following format: ) character sets - MP3 files stored on a memory card or networked in a shared folder will not play. Maximum number of nested folder levels: 10 levels • Files in Co., Ltd. • Toshiba is an authorized licensee - Toshiba 62HMX95 | Owner's Manual - English - Page 103
photos (JPEG files) on your TV's screen in thumbnail mode or as a slide show. Note: • You cannot use the Picture Viewer and Audio Player at the same time. • You must obtain any required permission from copyright owners to download or use copyrighted content. Toshiba cannot and does not grant such - Toshiba 62HMX95 | Owner's Manual - English - Page 104
seconds). Setup Installation Sleep Timer On/Off Timer PC Settings HDMI 1 Audio HDMI 2 Audio Slide Show Interval ENTER. Applications TV Guide On Screen Audio Player Picture TOSHIBA WARRANTY. 2. For a CompactFlash memory card, press the ejector button and then pull the card straight out from the TV - Toshiba 62HMX95 | Owner's Manual - English - Page 105
owners to download or use copyrighted content. Toshiba cannot and does not grant such permission. Accessing MP3 files stored on a networked PC 1. Make sure you have correctly set MP3 audio files on the TV" on the next page. Applications TV Guide On Screen Audio Player Picture Viewer Digital - Toshiba 62HMX95 | Owner's Manual - English - Page 106
After 30 seconds of inactivity, a screen saver will appear. To start the screen saver immediately, press any button on the remote control. To use the mute -static cloth. Note: Toshiba is not liable for any damage caused by the use of any memory card with this TV. Toshiba will not compensate for - Toshiba 62HMX95 | Owner's Manual - English - Page 107
to your home network 1. Connect the TV to your home network via the TV's RJ-45 (Ethernet) port. See page 30 for connection instructions. 2. If you want to use file sharing only and do not have Internet service in your home: Skip to section B, "Set up the network address," at right. Note: If you do - Toshiba 62HMX95 | Owner's Manual - English - Page 108
automatic network address setup was successful (even though the TV displayed the error message). If the file sharing and/or e-mail scheduling features do not work correctly, go to "Manually setting up the network address," below. Manually setting up the network address This setup requires the data - Toshiba 62HMX95 | Owner's Manual - English - Page 109
use the Number buttons on the remote control TV to your home network, you will not be able to use the automatic setup, and must manually set up the network address. • If you used a router with built-in DHCP functionality, use the automatic setup. Manual setup may not work. Copyright © 2005 TOSHIBA - Toshiba 62HMX95 | Owner's Manual - English - Page 110
of Microsoft Corporation in the United States and/or other countries. Microsoft product screen shot(s) reprinted with permission from Microsoft Corporation. d) Click "OK" to close the window. 4. Go to section D, "Set up file sharing on the TV." 110 Copyright © 2005 TOSHIBA CORPORATION. All rights - Toshiba 62HMX95 | Owner's Manual - English - Page 111
to be given sharing privileges.* *This user must match the user stored in the TV's "Home File Server Setup" menu. b) Click to check "Allow" next to section D, "Set up file sharing on the TV" on page 112. For home networktroubleshooting tips, see Chapter 12. Copyright © 2005 TOSHIBA CORPORATION. All - Toshiba 62HMX95 | Owner's Manual - English - Page 112
, and then press x • to select the name of the PC you set up for file sharing. If you have multiple PCs on your home network that MP3 files on the TV. USING THE ON-SCREEN KEYBOARD a. Press yzx • to highlight the desired letter, number, or character, and TOSHIBA CORPORATION. All rights reserved. - Toshiba 62HMX95 | Owner's Manual - English - Page 113
so, follow the instructions in sections A and B , pages 107-109, before proceeding. • Before you can schedule recordings, the time and date in the TV Guide On Screen feature must be set. See "Setting the time and date" on page 55. Required information and services Before you can set up the e-mail - Toshiba 62HMX95 | Owner's Manual - English - Page 114
"TESTING E-MAIL" ERROR CODES Solutions • If you receive the message "Error Sending Mail (-1)," the TV may not have received the test e-mail. Send another test e-mail to the TV using the "HELP request e-mail" format (see page 118). • Make sure the TV Guide On Screen® system was set up properly. See - Toshiba 62HMX95 | Owner's Manual - English - Page 115
TV. Also see the "Security settings" table, below. ■"ID" field Use the on-screen keyboard to enter six to 16 numbers and TV is set to record), it is recommended that you not change these settings unless you need to diagnose a problem or deal with a unique user situation. Copyright © 2005 TOSHIBA - Toshiba 62HMX95 | Owner's Manual - English - Page 116
from your e-mail password, banking log-ons, social security code etc.). ■"Incoming Mail Server" field Use the on-screen keyboard to enter the incoming (POP3) mail server that hosts the TV's e-mail account. Note: The TV does not support encrypted e-mail. ■"Outgoing Mail Server" field Use the on - Toshiba 62HMX95 | Owner's Manual - English - Page 117
to include the ID tag line in your request e-mail. See "Description of fields in the E-mail Scheduling Setup window" on pages 115-116. Sending a request e-mail to the TV To send a request e-mail to the TV: 1. Format the e-mail according to the instructions under "Formatting a request e-mail" below - Toshiba 62HMX95 | Owner's Manual - English - Page 118
is set is set to [TV's [TV's email address] To: [TV's email TYPE REC To: [TV's email address] TV, you will When you send a HELP request e-mail to the TV : [TV's email To: [TV's email set the "ID Required" field to On. If you set the "ID Required" field to Off, you do not need to include the ID tag line - Toshiba 62HMX95 | Owner's Manual - English - Page 119
error in the line of text referenced in the error message. Correct the text and resend the e-mail. • FAILED - NO DEVICE AVAILABLE Make sure you have a recording device connected to the TV and that all cables are properly connected. • FAILED - MISC ERROR TOSHIBA CORPORATION. All rights reserved. 119 - Toshiba 62HMX95 | Owner's Manual - English - Page 120
13). • The lamp unit may need to be replaced (pages 129-131). Also see "LED indications" on page 125. • If the TV is powered off and then quickly on again when the lamp unit is hot, it may take several minutes for the picture to appear on-screen. This is a property of DLP TV lamp technology and is - Toshiba 62HMX95 | Owner's Manual - English - Page 121
Chapter 12: Troubleshooting General troubleshooting (continued) Picture problems (continued) Picture brightness changes soon after turning on TV • If you set the lamp mode to Low Power, each time you turn on the TV, the lamp will start out in High Bright mode but will switch to Low Power mode in - Toshiba 62HMX95 | Owner's Manual - English - Page 122
you connected a Symbio™ AVHD recorder, in order to use its full functionality you must first set up the TV Guide On Screen® system (page 26 and Chapter 5). Memory card problems • Make sure you are using a supported or valid memory card format (page 102). • Make sure you have saved your files in the - Toshiba 62HMX95 | Owner's Manual - English - Page 123
TV for display. See "Media specifications" in Chapter 10 for Picture Viewer and JPEG file specifications. Home network troubleshooting Basic network setup problems instructions on enabling DHCP. If you do not have a router, you must manually set up the network address (page108). • Internet service - Toshiba 62HMX95 | Owner's Manual - English - Page 124
from the TV settings. See "Set up e-mail scheduling" in Chapter 11. The e-mail was successfully sent but the recording or reminder did not work. • The time and date in the TV Guide On Screen® system are not set. See "Setting the time and date" on page 55. 124 Copyright © 2005 TOSHIBA CORPORATION - Toshiba 62HMX95 | Owner's Manual - English - Page 125
intervals. Turn OFF the TV and unplug the power cord. Review "Lamp unit replacement and care" in Chapter 13 to ensure that the lamp door is installed securely. If the problem persists, contact a Toshiba Authorized Service Center. 2) Green blinks continuously The lamp is not working properly. at - Toshiba 62HMX95 | Owner's Manual - English - Page 126
the problem. After you set up the TV Guide On Screen® system (Chapter 5), the program guide opens automatically by default when you turn on the TV. You can turn off the automatic program guide (see page 45) and instead press the TV GUIDE button on the remote control to manually open the TV Guide On - Toshiba 62HMX95 | Owner's Manual - English - Page 127
Setup in the Service Bar. Press z to select Change Channel Display. Follow the on-screen instructions. 16. Q: Why do all my channels display "No Listing?" A: The TV Guide On Screen® system has not yet received its data download. The phrase "No Listing" will be replaced with program information - Toshiba 62HMX95 | Owner's Manual - English - Page 128
VCR owner's manual or contact your Cable TV company for proper wiring procedures. 32. Q: Is Help available in the TV Guide On Screen® system? If so, how do I find it? A: Yes. Highlight any of the five main Services (Listings, Schedule, Recordings, Setup, Search) and press the INFO key on the remote - Toshiba 62HMX95 | Owner's Manual - English - Page 129
; • if the screen (lamp) does not light (LED indication #3, page 125); or • if you hear a loud noise and the picture goes black, which may indicate a lamp rupture (LED indication #3, page 125). To obtain a replacement lamp unit: In warranty: In the U.S. Visit www.tacp.toshiba.com/service or call - Toshiba 62HMX95 | Owner's Manual - English - Page 130
cord. WARNING: Eye damage may result from directly viewing the light produced by this lamp. Always turn off the TV and unplug the power cord before opening the lamp unit door. 2. STOP! Allow the lamp to cool for at least one (1) hour before replacing it. CAUTION: HOT SURFACE! The temperature of the - Toshiba 62HMX95 | Owner's Manual - English - Page 131
. Do not use an electric screwdriver. Lamp unit screws (use manual Phillips screwdriver only) NOTE : Make sure the lamp unit and screws are installed securely; otherwise, the TV may not turn on and the lamp life may be shortened. Lamp unit door 9. Replace the thumb screw and hand-tighten. Thumb - Toshiba 62HMX95 | Owner's Manual - English - Page 132
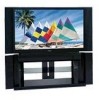
mm) Weight 52HMX95: 87 lbs (39.5 kg) 62HMX95: 103 lbs (46.7 kg) Supplied Accessories • Two dual-wand IR blaster cables • Remote control with two size "AA" alkaline batteries • Owner's manual (this book) Optional Stands: 52HMX95: ST5275 62HMX95: ST6275 132 Copyright © 2005 TOSHIBA CORPORATION. All - Toshiba 62HMX95 | Owner's Manual - English - Page 133
use of this DLP™ Television and connected equipment; or to units that have been modified or had the serial number removed, altered, defaced, or rendered illegible. How to Obtain Warranty Service If, after following all of the operating instructions in this manual and reviewing the section titled - Toshiba 62HMX95 | Owner's Manual - English - Page 134
providing the source code. A copy of the LGPL source code in this product may be obtained by contacting Toshiba Consumer Solutions at TO, PROCUREMENT OF SUBSTITUTE GOODS OR SERVICES; LOSS OF USE, DATA, OR PROFITS be given attribution as the author of the parts of the library used. This can be in - Toshiba 62HMX95 | Owner's Manual - English - Page 135
buttons 51 TheaterNet™ control 25 TheaterNet IR device codes 52-54 TheaterWide® picture size 78 TheaterNet™ setup 50 THINC™ system 12, 107 Time and date setting 55 Troubleshooting 120-128 TruBass 92 TruSurround 92 TV Guide On Screen® 9, 42, 58 TV/VIDEO button 72, 73 V V-Chip blocking (Locks menu - Toshiba 62HMX95 | Owner's Manual - English - Page 136
Cinema Series, ColorStream, StableSound, and TheaterWide are registered trademarks of Toshiba America Consumer Products, L.L.C. Channel Browser, GameTimer, SurfLock, Symbio, Quick Restart, TheaterNet, and THINC are trademarks of Toshiba America Consumer Products, L.L.C. Digital Light Processing, DLP
-
 1
1 -
 2
2 -
 3
3 -
 4
4 -
 5
5 -
 6
6 -
 7
7 -
8
-
9
-
10
-
11
-
12
-
13
-
14
-
15
-
16
-
17
-
18
-
19
-
20
-
21
-
22
-
23
-
24
-
25
-
26
-
27
-
28
-
29
-
30
-
31
-
32
-
33
-
34
-
35
-
36
-
37
-
38
-
39
-
40
-
41
-
42
-
43
-
44
-
45
-
46
-
47
-
48
-
49
-
50
-
51
-
52
-
53
-
54
-
55
-
56
-
57
-
58
-
59
-
60
-
61
-
62
-
63
-
64
-
65
-
66
-
67
-
68
-
69
-
70
-
71
-
72
-
73
-
74
-
75
-
76
-
77
-
78
-
79
-
80
-
81
-
82
-
83
-
84
-
85
-
86
-
87
-
88
-
89
-
90
-
91
-
92
-
93
-
94
-
95
-
96
-
97
-
98
-
99
-
100
-
101
-
102
-
103
-
104
-
105
-
106
-
107
-
108
-
109
-
110
-
111
-
112
-
113
-
114
-
115
-
116
-
117
-
118
-
119
-
120
-
121
-
122
-
123
-
124
-
125
-
126
-
127
-
128
-
129
-
130
-
131
-
132
-
133
-
134
-
135
-
136
 |
 |
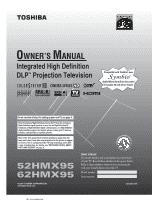
(E) 52/62HMX95
52HMX95
62HMX95
Integrated High Definition
DLP
™
Projection Television
O
WNER’S
M
ANUAL
© 2005 TOSHIBA CORPORATION
All Rights Reserved
Owner’s Record
The model number and serial number are on the back
of your TV. Record these numbers in the spaces below.
Refer to these numbers whenever you communicate
with your Toshiba dealer about this TV.
Model number:
Serial number:
HIGH
-DEFINITION TELEVISION
I
S
O
1
4
0
0
1
F
I
L
E
N
o
.
A
9
6
4
5
T
O
S
H
I
B
A
A
M
E
R
I
C
A
C
O
N
S
U
M
E
R
P
R
O
D
U
C
T
S
,
L
.
L
.
C
.
23566726A
For an overview of steps for setting up your new TV, see page 9.
Note: To display a High Definition picture, the TV must be receiving a
High Definition signal (such as an over-the-air High Definition TV
broadcast, a High Definition digital cable program, or a High Definition
digital satellite program). For details, please contact your TV antenna
installer, cable provider, or satellite provider.
Note: If the TV is powered off and then quickly on again when the
lamp unit is hot, it may take several minutes for the picture to appear
on-screen. This is a property of DLP TV lamp technology and is NOT
a sign of malfunction. For details, see
“
IMPORTANT NOTICE ABOUT
HOT LAMP RESTART
”
on page 5.
Compatible with Toshiba’s new
Audio/Video Hard Drive Recorder!
See pages 26 and 55 for details.
TM