Toshiba SD-P1850SN Owners Manual - Page 54
Connecting to a TV or audio system
 |
View all Toshiba SD-P1850SN manuals
Add to My Manuals
Save this manual to your list of manuals |
Page 54 highlights
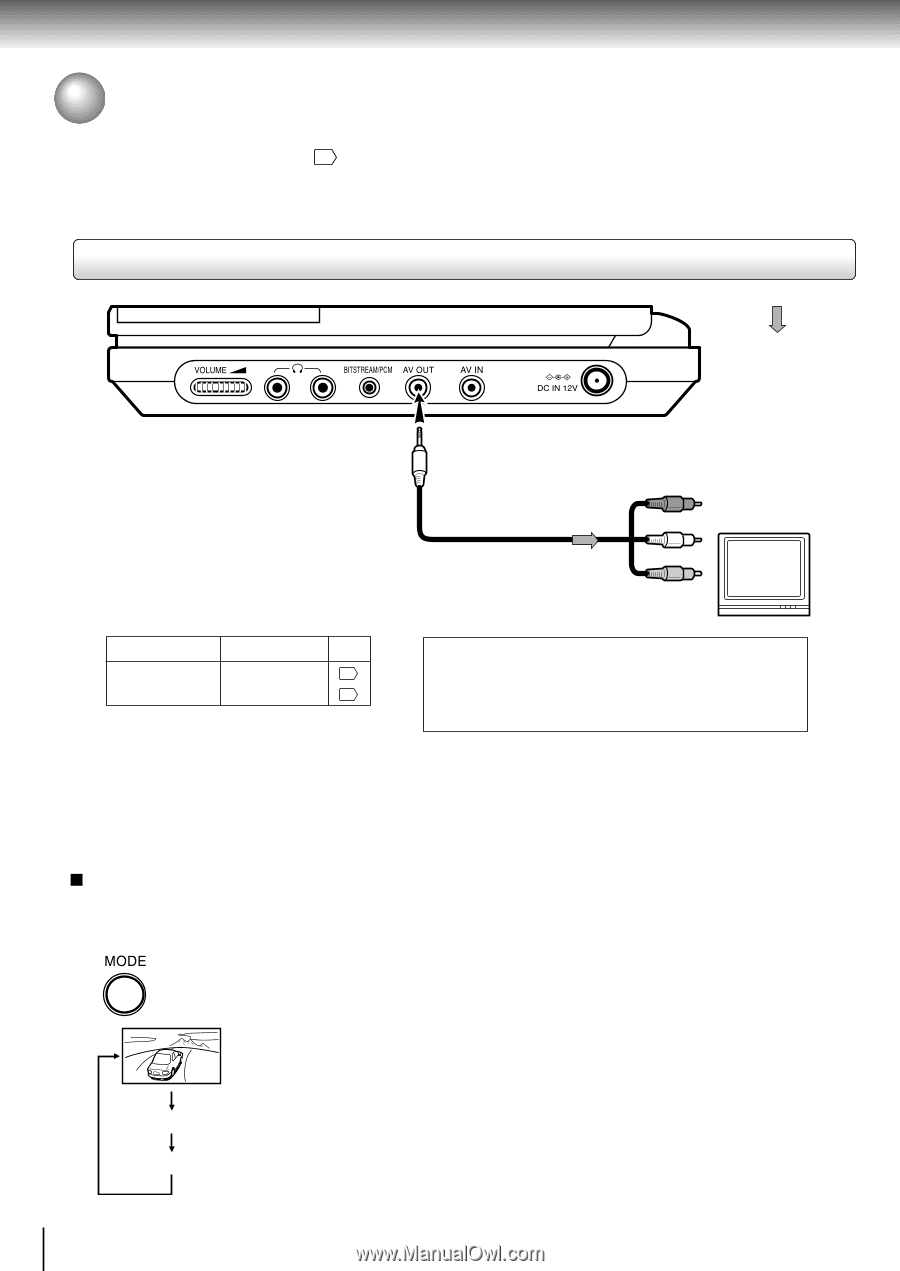
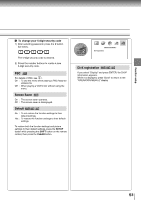
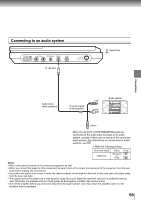
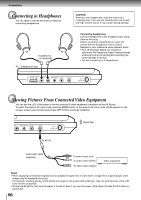
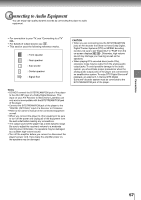
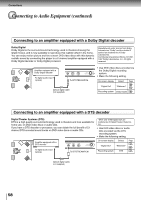
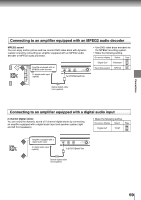
Connections Connecting to a TV or audio system Connect the player to your TV or audio system. For details of output sound, see 40 . Connecting to a TV Signal flow To AV OUT Audio/video cable (supplied) To audio inputs To video input (red) (white) TV or monitor with audio/video inputs (yellow) • Make the following setting. On-screen display Select: Page "Digital Out" 46 "Analog 2ch" 50 If you connect an audio/video cable (external output cord) to the AV-OUT jack, video is not displayed on the LCD of the player because the player switches to external output mode. Disconnect the audio/video cable when you want to display video on the LCD of the player. Notes • Refer to the owner's manual of the connected TV as well. • When you connect the player to your TV, be sure to turn off the power and unplug both units from the wall outlet before making any connections. • Connect the player directly to your TV. If you connect the player to a VCR, TV/VCR combination or video selector, the playback picture may be distorted as DVD video discs are copy protected. To switch LCD screen / Memory Card / AV-IN Select a mode other than AV-IN to output to an external device connected to the player. Press MODE button on the player. Each time the button is pressed, the LCD will change as below. Normal: Outputs video and audio to the LCD of the player only. Memory Card: To switch to the Memory Card mode. AV-IN: Inputs video and audio from an external device such as a VCR connected to the LCD of the player, thus allowing you to view video on the LCD of the player. Normal Note • Normal will be set the next time the player is turned on even if you turn the power of the player off while AV-IN is set. Memory Card AV-IN 54
-
 1
1 -
2
-
3
-
4
-
5
-
6
-
7
-
8
-
9
-
10
-
11
-
12
-
13
-
14
-
15
-
16
-
17
-
18
-
19
-
20
-
21
-
22
-
23
-
24
-
25
-
26
-
27
-
28
-
29
-
30
-
31
-
32
-
33
-
34
-
35
-
36
-
37
-
38
-
39
-
40
-
41
-
42
-
43
-
44
-
45
-
46
-
47
-
48
-
 49
49 -
 50
50 -
 51
51 -
 52
52 -
 53
53 -
 54
54 -
 55
55 -
 56
56 -
 57
57 -
 58
58 -
 59
59 -
60
-
61
-
62
-
63
-
64
-
65
-
66
-
67
-
68
-
69
-
70
-
71
-
72
 |
 |