Toshiba Satellite P205-S6307 Toshiba Online User's Guide for Satellite P200/P2 - Page 184
Sound system problems, The disc will not come out of the drive when you click
 |
View all Toshiba Satellite P205-S6307 manuals
Add to My Manuals
Save this manual to your list of manuals |
Page 184 highlights
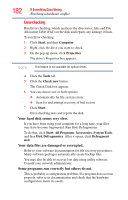
184 If Something Goes Wrong Resolving a hardware conflict If you need to remove a disc and cannot turn on the computer (for example, if the battery is completely discharged), use a narrow object, such as a straightened paper clip, to press the manual eject button. This button is in the small hole next to the optical drive eject button on the face of the optical drive tray. Never use a pencil to press the manual eject button. Pencil lead can break off inside the computer and damage it. Some discs run correctly but others do not. Check the type of disc you are using. The optical drive supports the Digital Versatile Disc (DVD) formats DVD±R, DVD±RW, and DVD RAM, plus the CD formats CD-Recordable (CD-R) and CDRewritable (CD-RW). If the problem is with a data CD or DVD, refer to the software's documentation and check that the hardware configuration meets the program's needs. The disc will not come out of the drive when you click the eject button on the screen. Press the button on the optical drive itself. For additional information see "You press the disc eject button, but the drive tray does not slide out." on page 183. Sound system problems No sound is coming from the computer's speakers. Adjust the volume control. Try pressing Fn + Esc to see if volume mute is disabled. Check that the volume control on the computer is turned up. If you are using external headphones or speakers, check that they are securely connected to your computer. The computer emits a loud, high-pitched noise. This is feedback between the microphone and the speakers. It occurs in any sound system when input from a microphone is fed to the speakers and the speaker volume is too loud. Adjust the volume control.
-
 1
1 -
2
-
3
-
4
-
5
-
6
-
7
-
8
-
9
-
10
-
11
-
12
-
13
-
14
-
15
-
16
-
17
-
18
-
19
-
20
-
21
-
22
-
23
-
24
-
25
-
26
-
27
-
28
-
29
-
30
-
31
-
32
-
33
-
34
-
35
-
36
-
37
-
38
-
39
-
40
-
41
-
42
-
43
-
44
-
45
-
46
-
47
-
48
-
49
-
50
-
51
-
52
-
53
-
54
-
55
-
56
-
57
-
58
-
59
-
60
-
61
-
62
-
63
-
64
-
65
-
66
-
67
-
68
-
69
-
70
-
71
-
72
-
73
-
74
-
75
-
76
-
77
-
78
-
79
-
80
-
81
-
82
-
83
-
84
-
85
-
86
-
87
-
88
-
89
-
90
-
91
-
92
-
93
-
94
-
95
-
96
-
97
-
98
-
99
-
100
-
101
-
102
-
103
-
104
-
105
-
106
-
107
-
108
-
109
-
110
-
111
-
112
-
113
-
114
-
115
-
116
-
117
-
118
-
119
-
120
-
121
-
122
-
123
-
124
-
125
-
126
-
127
-
128
-
129
-
130
-
131
-
132
-
133
-
134
-
135
-
136
-
137
-
138
-
139
-
140
-
141
-
142
-
143
-
144
-
145
-
146
-
147
-
148
-
149
-
150
-
151
-
152
-
153
-
154
-
155
-
156
-
157
-
158
-
159
-
160
-
161
-
162
-
163
-
164
-
165
-
166
-
167
-
168
-
169
-
170
-
171
-
172
-
173
-
174
-
175
-
176
-
177
-
178
-
 179
179 -
 180
180 -
 181
181 -
 182
182 -
 183
183 -
 184
184 -
 185
185 -
 186
186 -
 187
187 -
 188
188 -
 189
189 -
190
-
191
-
192
-
193
-
194
-
195
-
196
-
197
-
198
-
199
-
200
-
201
-
202
-
203
-
204
-
205
-
206
-
207
-
208
-
209
-
210
-
211
-
212
-
213
-
214
-
215
-
216
-
217
-
218
-
219
-
220
-
221
-
222
-
223
-
224
-
225
-
226
-
227
-
228
-
229
-
230
-
231
-
232
-
233
-
234
-
235
-
236
-
237
-
238
 |
 |
