Toshiba TDP-EW25 User Manual - Page 31
Checking the projector status, Status display, Using the Network Projector, Setting up the projector
 |
View all Toshiba TDP-EW25 manuals
Add to My Manuals
Save this manual to your list of manuals |
Page 31 highlights
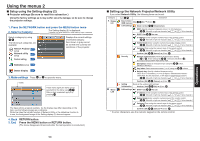
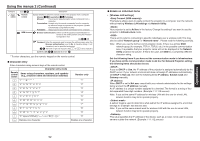
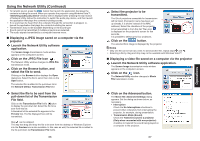
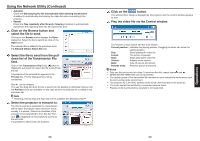
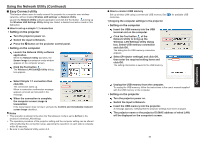
Using the menus 2 (Continued) Common • [Play icon] The slideshow icon can be displayed. • Standard The projector handles the slideshow icon as follows depending on the "On/Off" setting of Icon on the projector's menu. Icon On: The projector displays the icon upon the start of playing a slide show and turns it off after a few seconds. Icon Off: The projector does not display the icon. • Continuous The projector keeps the icon displayed during the slide show. • [Thumbnail display] Select the form of a thumbnail list. All: Displays a thumbnail preview of JPEG files, and if any JPEG files exist in the folder displays the leading thumbnail image. File: Displays only a thumbnail image of JPEG files. The thumbnail image of the JPEG files in the folder is not displayed. Off: Displays an icon without displaying thumbnail preview. Note • Thumbnail image of MPEG files can not be displayed. • [Unplug device] Run when unplugging a USB memory, a USB memory card reader/writer or a digital camera and the like. 60 Checking the projector status N Status display To check the current status of the projector, select Status display in step 2 in "Projector settings" p.50 . The following items of information will then be displayed. Application Details Version The name of the application currently running on the projector is displayed. (Examples: Slideshow, Network Utility) When inputting from USB memory "Free space/Status" are displayed. When inputting from network For wireless LAN, "MAC address/Mode/Channel/SSID/ Encryption/IP address/Subnet mask/Gateway" are displayed. For wired LAN, "Connection status/MAC address/IP address/ Subnet mask/Gateway" are displayed. PJLink class is displayed. The firmware version number of the network feature and the USB memory feature is displayed. Using the Network Projector N Setting up the projector 1 Turn the projector power on. 2 Switch the input to Network. Make sure to set the projector's input to Network. If the other inputs are selected, the projector will not be recognized by the computer. 3 A password prompt will be displayed. A password prompt will be displayed only when [Password] is set to [On] in the Application category of the Network Projector settings. 4 By referring to "Using the menus 2", make the wireless LAN or wired LAN settings. N Setting up the computer 5 Make the wireless LAN or wired LAN settings. Please see the help function of your computer for details. 6 Open the [Connect to a Network Projector] wizard by clicking on the [Start] button, by clicking [All Programs], then clicking [Accessories], finally clicking [Connect to a Network Projector]. 7 Select the desired projector from the list or enter the projector address. 8 When the password prompt is displayed in step 3 , enter the password. 61 Operations
-
 1
1 -
2
-
3
-
4
-
5
-
6
-
7
-
8
-
9
-
10
-
11
-
12
-
13
-
14
-
15
-
16
-
17
-
18
-
19
-
20
-
21
-
22
-
23
-
24
-
25
-
 26
26 -
 27
27 -
 28
28 -
 29
29 -
 30
30 -
 31
31 -
 32
32 -
 33
33 -
 34
34 -
 35
35 -
 36
36 -
37
-
38
-
39
-
40
-
41
-
42
-
43
-
44
-
45
-
46
-
47
-
48
-
49
-
50
 |
 |