Toshiba TDP-EX20 User Manual
Toshiba TDP-EX20 Manual
 |
View all Toshiba TDP-EX20 manuals
Add to My Manuals
Save this manual to your list of manuals |
Toshiba TDP-EX20 manual content summary:
- Toshiba TDP-EX20 | User Manual - Page 1
TDP-EX20 DATA PROJECTOR OWNER'S MANUAL Others Maintenance Operations Preparations Before Using - Toshiba TDP-EX20 | User Manual - Page 2
user to the presence of important operating and maintenance (servicing) instructions WARNING: Lamp contains mercury TDP-EX20 USA only TRADE NAME: DATA PROJECTOR Tested To Comply With FCC Standards FOR HOME OR OFFICE USE MODEL NAME: TDP-EX20 help. RESPONSIBLE PARTY: TOSHIBA AMERICA INFORMATION SYSTEMS, - Toshiba TDP-EX20 | User Manual - Page 3
TO DANGEROUS VOLTAGE. REFER SERVICING TO QUALIFIED SERVICE PERSONNEL ONLY. 1. Read Owner's Manual After unpacking this product, read the owner's manual carefully, and follow all the operating and other instructions. 3. Source of Light Do not look into the lens while the lamp is on. The strong - Toshiba TDP-EX20 | User Manual - Page 4
to other unit. 16. Moving the projector When carrying the projector, be sure to use the carrying handle Service Unplug this product from the wall outlet and refer servicing to qualified service operating instructions. Adjust only those controls that are covered by the operating instructions as - Toshiba TDP-EX20 | User Manual - Page 5
required, be sure the service technician has used replacement parts specified by the manufacturer or have the same characteristics as the original part. Unauthorized substitutions may result in fire, electric shock, or other hazards. (Replacement of the lamp only should be made by users.) 25. Do not - Toshiba TDP-EX20 | User Manual - Page 6
by ASTA or BSI to BSI362. Always replace the fuse cover after changing the fuse use the unit for at least 2 hours when there is an extreme or sudden where people could trip over it. The projector may fall down, which could result in other problems. • Toshiba Corporation Instruction Manual. • Toshiba - Toshiba TDP-EX20 | User Manual - Page 7
lamp contains mercury. Please dispose of this product or used lamps service or the shop where you purchased the product. Trademarks • VGA, SVGA, XGA, SXGA, UXGA are trademarks or registered trademarks of International Business Machines Corporation. • DLP Manual becomes reduced, replace both batteries - Toshiba TDP-EX20 | User Manual - Page 8
Using SAFETY PRECAUTIONS 2 IMPORTANT SAFETY INSTRUCTIONS 4 POWER SUPPLY INFORMATION 10 IMPORTANT PRECAUTIONS up the projector using a Web browser 82 Maintenance About lamp ...85 Lamp replacement 86 Lens and main unit cleaning 89 Others Trouble indications 90 Before calling service personnel - Toshiba TDP-EX20 | User Manual - Page 9
ever have to ship your projector. For maximum protection, repack the set as it was originally packed at the factory. UThe Supplied CD-ROM The supplied CD-ROM contains an owner's manual, including information not available for the printed Owner's manual (Getting started), each Application, Project - Toshiba TDP-EX20 | User Manual - Page 10
Menu selections and adjustments, volume control, etc. p.37 : Displays lamp mode. p.90 : Displays whether power is on or off (standby). projector. p.44 (19) PICTURE button : Changes image mode. p.34 (20) SCREEN SIZE button : Changes screen size. p.34 (21) GUIDE button : Displays operation guide - Toshiba TDP-EX20 | User Manual - Page 11
and minus ends of the batteries properly. Approx. 15° Approx. 5m Two batteries (LR03, SIZE AAA) are used. 3 Replace the battery cover. When operating the remote control from behind the projector, the signal beam is reflected on the projecting surface and may travel a shorter distance to reach the - Toshiba TDP-EX20 | User Manual - Page 12
rear projection WARNING • Always obey the instructions listed in IMPORTANT SAFETY INSTRUCTIONS when placing the unit. Attempting to clean and replace the lamp in a high location by yourself may cause you to fall, resulting in injury. • If you wish to mount the projector on the ceiling, be sure to - Toshiba TDP-EX20 | User Manual - Page 13
Connection Before connection • Read the owner's manual of the device you are connecting to the projector. • Some types of computer cannot be used or connected to this projector. Check for an RGB output terminal, supported signal p.94 , etc. • Turn off the power of both devices before connecting. • - Toshiba TDP-EX20 | User Manual - Page 14
stains are left on the projection lens surface, they may interfere with the projector's ability to project images on the screen. • If the lens cover projector for an extended period. Precaution • If the power cord is unplugged before cooling is complete or the main power is turned off, give the lamp - Toshiba TDP-EX20 | User Manual - Page 15
, if [Reset all] is executed from the Default setting 2 menu p.44 , the start menu will be displayed the next time when the power is turned on. • The language can also be set via the Display setting menu p.40 and Lamp power via the Default setting 2 menu p.44 . • This owner's manual assumes that - Toshiba TDP-EX20 | User Manual - Page 16
to turn off the LCD display, see the owner's manual of your computer. • If no signal is being input from the connected equipment or signal input is stopped while projecting, the "No signal" will appear. • If a signal not supported by the projector is input, the "Unsupport signal" will appear. • If - Toshiba TDP-EX20 | User Manual - Page 17
handy features (Continued) N Zooming out the images This projector is provided with the digital zoom (electric zoom: 100 size by pressing RESIZE button several times, the zoom will be reset. Pressing the RETURN button during resizing also resets the zoom. Notes • The icon appears while resizing. • - Toshiba TDP-EX20 | User Manual - Page 18
The icon will appear while freeze is in effect. • Other operation will also release the freeze. • Even if an image is frozen on the projector, the pictures are running on the video or other equipment. • If you use this function on commercial video software, broadcast or cable-broadcasting except for - Toshiba TDP-EX20 | User Manual - Page 19
[On] 1 Turn on the power. 2 The lamp lights and the password entry screen appears. 3 Enter wrong password for more than 5 times, the projector will automatically power off and enter standby mode. The figure shows displays given for operation instructions purposes. As the display may differ depending - Toshiba TDP-EX20 | User Manual - Page 20
Using the menus 1 (Continued) N The image adjustment menu Use this menu to set or adjust image-related items. Items that can be set or adjusted are marked with "Yes", and those that cannot are marked with "No". (When an item is masked, it indicates that you cannot select for the current input.) - Toshiba TDP-EX20 | User Manual - Page 21
Display icons as function guides On Off Start-up screen User logo Display start- Logo confirmation Press . Reset logo Yes No 40 Detailed the projector is connected to your computer using the Network Projector (Windows ] • TOSHIBA is set for [Logo] by factory setting. • If user's logo has - Toshiba TDP-EX20 | User Manual - Page 22
to register user logo 1 Project a picture to register. 2 Select [User logo] in can preview the registered logo. You can reset the registered logo and display style pressed (Manual), or when the main power switch is turned on (Auto). Manual Auto projector will come on. 43 Operations - Toshiba TDP-EX20 | User Manual - Page 23
of guaranteed lamp time.) When the displayed time approaches 2,000 hours, consult with a dealer about getting replacement for: TLPLW15 for TDP-EX20 (sold separately). 4: [Version] shows the version of the projector's internal control program. This version is referred to for customer service, etc - Toshiba TDP-EX20 | User Manual - Page 24
LAN equipment. This mode is applicable, for example, to a presentation in the conference room, as it requires no other facilities. This function can only be used if the projector is in range of the computer's wireless signals. Toshiba does not guarantee the converage of the radio wave in the form of - Toshiba TDP-EX20 | User Manual - Page 25
up the data saved in the USB memory onto your computer and the like before use. (Toshiba assumes no liability for losses incurred by data lost through the use of this projector.) N Supported files (1) Supported file extensions are .jpg, .JPG, .jpeg, .JPEG, .mpg, .MPG, .mpeg, and .MPEG. (2) The maximum - Toshiba TDP-EX20 | User Manual - Page 26
in gray cannot be set with the currently set conditions of the projector. Slideshow setup p.58 Status display p.61 3. Make settings Press to : Set a character.] Confirm: [OK] [Cancel] [Enter: ] Setting Reset all the wireless LAN settings. Iinitialization Confirm: [Yes] [No] [Enter: ] Wired - Toshiba TDP-EX20 | User Manual - Page 27
settings] This feature allows users to easily connect the projector to a computer over the network, without making Wireless LAN use, then set the following items IP address, Subnet mask and Gateway manually. When DHCP is set to Not use, consult with your - Toshiba TDP-EX20 | User Manual - Page 28
change the key sometimes. This item resets the wireless LAN settings to their factory defaults. 54 DHCP to Use, the IP address of the projector is assigned automatically by the DHCP server. If IP address, Subnet mask and Gateway manually. When DHCP is set - Toshiba TDP-EX20 | User Manual - Page 29
utility p.70 allows users to easily connect the projector to a computer over wireless networks, without making wireless LAN settings. For Easy Connect support, the computer requires a wireless LAN environment that is NDIS5.1 or higher driver compliant. Refer to the user's manual supplied with the - Toshiba TDP-EX20 | User Manual - Page 30
support transmission to the SMTP server that requires authentication. N Setting slideshow options Slideshow is the function to allow users when using a USB memory card reader/writer to mount multiple media. • The Auto Demo function is available a slide show, the projector can give various display - Toshiba TDP-EX20 | User Manual - Page 31
prompt will be displayed. A password prompt will be displayed only when [Password] is set to [On] in the Application category of the Network Projector settings. 4 By referring to "Using the menus 2", make the wireless LAN or wired LAN settings. N Setting up the computer 5 Make the wireless LAN - Toshiba TDP-EX20 | User Manual - Page 32
Windows Vista™ 64-bit version is not supported. N Application Types and Major Functions Network run setup.exe, respectively. Follow the on-screen instructions. During the installation, a dialog box may p.78 N How to uninstall Uninstall [Toshiba Data Projector] and [Jpeg Conversion Tool] programs - Toshiba TDP-EX20 | User Manual - Page 33
the sound being played on a computer can be sent to the projector. When "Update manually" is selected in step 2 A single screen image is sent projector. • The projector ID is the MAC address of the wired LAN inserted into the projector. • Playing contents protected by copyright is not supported. - Toshiba TDP-EX20 | User Manual - Page 34
that plays the contents including the sound. When you operate the projector using Windows Vista™, "Switching audio play device" window will be displayed after pressing the start button of Network Utility. Follow the instruction to switch the audio play device, and then launch the application - Toshiba TDP-EX20 | User Manual - Page 35
video file when connecting to the projector. • Repeat Check the Play repeatedly 6 Select the projector to transmit to. The IDs of projectors accessible for transmission will be listed. (If projector name has been set • The projector ID is the MAC address of the wired LAN mounted on the projector. • - Toshiba TDP-EX20 | User Manual - Page 36
to the USB memory. 4 Unplug the USB memory from the computer. To unplug the USB memory, follow the instructions in the user's manual supplied with the USB memory or the computer. • Setting on the projector 5 Turn the projector power on. 6 Switch the input to Network. 7 Insert the USB memory into the - Toshiba TDP-EX20 | User Manual - Page 37
mode is set to Ad hoc in the projector's wireless LAN settings. Be sure to use Network Utility version 5.0. 72 L Profile settings This feature allows the user to save the computer's wireless LAN settings. use the Network Utility menu to make necessary wireless LAN settings manually. 73 Operations - Toshiba TDP-EX20 | User Manual - Page 38
window is still displayed, you can operate the projector via the Remote Control window, while using the number of lists Current File Name Operation Guide Previous page exists Orange frame: currently that the JPEG, MPEG or other file is not supported. When the Thumbnail display is set to Off, the - Toshiba TDP-EX20 | User Manual - Page 39
such a phenomenon, use another USB memory because the current one is not supported. • Pressing the GUIDE button on the remote control with a slide displayed displays the operation guide for slideshow. • When you operate the projector using the USB memory card reader/writer, up to 4 media types are - Toshiba TDP-EX20 | User Manual - Page 40
quality of an image after it has been lowered.) N Converting an image file This converts JPEG files using compression formats not supported by the projector, Windows® metafiles (wmf), and bitmapped files (bmp) into JPEG files. (1) In the Conversion Method field, select Converting image file. (Status - Toshiba TDP-EX20 | User Manual - Page 41
in "Playing a slide show from a thumbnail list" p.75 to display a list of thumbnails. (3) Follow the instructions in step 2 in "Playing a slide show from a thumbnail list" p.75 to find the thumbnail of file. Specify the resolution in accordance with your projector's resolution. Operations 80 81 - Toshiba TDP-EX20 | User Manual - Page 42
available with the Network or USB memory. Top: Returns you to the top page. TOSHIBA Projector Site: The browser will display the home page at http://multimedia. projector-toshiba.com/map.html, providing projector information. The home page address is subject to change without notice. (The - Toshiba TDP-EX20 | User Manual - Page 43
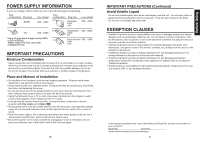
with care to avoid injury and contact your dealer for repair service. • In the event of lamp burst, unplug the product from the wall outlet, leave and completely ventilate the room. Then, thoroughly clean the area around the projector and discard any edible items placed in that area. • When the - Toshiba TDP-EX20 | User Manual - Page 44
loose. 8 Replace the outer lamp cover. Align the cover, and press it in, then tighten the screws loosened in step 3 until the outer lamp cover is no longer loose. (Be sure to replace the outer lamp cover.) 9 Reset the lamp time. See the lamp's manual for instructions on resetting the lamp time. 87 - Toshiba TDP-EX20 | User Manual - Page 45
lamp use (as a rough guide) p.45 • Please replace the lamp after 2000 hours of use with [Lamp power] in the Default setting 2 menu set to [Standard], and 3000 hours of use with [Lamp of a ceiling-mounted unit from your projector dealership. Attempting to clean or replace the lamp in a high location - Toshiba TDP-EX20 | User Manual - Page 46
Others Trouble indications The indicator lights to inform you of internal abnormalities. No power ⇒ Problem with projector (Off) • Unplug the power cord, and contact your dealer. (Red lit) (Red flashing) Or (Red lit) (Red lit) Lamp went out during use, or won't come on ⇒ Lamp temperature is - Toshiba TDP-EX20 | User Manual - Page 47
between the computer and the projector? • Do your computer and OS support the supplied software application? 1 DLP® chip Picture elements 786,432 pixels (1024H × 768V) Lens F=2.63 f=8.37 mm Lamp High-pressure mercury lamp ( Replacement Lamp Model TLPLW15 Connection terminal Others 92 93 - Toshiba TDP-EX20 | User Manual - Page 48
Specifications (Continued) N List of supported signals (RGB signals) This projector supports the following RGB signals. Note, however, that depending on the computer model, the screen may show flicker or streaking. Please adjust the projector if this happens. Resolution Mode Refresh rate (Hz) H- - Toshiba TDP-EX20 | User Manual - Page 49
communication. For input commands, only ASCII-compliant alluppercase alphanumeric characters supported. 4. Replies Acknowledge ACK (06h) CR(0Dh) Data are to be sent consecutively, wait for the response from the projector before sending the next command. Q Main Commands Item Power on Power - Toshiba TDP-EX20 | User Manual - Page 50
-
 1
1 -
 2
2 -
 3
3 -
 4
4 -
 5
5 -
 6
6 -
 7
7 -
8
-
9
-
10
-
11
-
12
-
13
-
14
-
15
-
16
-
17
-
18
-
19
-
20
-
21
-
22
-
23
-
24
-
25
-
26
-
27
-
28
-
29
-
30
-
31
-
32
-
33
-
34
-
35
-
36
-
37
-
38
-
39
-
40
-
41
-
42
-
43
-
44
-
45
-
46
-
47
-
48
-
49
-
50
 |
 |

Before Using
Preparations
Operations
Maintenance
Others
TDP-EX20
DATA PROJECTOR
OWNER’S MANUAL