Toshiba TDP-EX20 User Manual - Page 38
Operating the projector, Projecting images stored in a USB memory
 |
View all Toshiba TDP-EX20 manuals
Add to My Manuals
Save this manual to your list of manuals |
Page 38 highlights
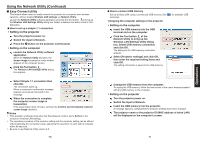
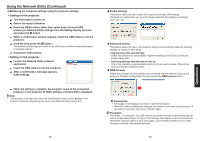
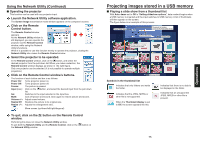
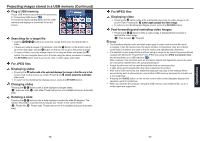
Using the Network Utility (Continued) N Operating the projector This function can be used with any projector input. 1 Launch the Network Utility software application. The Screen Image transmission mode window appears on the computer's screen. 2 Click on the Remote Control button. The Remote Control window appears. As the Network Utility window is still displayed, you can operate the projector via the Remote Control window, while using the Network Utility's functions. While it is possible to use this function merely to operate the projector, closing the Network Utility also closes the Remote Control window. 3 Select the projector to be operated. In the Remote Control window, click on the button, and select the desired projector from the pull-down list. When you make a selection, the Remote Control window displays as shown in the right figure. Only one projector can be selected. (It is not possible to operate multiple projectors.) 4 Click on the Remote Control window's buttons. The function of each button and box is as follows: Power On: Turns projector power on. Power Off: Turns projector power off. Freeze: The picture is paused. Input (box): Click on the button, and select the desired input from the pull-down list. Go: Switches to the input selected in the Input box. Mute: Cuts off picture and sound. Click again to restore picture and sound. Volume +/-: Adjust sound volume. Resize Off Restores the picture to its original size. Resize +/-: Adjusts the enlargement ratio. : Move screen (up/down/left/right/diagonal) 5 To quit, click on the button on the Remote Control window. Performing this does not close the Network Utility window. To exit both the Network Utility and the Remote Control, click on the the Network Utility window. button on 74 Projecting images stored in a USB memory N Playing a slide show from a thumbnail list With Auto. demo set to Off in "Setting slideshow options", data readout begins when a USB memory is inserted and the input switches to USB memory. A list of thumbnails will then appear on the screen. The figure below is an example of this process: Current Folder Name Thumbnail list number Current list No./Total number of lists Current File Name Operation Guide Previous page exists Orange frame: currently selected file or folder Folder Thumbnail image of first file in folder JPEG file Thumbnail image of file Next page exists MPEG file Symbols in the thumbnail list Indicates that only folders are inside the folder. Indicates that the JPEG, MPEG or other file is not supported. When the Thumbnail display is set to Off, the screen appears like this. Indicates that there is no data to be displayed in the folder. Indicates that an unsupported JPEG, MPEG or other file is present. 75 Operations
-
 1
1 -
2
-
3
-
4
-
5
-
6
-
7
-
8
-
9
-
10
-
11
-
12
-
13
-
14
-
15
-
16
-
17
-
18
-
19
-
20
-
21
-
22
-
23
-
24
-
25
-
26
-
27
-
28
-
29
-
30
-
31
-
32
-
 33
33 -
 34
34 -
 35
35 -
 36
36 -
 37
37 -
 38
38 -
 39
39 -
 40
40 -
 41
41 -
 42
42 -
 43
43 -
44
-
45
-
46
-
47
-
48
-
49
-
50
 |
 |
