Toshiba e740 User Guide - Page 161
(2).Launching applications, (3).Switching the icon display, (4).Icon settings
 |
View all Toshiba e740 manuals
Add to My Manuals
Save this manual to your list of manuals |
Page 161 highlights
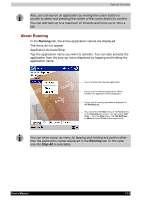
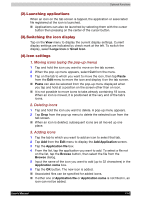
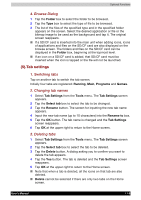
Optional Functions (2).Launching applications When an icon on the tab screen is tapped, the application or associated file registered at the icon is launched. ■ Applications can also be launched by selecting them with the cursor button then pressing on the center of the cursor button. (3).Switching the icon display Tap on the View menu to display the current display settings. Current display settings are indicated by check mark at the left. To switch the display, select Large Icon or Small Icon. (4).Icon settings 1. Moving icons (using the pop-up menu) 1 Tap and hold the icon you want to move on the tab screen. 2 When the pop-up menu appears, select Cut from the menu. 3 Tap on the tab to which you want to move the icon, then tap Paste from the Edit menu to move the icon and display it on the tab screen. ■ Paste can also be selected from the pop-up menu displayed when you tap and hold at a position on the screen other than on icon. ■ It is not possible to move icons to tabs already containing 18 icons. When an icon is moved, it is positioned at the very end of the tab's icons. 2. Deleting icons 1 Tap and hold the icon you want to delete. A pop-up menu appears. 2 Tap Drop from the pop-up menu to delete the selected icon from the tab screen. ■ When an icon is deleted, subsequent icons are all moved up one place. 3. Adding icons 1 Tap the tab to which you want to add an icon to select that tab. 2 Tap Add from the Edit menu to display the Add Application screen. 3 Tap the Application file box. 4 From the list, tap the application you want to add. To select a file not on the list, tap the Browse button, then select the file from the Browse dialog. 5 Input the name of the icon you want to add (up to 32 characters) in the Application name box. 6 Tap the OK button. The new icon is added. ■ Associated files can be specified for added icons. ■ If either one of Application file or Application name is not filled in, an icon can not be added. User's Manual 11-7
-
 1
1 -
2
-
3
-
4
-
5
-
6
-
7
-
8
-
9
-
10
-
11
-
12
-
13
-
14
-
15
-
16
-
17
-
18
-
19
-
20
-
21
-
22
-
23
-
24
-
25
-
26
-
27
-
28
-
29
-
30
-
31
-
32
-
33
-
34
-
35
-
36
-
37
-
38
-
39
-
40
-
41
-
42
-
43
-
44
-
45
-
46
-
47
-
48
-
49
-
50
-
51
-
52
-
53
-
54
-
55
-
56
-
57
-
58
-
59
-
60
-
61
-
62
-
63
-
64
-
65
-
66
-
67
-
68
-
69
-
70
-
71
-
72
-
73
-
74
-
75
-
76
-
77
-
78
-
79
-
80
-
81
-
82
-
83
-
84
-
85
-
86
-
87
-
88
-
89
-
90
-
91
-
92
-
93
-
94
-
95
-
96
-
97
-
98
-
99
-
100
-
101
-
102
-
103
-
104
-
105
-
106
-
107
-
108
-
109
-
110
-
111
-
112
-
113
-
114
-
115
-
116
-
117
-
118
-
119
-
120
-
121
-
122
-
123
-
124
-
125
-
126
-
127
-
128
-
129
-
130
-
131
-
132
-
133
-
134
-
135
-
136
-
137
-
138
-
139
-
140
-
141
-
142
-
143
-
144
-
145
-
146
-
147
-
148
-
149
-
150
-
151
-
152
-
153
-
154
-
155
-
 156
156 -
 157
157 -
 158
158 -
 159
159 -
 160
160 -
 161
161 -
 162
162 -
 163
163 -
 164
164 -
 165
165 -
 166
166 -
167
-
168
-
169
-
170
-
171
-
172
-
173
-
174
-
175
-
176
-
177
-
178
-
179
-
180
-
181
-
182
 |
 |