ViewSonic N2050W User Guide - Page 21
To Use The Menus
 |
View all ViewSonic N2050W manuals
Add to My Manuals
Save this manual to your list of manuals |
Page 21 highlights
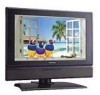
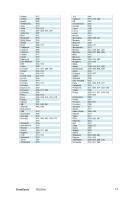
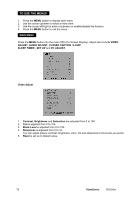
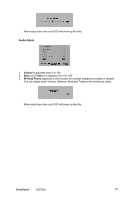
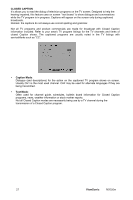
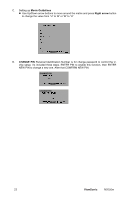
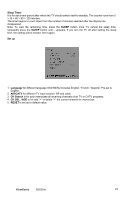
TO USE THE MENUS 1. Press the MENU button to display each menu 2. Use the cursor up/down to select a menu item. 3. Use the cursor left/right to enter a submenu or enable/disable the function. 4. Press the MENU button to exit the menu. MAIN MENU Press the MENU button into the main OSD (On Screen Display). Adjust item include VIDEO ADJUST, AUDIO ADJUST, CLOSED CAPTION ,V-CHIP, SLEEP TIMER , SET UP and PC ADJUST. Video Adjust 50 0 ADJUST 1. Contrast, Brightness and Saturation are adjusted from 0 to 100. 2. Tint is adjusted from 0 to 100. 3. Black Level is adjusted from 0 to 100. 4. Sharpness is adjusted from 0 to 10. You can adjust picture contrast, brightness, color, tint and sharpness to the levels you prefer. 5. Reset is set up to default value. 19 ViewSonic N2050w
-
 1
1 -
2
-
3
-
4
-
5
-
6
-
7
-
8
-
9
-
10
-
11
-
12
-
13
-
14
-
15
-
 16
16 -
 17
17 -
 18
18 -
 19
19 -
 20
20 -
 21
21 -
 22
22 -
 23
23 -
 24
24 -
 25
25 -
 26
26 -
27
-
28
-
29
-
30
-
31
-
32
-
33
-
34
-
35
-
36
-
37
-
38
-
39
 |
 |