ViewSonic SC-Z55 SC-Z55 User Guide (English) - Page 19
Assembling the AC Adapter
 |
View all ViewSonic SC-Z55 manuals
Add to My Manuals
Save this manual to your list of manuals |
Page 19 highlights
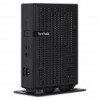
Setting Up Your SC-Z55 Assembling the AC Adapter Step 5: Mount Your SC-Z55 To mount your SC-Z55 on the back of a monitor, please do the following: 1. Refer to Step 2 and Step 4 to prepare required screws for mounting your SC-Z55. • You will need two (2) screws of type 2 to secure the bracket to your SC-Z55. • You will need two (2) screws of type 1 or 2 to secure the bracket to the monitor. 2. Place your SC-Z55 on a flat surface with the VESA mount hole side upward. 3. Refer to Step 2 to choose two of the four VESA mount holes on the bracket to align with two mount holes on your SC-Z55 such that the bracket projects out and is closer to the rear panel than the front one as shown below, and then secure the bracket to your SC-Z55 with two (2) screws of type 2 . 4. Align the mount holes on the bracket with the mount holes on the back of the monitor, and then secure the bracket to the monitor with two (2) screws of type 2 or 1 . Ensure that your SC-Z55 is located in the center of the monitor and the rear panel of your SC-Z55 is facing rightward as shown below. Have SC-Z55's rear panel facing rightward. 2.2 Assembling the AC Adapter To assemble the AC adapter for your SC-Z55, please do the following: 1. Unpack your zero client package and take out the AC adapter and its detached plug. 2. Slide the plug into the AC adapter until it clicks into place. NOTE • The supplied plug may vary, depending on different areas. 11
-
 1
1 -
2
-
3
-
4
-
5
-
6
-
7
-
8
-
9
-
10
-
11
-
12
-
13
-
 14
14 -
 15
15 -
 16
16 -
 17
17 -
 18
18 -
 19
19 -
 20
20 -
 21
21 -
 22
22 -
 23
23 -
 24
24 -
25
 |
 |
