Vizio L32HDTV User Manual - Page 10
Basic Controls and Connections - remote control
 |
UPC - 857380000638
View all Vizio L32HDTV manuals
Add to My Manuals
Save this manual to your list of manuals |
Page 10 highlights
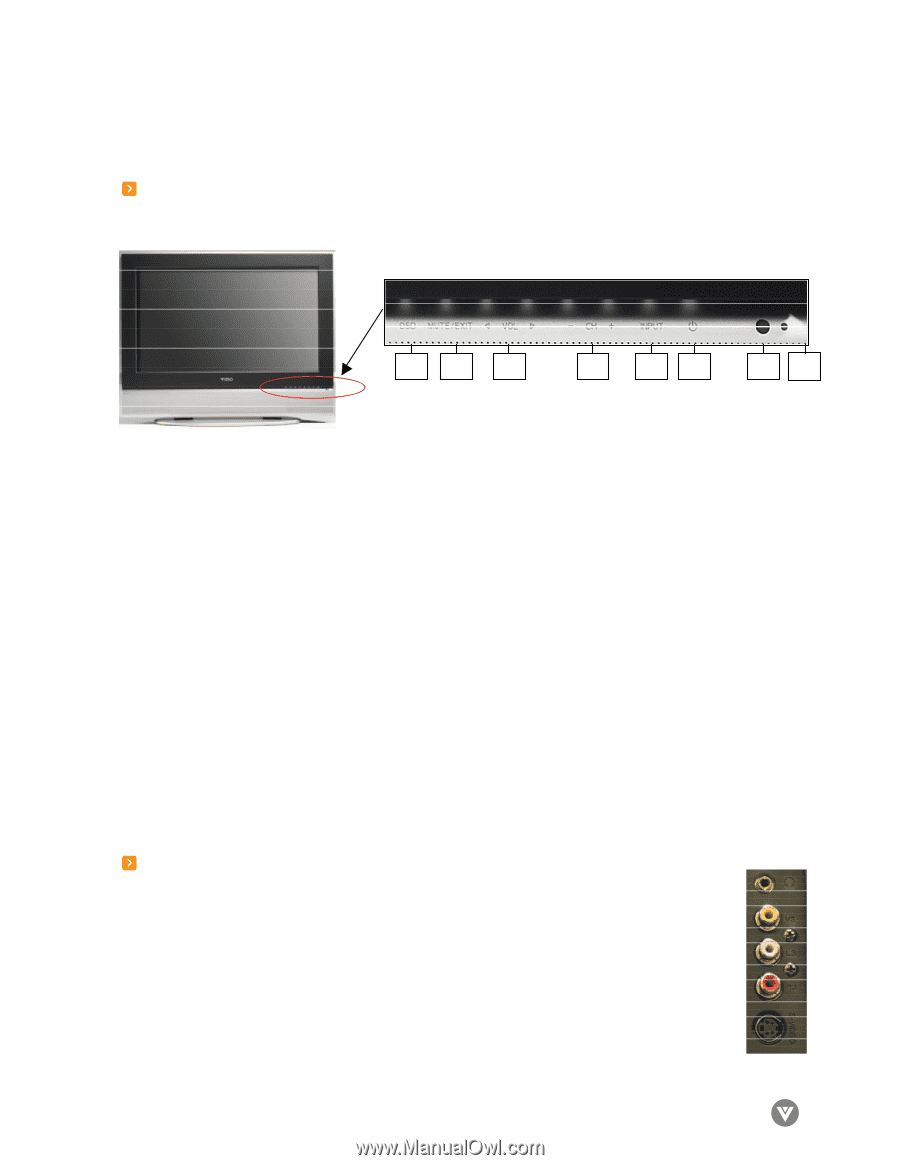
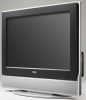
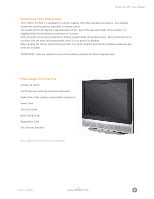
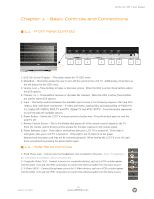
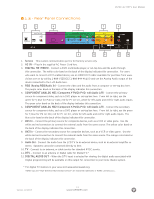
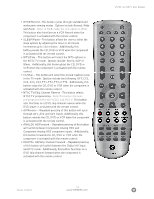
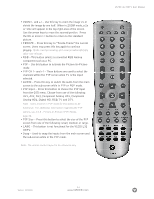
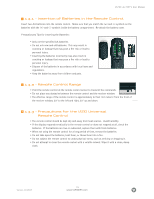
VIZIO L32 HDTV User Manual Chapter 1 - Basic Controls and Connections 1.1 - Front Panel Controls 1 2 3 4 5 6 7 8 1. OSD (On-Screen Display) - This button opens the TV OSD menu. 2. Mute/Exit - This button allows the user to turn off the sound on the LCD TV. Additionally, it functions as the exit button for the OSD menu. 3. Volume (-/+) -- These buttons increase or decrease volume. When the OSD is active, these buttons adjust the OSD options. 4. Channel (-/+) - These buttons increase or decrease the channels. When the OSD is active, these buttons are used to select OSD options. 5. Input - This button switches between the available input sources in the following sequence: AV1 and AV2 (Video), AV3 (side panel connections - S-Video and Video), Analog HD1 and Analog HD2 (Y-Pb/Cb-Pr/ Cr), Digital HD (HDMI), RGB, TV and DTV (Digital TV and ATSC HDTV). Press the button repeatedly to cycle through the available options. 6. Power Button - Switch the LCD TV on by pressing the button once. Press the button again to turn the LCD TV off. 7. Remote Control Sensor - This is the window that passes all of the remote control signals to the TV. Point the remote control directly at this window for the best response to the remote signal. 8. Power Indicator Light - If the light is solid yellow, then your LCD TV is turned off. If the light is solid green, then your LCD TV is turned on. If the light is not lit, there is no AC power detected and the power cord may not be connected properly. When turning the LCD TV on or off, wait three seconds before pressing the power button again. 1.2 - Side Panel Controls 1. Head Phone Jack - Connect external headphones (not included) to this port. Note: if headphones are connected, the speakers will be disconnected. 2. Composite Video (V3) - Connect a source for composite devices, such as a VCR or video games. Use the white (L3) and red (R3) connectors to connect the external audio from the same source. 3. S-Video (AV3) - Connect the primary source for S-Video devices, such as a VCR or video games. Use the white (L3) and red (R3) connectors to connect the external audio from the same source. Version- 11/29/05 10 www.VIZIOCE.com
-
 1
1 -
2
-
3
-
4
-
 5
5 -
 6
6 -
 7
7 -
 8
8 -
 9
9 -
 10
10 -
 11
11 -
 12
12 -
 13
13 -
 14
14 -
 15
15 -
16
-
17
-
18
-
19
-
20
-
21
-
22
-
23
-
24
-
25
-
26
-
27
-
28
-
29
-
30
-
31
-
32
-
33
-
34
-
35
-
36
-
37
-
38
-
39
-
40
-
41
-
42
-
43
-
44
-
45
-
46
-
47
-
48
-
49
-
50
-
51
-
52
-
53
-
54
-
55
-
56
-
57
-
58
-
59
-
60
-
61
-
62
-
63
-
64
-
65
-
66
-
67
-
68
-
69
-
70
-
71
-
72
-
73
-
74
-
75
-
76
-
77
-
78
-
79
-
80
-
81
 |
 |