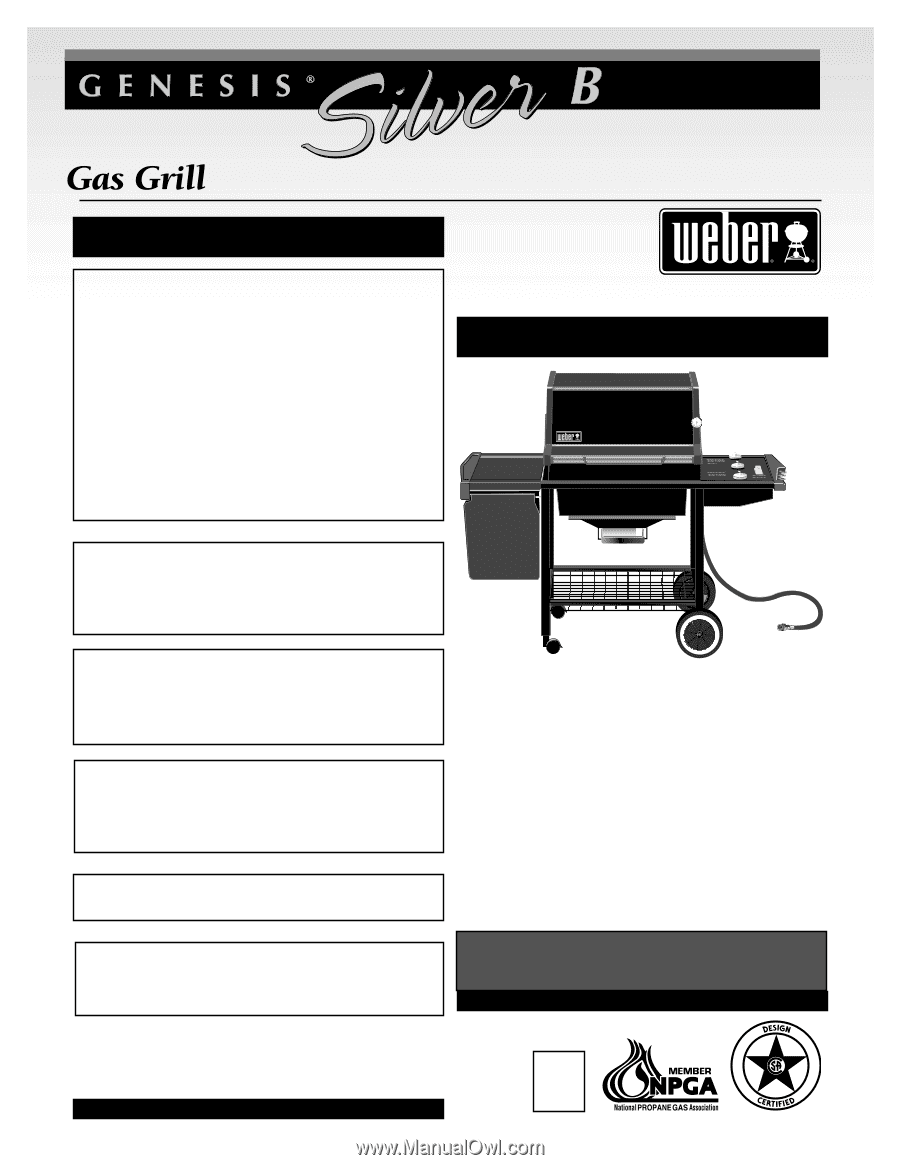
Weber Genesis Silver B NG Owner Manual
Weber Genesis Silver B NG Manual
 |
View all Weber Genesis Silver B NG manuals
Add to My Manuals
Save this manual to your list of manuals |
Weber Genesis Silver B NG manual content summary:
- Weber Genesis Silver B NG | Owner Manual - Page 1
death, or damage to property. Natural Gas ® ® ƽ WARNING Do not store GAS APPLIANCE IS DESIGNED FOR OUTDOOR USE ONLY. ƽ WARNING: Do not try to light this appliance without reading the "Lighting" Instructions section of this manual YOU MUST READ THIS OWNERS GUIDE BEFORE OPERATING YOUR GAS GRILL - Weber Genesis Silver B NG | Owner Manual - Page 2
. ƽ After a period of storage, and/or nonuse, the Weber Gas Barbecue should be checked for gas leaks and burner obstructions before use. See instructions in this manual for correct procedures. ƽ Do not operate the Weber gas barbecue if there is a gas leak present. ƽ Do not use a flame to check for - Weber Genesis Silver B NG | Owner Manual - Page 3
this Weber Gas Grill that in accordance with the printed instructions accompanying it. Weber may require reasonable proof of service, or failure to perform normal and routine maintenance, including but not limited to damage caused by insects within the burner tubes, as set out in this owner's manual - Weber Genesis Silver B NG | Owner Manual - Page 4
A-9 Assembly Instructions B-1 Installing Features C-1 Operating D-1 Lighting D-1 Manual Lighting D-2 Cooking D-3 Storage and/or Nouse D-3 Cleaning D-3 Annual Maintenance D-4 General Maintenance D-5 Replacing Main Burners D-6 Crossover Ignition System Operations ... D-7 Troubleshooting - Weber Genesis Silver B NG | Owner Manual - Page 5
you the minimum requirements for assembling your Weber Gas Barbecue. Please read the instructions carefully before using your Weber Gas Barbecue. Improper assembly can be dangerous. • Not for use by children. • If there are local codes that apply to portable gas grills, you will have to conform to - Weber Genesis Silver B NG | Owner Manual - Page 6
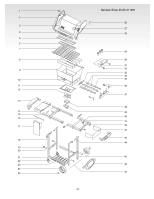
1 Genesis Silver-B NG 011901 2 26 3 27 4 28 5 6 7 29 8 30 31 9 32 33 34 10 35 11 36 12 37 13 38 14 39 15 40 16 41 17 32 42 43 18 44 19 20 21 45 22 23 46 24 25 47 A-6 - Weber Genesis Silver B NG | Owner Manual - Page 7
26. Hair Pin Cotter 27. Thermometer 28. Right Endcap 29. Burner Control Knobs 30. Control Panel 31. Ignitor Button 32. Control Panel Hardware 33. Crossover tube 34. Front and Back Burners 35. Center Burner 36. Manifold Hardware 37. Manifold 38. Catch Pan 39. Disposable Drip Pan 40. Igniter 41. Right - Weber Genesis Silver B NG | Owner Manual - Page 8
-Stephen Products Co., Weber, the silhouette, and the kettle configuration are registered trademarks ® of Weber-Stephen Products Co., 200 East Daniels Road, Palatine, IL, 60067-6266, U.S.A. This product is covered by one or more United States patents and patents in - Weber Genesis Silver B NG | Owner Manual - Page 9
Screwdriver Phillips screwdriver Hammer 7/16 open-end or an adjustable wrench Pliers Block of wood Lid -1 Left Frame - 1 Right Frame -1 Wheel Frame - 1 Caster Frame - 1 Frame Connectors - 2 ® ® Left Trim Piece - 1 Cooking Box - 1 Right Trim Piece - 1 Work Surface - 1 Swing-Up Work Surface - 1 - Weber Genesis Silver B NG | Owner Manual - Page 10
Warming Rack - 1 Warm-Up Basket - 1 Flavorizer Bars - 5 Wrap-Around Trim Piece - 1 Bottom tray - 1 Catch Pan Holder - 1 Catch-Pan -1 Disposable Drip Pans - 2 Thermometer -1 Casters - 2 Wheels - 2 Hose - 1 Burner Control Knobs - 3 Hinge Pins (1/4 x 1 1/2 inch clevis pin) - 2 2 inch bolts (1/4 x 20 x - Weber Genesis Silver B NG | Owner Manual - Page 11
instruction manual. If you do, please follow these steps below in place of the steps included in the manual. Assembly Instructions Manifold Support Bracket - 1 * See Section D * Operating General Maintenance Weber Spider Stopper™ Guards Your Weber Gas Barbecue, as well as any outdoor gas - Weber Genesis Silver B NG | Owner Manual - Page 12
tube(1) from the burners. Remove the burners from the cooking box. (1) Replacing Main Burners 1) Your Weber Gas Barbecue must be OFF and cool. 2) Turn gas guide Service Representative in your region using the contact information sheet provided with your manual. ƽ WARNING: After reinstalling the gas - Weber Genesis Silver B NG | Owner Manual - Page 13
Assembly Instructions WE B Assemble wheel frame You will need: axle rod, two wheel hubcaps, two wheels, wheel frame, one hubcap onto the end of the axle rod. Slide one wheel onto the axle, WEBER name facing out. Next, slide the other end of the axle rod through the wheel frame. Add the other wheel - Weber Genesis Silver B NG | Owner Manual - Page 14
Continue frame assembly You will need: caster frame, wheel frame, four 1/2 inch bolts, four nylon washers and a 7/16 inch or adjustable wrench. Place the caster frame onto the tabs of the left frame, so that the swing table locking latch(1) is to the rear. Place the wheel frame onto the tabs of the - Weber Genesis Silver B NG | Owner Manual - Page 15
Insert casters You will need: frame assembly and two casters. Push the casters firmly into the inserts in the ends of the caster frame. Add Wrap-around Frame Panel You will need: wrap around frame panel and a wrench. Place wrap-around frame panel in place: 1) The cut-out tabs should fit between the - Weber Genesis Silver B NG | Owner Manual - Page 16
the burner tubes(1) are under the frame brace(2). (1) (2) Your Weber Gas Grill Manifold assembly consisting of gas manifold, valves and gas burners Contact the Customer Service Representative in your region using the contact information sheet provided with your manual. Do not use grill. (2) (1) - Weber Genesis Silver B NG | Owner Manual - Page 17
and cooking box slightly and hook the manifold bracket(2) onto the frame brace(1). (1) (2) Install igniter Note - The igniter wires are already attached to the Gas Catcher Ignition Chamber and the igniter. This was done to factory test the ignition system. The igniter lock nut is on the igniter - Weber Genesis Silver B NG | Owner Manual - Page 18
manual shut-off valve must be installed outdoors, immediately ahead of the quick disconnect. s An additional manual action of natural gas when connections tube. One size larger should be used for lengths greater than 50 feet. s Gas piping may be copper tubing, type K or L; polyethylene plastic tube - Weber Genesis Silver B NG | Owner Manual - Page 19
them clockwise until they stop, then they are off. Proceed to the next step. Connect flexible hose to manifold You will need: the 12 foot natural supply hose and a 3/ 4 inch wrench. Thread fitting end of hose onto manifold. Tighten with wrench. B-7 - Weber Genesis Silver B NG | Owner Manual - Page 20
before using your Weber Gas Barbecue. Shipping and handling may loosen or damage a gas fitting. ƽ WARNING gas. DO NOT OPERATE THE BARBECUE. Contact the Customer Service Representative in your region using the contact information sheet provided with your manual. When leak checks are complete, turn gas - Weber Genesis Silver B NG | Owner Manual - Page 21
Install the slide out bottom tray You will need: the slide out bottom tray(1), catch pan holder(2), catch pan and one disposable drip pan. Slide the bottom tray onto the mounting rails under the cooking box with finger grip toward you(1). ƽ WARNING: Do not line bottom tray with aluminum foil. It - Weber Genesis Silver B NG | Owner Manual - Page 22
Install Lid You will need: lid, two hair pin cotters(1) and two hinge pins(2). Place lid on top of the cooking box. Align the hinges at the rear of the barbecue. Insert hinge pins through the hinges from the outside. Insert hair pin cotters into the small holes in the hinge pins. (1) (2) Install - Weber Genesis Silver B NG | Owner Manual - Page 23
Installing Features Install the right trim piece with tool holders You will need: Right trim piece with tool holders Push the Right trim piece into the frame as shown(1), making sure that the tabs on the underside of the trim piece are snapped into the slots in the frame.(2) 2.) Slide the swing-up - Weber Genesis Silver B NG | Owner Manual - Page 24
4.) While holding swing-up work surface in position, insert the other end of the swing-up work surface rod into the left end trim piece. Push the trim piece into the frame. To raise swing-up work surface: Lift table all the way up and slide it to the right, then lower table until you feel it lock - Weber Genesis Silver B NG | Owner Manual - Page 25
its holder on the right side of the lid. ® ® Installing the Warm-Up™ Basket You will need: Warm-Up Basket Insert one end of the Weber Warm-Up Basket into the hole at the right side of the inside of the lid, and the other end into the slot at the - Weber Genesis Silver B NG | Owner Manual - Page 26
to be damaged in any way, do not use the barbecue. Replace using only Weber authorized replacement hose. Contact the Customer Service Representative in your region using the contact information sheet provided with your manual. 1 1) Open the lid. 2) Make sure all burner control knobs are turned OFF - Weber Genesis Silver B NG | Owner Manual - Page 27
Manual Lighting ƽ DANGER Failure to open lid while igniting the barbecue's burners, or not waiting 5 minutes to allow the gas to control knob clockwise to the OFF position. Turn gas supply OFF at the source. 2 7 4,6 3 5 *The grill illustrated may have slight differences than the model purchased - Weber Genesis Silver B NG | Owner Manual - Page 28
secured in the OFF position. When the Weber Gas Barbecue is stored indoors, the gas supply MUST BE DISCONNECTED. s After a period of storage and/or nonuse, the Weber Gas Grill should be checked for gas leaks and any obstructions in the burner tubes before using. (See "Maintenance" Section.) s Check - Weber Genesis Silver B NG | Owner Manual - Page 29
Service Representative in your region using the contact information sheet provided with your manual. When leak checks are complete, turn gas supply OFF at the source and rinse connections with water. (1) (2) (3) *The grill and dirt out of the burner tube. Once the spider/insect screens and burners - Weber Genesis Silver B NG | Owner Manual - Page 30
serious damage to your barbecue. (1) Main Burner Flame Pattern The Weber Gas Barbecue burners have been factory set for the correct air and gas mixture. The correct flame pattern is shown. 1) Burner tube 2) Tips occasionally flicker yellow 3) Light blue 4) Dark blue (1) (2) (3) (4) The burner - Weber Genesis Silver B NG | Owner Manual - Page 31
Your Weber Gas Barbecue must be OFF and cool. 2) Turn gas OFF (2) 5) Slide the burner assembly out from under the guide screw and washer(1) in the corners of the cooking box the crossover tube(1) from the burners. Remove the burners from the cooking box. ƽ WARNING: After reinstalling the gas lines, - Weber Genesis Silver B NG | Owner Manual - Page 32
in the frame. Tighten if necessary; See Step Install igniter" for correct procedure. If the Crossover Ignition System still fails to light, Contact the Customer Service Representative in your region using the contact information sheet provided with your - Weber Genesis Silver B NG | Owner Manual - Page 33
Troubleshooting Problem Check Burners burn with a yellow or Inspect Weber Spider/Insect orange flame, in conjunction with Screens for possible obstructions. the smell of gas of the burner tube. Are burners problems cannot be corrected by using these methods, please contact the Customer Service - Weber Genesis Silver B NG | Owner Manual - Page 34
17 RIGA LV 1039 LATVIA ℡ 371.755.65.66 NEW ZEALAND Supreme Barbeques LTD 6 Maurice Road Penrose Auckland NEW ZEALAND ℡ 649.579.6630 NORWAY Weber Scandinavia A/S Hoffsveien 17 0275 Oslo Norway ℡ 47.22.51.01.81 PORTUGAL Markt-Portugal LDA Recta da Granja do Marques Edificio GARDENA-Algueirao 2725-596 - Weber Genesis Silver B NG | Owner Manual - Page 35
Ltd. Suite 6 Croston House L.E. Business Park Centurion Way Leyland Lancashire PR5 1TZ UK ℡ 44.1772.33.1900 UNITED STATES Weber-Stephen Products Co. Customer Service Center 1890 Roselle Road, Suite 308 Schaumburg, IL 60195 USA ℡ 800.446.1071 ƽWARNING: Combustion byproducts produced when using this - Weber Genesis Silver B NG | Owner Manual - Page 36
grill did you purchase? 1. Gas Go-Anywhere® 2. Genesis® Silver-A 3. Genesis® Silver-B 4. Genesis® Silver-C 5. Genesis® Gold-B 6. Genesis® Gold-C 7. Genesis® Platinum-B 8. Genesis 6. Travel 7. Other For years Weber® has made better products and provided great service because we know our customers. If - Weber Genesis Silver B NG | Owner Manual - Page 37
PO BOX 8556 DENVER CO 80201-9840 !8020198408! Thanks for choosing Weber! PRODUCT REGISTRATION Complete this card and return, or register via the Internet at www.weber.com. Something to bring out the sizzle in your new Weber® grill! Complete and mail this product registration card and we'll give
-
 1
1 -
 2
2 -
 3
3 -
 4
4 -
 5
5 -
 6
6 -
 7
7 -
8
-
9
-
10
-
11
-
12
-
13
-
14
-
15
-
16
-
17
-
18
-
19
-
20
-
21
-
22
-
23
-
24
-
25
-
26
-
27
-
28
-
29
-
30
-
31
-
32
-
33
-
34
-
35
-
36
-
37
 |
 |
to barbecue operation. Do this even if the
barbecue was dealer-assembled.
NOTICE TO INSTALLER: These
instructions must be left with the owner
and the owner should keep them for future
use.
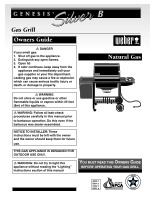
THIS GAS APPLIANCE IS DESIGNED FOR
OUTDOOR USE ONLY.
±
WARNING: Do not try to light this
appliance without reading the “Lighting”
Instructions section of this manual
±
WARNING
Do not store or use gasoline or other
flammable liquids or vapors within 25 feet
(8m) of this appliance.
±
WARNING: Follow all leak-check
procedures carefully in this manual prior
55021 03/21/01
Natural Gas
±
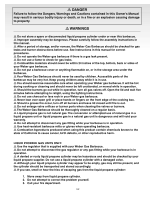
DANGER
If you smell gas:
1.
Shut off gas to the appliance.
2.
Extinguish any open flames.
3.
Open lid
4.
If odor continues, keep away from the
appliance and immediately call your
gas supplier or your fire department.
Leaking gas may cause a fire or explosion
which can cause serious bodily injury or
death, or damage to property.
A005.f
B004.c
C002.c
D001.e
W
E
B
E
R
W
E
B
E
R
Owners Guide
Y
OU
MUST
READ
THIS
O
WNERS
G
UIDE
BEFORE
OPERATING
YOUR
GAS
GRILL