Weber Summit S-670 LP Owner Manual - Page 15
Check For Gas Leaks - parts
 |
View all Weber Summit S-670 LP manuals
Add to My Manuals
Save this manual to your list of manuals |
Page 15 highlights
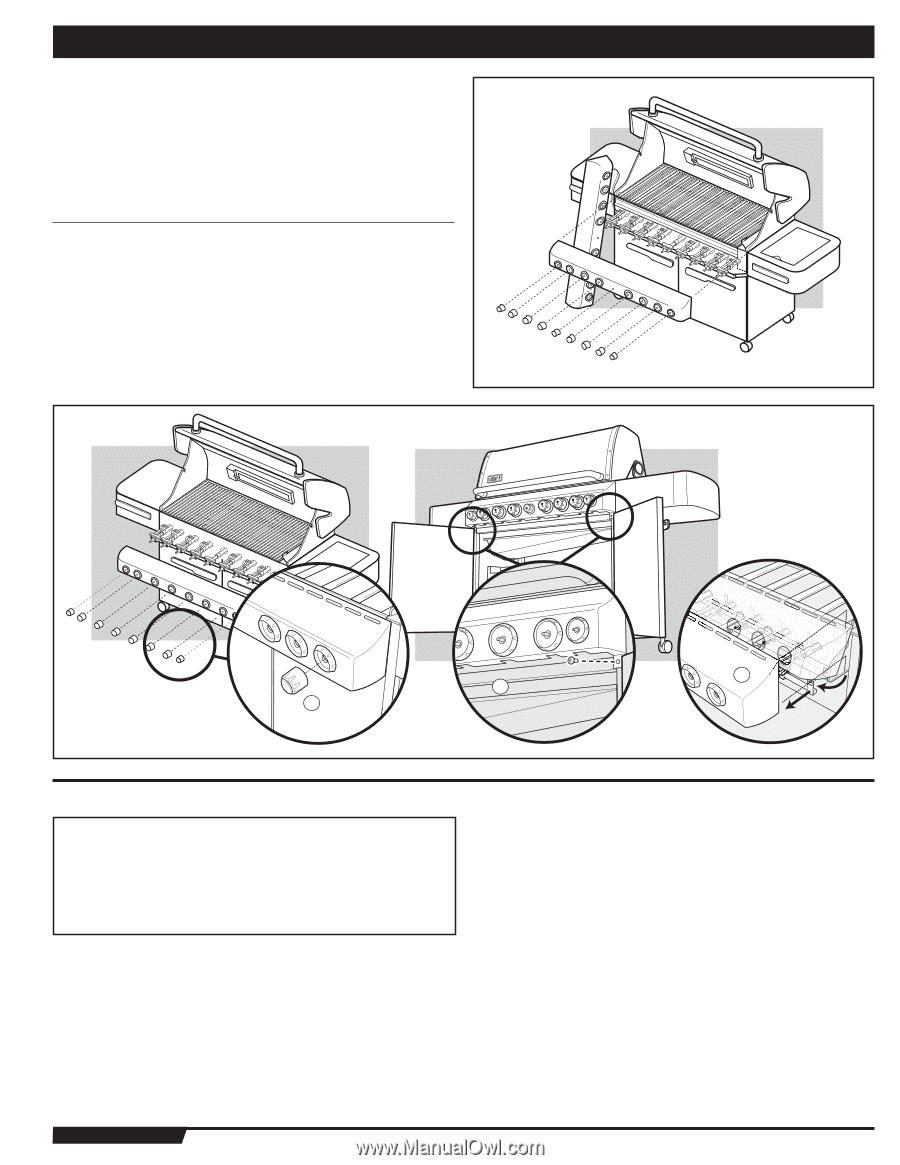
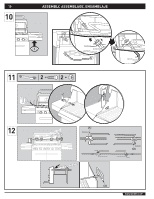
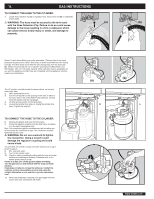
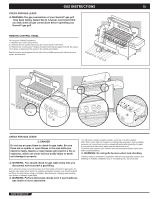
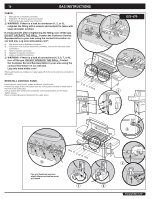
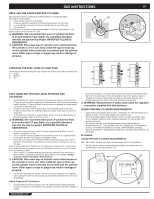
GAS INSTRUCTIONS CHECK FOR GAS LEAKS ƽ WARNING: The gas connections of your Summit® gas grill have been factory tested. We do however recommend that you leak check all gas connections before operating your Summit® gas grill. REMOVE CONTROL PANEL (A) Part required: Phillips Screwdriver. 1) Remove the burner control knobs. 2) Remove the two screws that secure the control panel to the frame. 3) Remove the control panel. Tilt panel forward and lift up and away from grill. Be careful not to break or disconnect the wires for the control panel lights. Rest the control panel against the left side of the grill (A) exposing the valves, burners, igniter, and manifold. 15 15 3 2 1 CHECK FOR GAS LEAKS ƽ DANGER Do not use an open flame to check for gas leaks. Be sure there are no sparks or open flames in the area while you check for leaks. Sparks or open flames will result in a fire or explosion, which can cause serious bodily injury or death and damage to property. ƽ WARNING: You should check for gas leaks every time you disconnect and reconnect a gas fitting. Note: All factory-made connections have been thoroughly checked for gas leaks. The burners have been flame-tested. As a safety precaution however, you should recheck all fittings for leaks before using your Weber® Gas Barbecue. Shipping and handling may loosen or damage a gas fitting. ƽ WARNING: Perform these leak checks even if your barbecue was dealer or store assembled. You will need: a soap and water solution, and a rag or brush to apply it. Note: Since some leak test solutions, including soap and water, may be slightly corrosive, all connections should be rinsed with water after checking for leaks. If your grill has a side burner make sure the side burner is off. To perform leak checks: open cylinder valve by turning the cylinder valve handwheel counterclockwise. ƽ WARNING: Do not ignite burners when leak checking. Check for leaks by wetting the connections with the soap and water solution and watching for bubbles. If bubbles form or if a bubble grows, there is a leak. WWW.WEBER.COM®
-
 1
1 -
2
-
3
-
4
-
5
-
6
-
7
-
8
-
9
-
 10
10 -
 11
11 -
 12
12 -
 13
13 -
 14
14 -
 15
15 -
 16
16 -
 17
17 -
 18
18 -
 19
19 -
 20
20 -
21
-
22
-
23
-
24
-
25
-
26
-
27
-
28
-
29
-
30
-
31
-
32
-
33
-
34
-
35
-
36
-
37
-
38
-
39
-
40
-
41
-
42
-
43
-
44
-
45
-
46
-
47
-
48
-
49
-
50
-
51
-
52
-
53
-
54
-
55
-
56
-
57
-
58
-
59
-
60
-
61
-
62
-
63
-
64
-
65
-
66
-
67
-
68
-
69
-
70
-
71
-
72
-
73
-
74
-
75
-
76
-
77
-
78
-
79
-
80
-
81
-
82
-
83
-
84
-
85
-
86
-
87
-
88
-
89
-
90
-
91
-
92
 |
 |