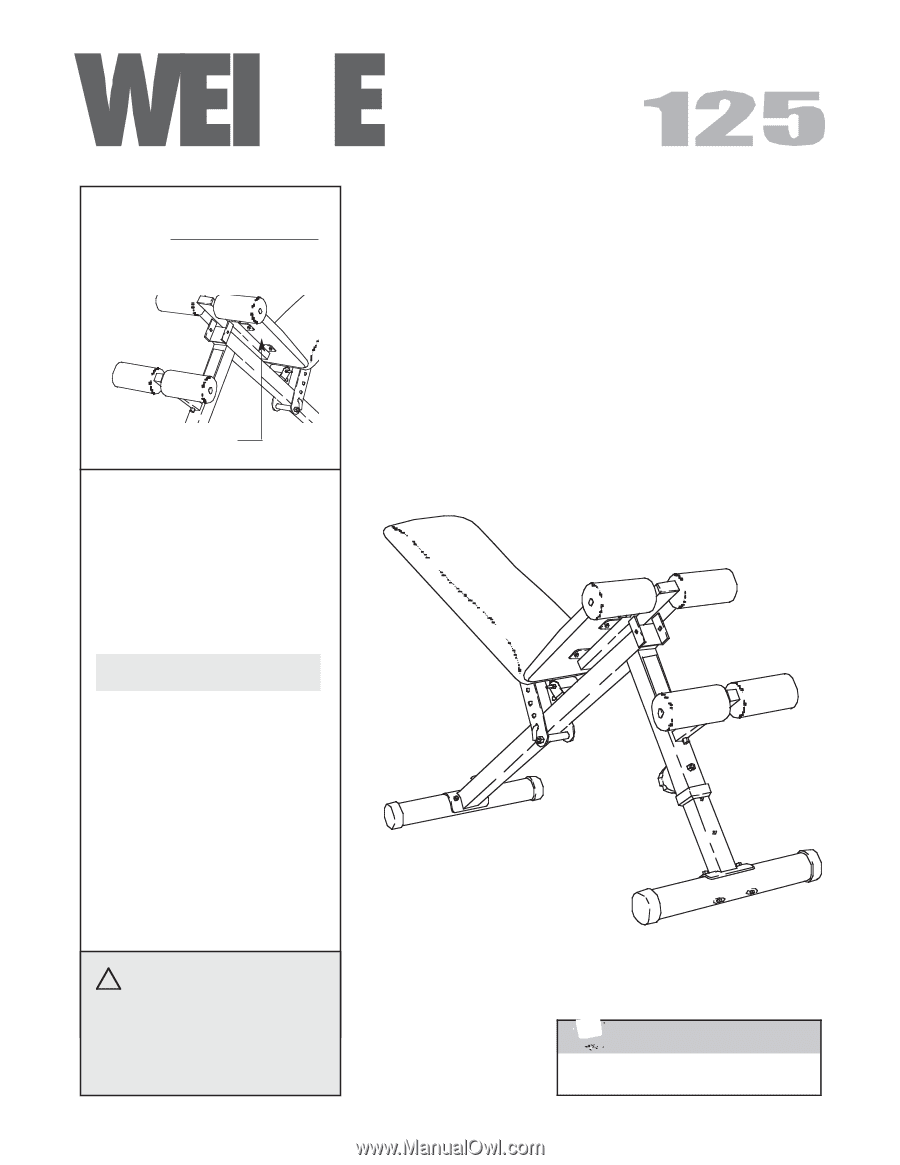
Weider Pro 125 Bench Uk Manual
Weider Pro 125 Bench Manual
 |
View all Weider Pro 125 Bench manuals
Add to My Manuals
Save this manual to your list of manuals |
Weider Pro 125 Bench manual content summary:
- Weider Pro 125 Bench | Uk Manual - Page 1
: ICON Health & Fitness, Ltd. Customer Service Department Unit 4 Revie Road Industrial Estate Revie Road Beeston Leeds, LS118JG UK email: [email protected] CAUTION Read all precautions and instructions in this manual before using this equipment. Save this manual for future reference. Class HC - Weider Pro 125 Bench | Uk Manual - Page 2
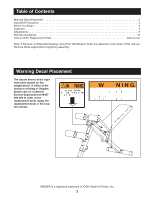
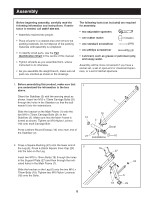
are attached in the centre of this manual. Remove these pages before beginning assembly. Warning Decal Placement The decals shown at the right have been placed on the weight bench. If either of the decals is missing or illegible, please call our Customer Service Department at 08457 089 009 to order - Weider Pro 125 Bench | Uk Manual - Page 3
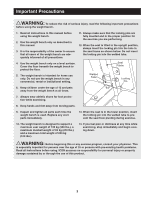
the risk of serious injury, read the following important precautions before using the weight bench. 1. Read all instructions in this manual before using the weight bench. 2. Use the weight bench only as described in this manual. 3. It is the responsibility of the owner to ensure that all users of - Weider Pro 125 Bench | Uk Manual - Page 4
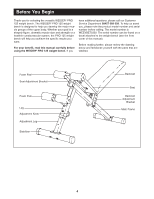
read this manual carefully before using the WEIDER® PRO 125 weight bench. If you have additional questions, please call our Customer Service Department 08457 decal attached to the weight bench (see the front cover of this manual). Before reading further, please review the drawing below and - Weider Pro 125 Bench | Uk Manual - Page 5
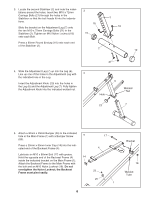
centre of this manual. • Tighten all parts as you assemble them, unless instructed to do otherwise. • As you assemble the weight bench, make sure all Leg (6). Press a 25mm Square Inner Cap (24) 2 19 into the tube on the Leg. Insert two M10 x 70mm Bolts (19) through the holes in the Support Plate - Weider Pro 125 Bench | Uk Manual - Page 6
Leg (7) onto the two M10 x 72mm Carriage Bolts (21) in the Stabiliser (2). Tighten an M10 Nylon Locknut (18) onto each Bolt. 3 18 10 7 18 Press a 60mm Round Endcap (10) onto each end of the Stabiliser (2). 2 10 4. Slide the Adjustment Leg (7) up into the Leg (6). Line up one of the holes - Weider Pro 125 Bench | Uk Manual - Page 7
with four M6 x 16mm Screws 7 (15). 8 4 8. Attach a 30mm x 25mm Bumper (26) to the indicated hole in the Main Frame (1) with a Bumper Screw (25). Press a 25mm x 50mm Inner Cap (14) into each end of the Seat Frame (5). Note that the Seat Frame (5) has two welded tubes. "tube A" passes through the - Weider Pro 125 Bench | Uk Manual - Page 8
Seat 9 Frame (5) with four M6 x 16mm Screws (15). 9 5 15 15 10. Press four 19mm Round Inner Caps (13) into the ends of the Long Pad Tube (12) and parts are tightened before you use the weight bench. Cover the floor beneath the weight bench to protect the floor. 10 11 3 3 13 31 12 13 53 11 3 - Weider Pro 125 Bench | Uk Manual - Page 9
insert the Adjustment Knob and tighten it fully into the welded nut. 6 Welded Nut 1 23 7 SETTING UP THE WEIGHT BENCH FOR ROMAN CHAIR EXERCISES To use the weight bench for roman chair exercises, first raise the Seat Frame (5) to the upright position. Insert the Locking Pin/w Ring (30) through the - Weider Pro 125 Bench | Uk Manual - Page 10
each set. Work your muscles by completing more sets rather than by using high amounts of weight. Weight Loss To lose weight, use a low amount of weight and increase the number of repetitions in each set. Exercise for 20 to 30 minutes, resting for a maximum of 30 seconds between sets. Cross Training - Weider Pro 125 Bench | Uk Manual - Page 11
of your everyday life. SUGGESTED EXERCISES These pictures show a variety of exercises that can be performed with your weight bench. Note: Your bench may differ in appearance from the benches shown in the photos. Roman Chair Alternate French Curl Flyes Leg Raise Incline Sit-up Bench Press 11 - Weider Pro 125 Bench | Uk Manual - Page 12
Ltd. office, or write: ICON Health & Fitness, Ltd. Customer Service Department Unit 4 Revie Road Industrial Estate Revie Road Beeston Leeds, LS118JG UK The NAME OF THE PRODUCT (WEIDER® PRO 125 weight bench) • The SERIAL NUMBER OF THE PRODUCT (see the front cover of this manual) • The KEY NUMBER OF - Weider Pro 125 Bench | Uk Manual - Page 13
Part Identification Chart-Model No. WEEVBE70330 R1203A M10 x 70mm Bolt (19)-2 M10 x 72mm Carriage Bolt (21)-4 M10 x 80mm Bolt (17)-1 M10 x 88mm Bolt (29)-1 M10 x 95mm Bolt (20)-1 M10 Nylon Locknut (18)-9 Bumper Screw (25)-2 M6 x 16mm Screw (15)-8 - Weider Pro 125 Bench | Uk Manual - Page 14
Square Bushing Adjustment Knob 25mm Square Inner Cap Bumper Screw 30mm x 25mm Bumper Support Plate 15mm x 10mm x 67mm Spacer M10 x 88mm Bolt Locking Pin w/Ring Short Pad Tube Exercise Poster User's Manual Grease Packet Note: "#" indicates a non-illustrated part. Specifications are subject to change - Weider Pro 125 Bench | Uk Manual - Page 15
8 29 16 4 14 15 18 15 28 25 26 18 10 18 10 2 21 11 3 13 19 27 17 25 26 18 18 9 31 13 18 6 24 3 11 3 13 20 30 12 14 13 3 11 5 14 18 15 15 11 1 23 22 7 18 18 10 2 10 21 R1203A Exploded Drawing-Model No. WEEVBE70330
-
 1
1 -
 2
2 -
 3
3 -
 4
4 -
 5
5 -
 6
6 -
 7
7 -
8
-
9
-
10
-
11
-
12
-
13
-
14
-
15
 |
 |
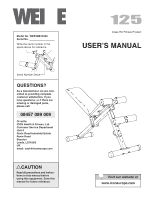
Model No. WEEVBE70330
Serial No.
Write the serial number in the
space above for reference.
CAUTION
Read all precautions and instruc-
tions in this manual before
using this equipment. Save this
manual for future reference.
Serial Number Decal
USER’S MANUAL
www.iconeurope.com
Visit our website at
Class HC Fitness Product
QUESTIONS?
As a manufacturer, we are com-
mitted to providing complete
customer satisfaction. If you
have questions, or if there are
missing or damaged parts,
please call:
Or write:
ICON Health & Fitness, Ltd.
Customer Service Department
Unit 4
Revie Road Industrial Estate
Revie Road
Beeston
Leeds, LS118JG
UK
email: [email protected]
08457 089 009