Weider Pro 125 Bench Uk Manual - Page 8
Slide a Plastic Spacer 3 and a Foam Pad 11
 |
View all Weider Pro 125 Bench manuals
Add to My Manuals
Save this manual to your list of manuals |
Page 8 highlights
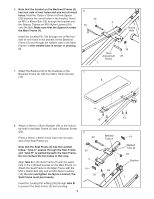
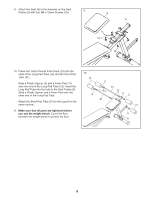
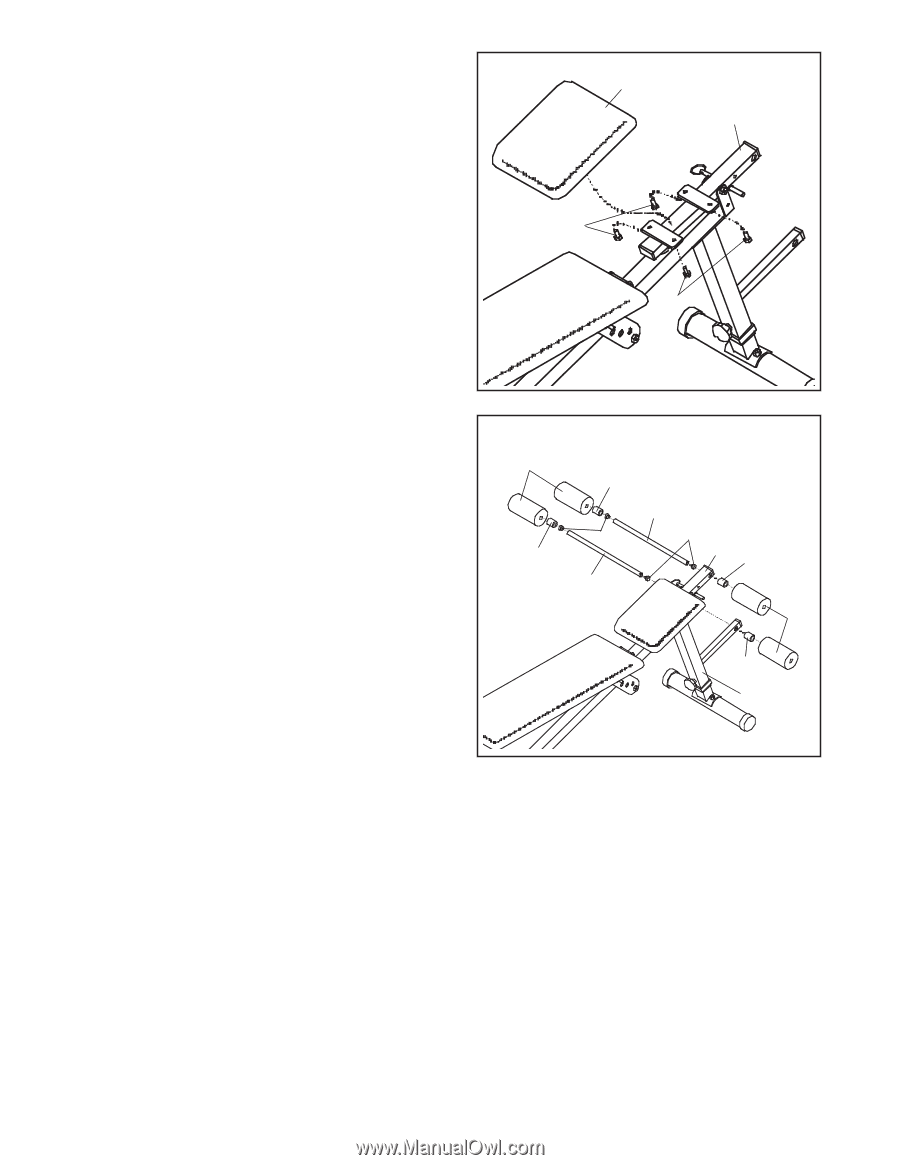
9. Attach the Seat (9) to the brackets on the Seat 9 Frame (5) with four M6 x 16mm Screws (15). 9 5 15 15 10. Press four 19mm Round Inner Caps (13) into the ends of the Long Pad Tube (12) and the Short Pad Tube (31). Slide a Plastic Spacer (3) and a Foam Pad (11) onto one end of the Long Pad Tube (12). Insert the Long Pad Tube into the hole in the Seat Frame (5). Slide a Plastic Spacer and a Foam Pad onto the other end of the Long Pad Tube. Attach the Short Pad Tube (31) to the Leg (6) in the same manner. 11. Make sure that all parts are tightened before you use the weight bench. Cover the floor beneath the weight bench to protect the floor. 10 11 3 3 13 31 12 13 53 11 3 6 8
-
 1
1 -
2
-
 3
3 -
 4
4 -
 5
5 -
 6
6 -
 7
7 -
 8
8 -
 9
9 -
 10
10 -
 11
11 -
 12
12 -
 13
13 -
14
-
15
 |
 |
8
9
10
9.
Attach the Seat (9) to the brackets on the Seat
Frame (5) with four M6 x 16mm Screws (15).
10. Press four 19mm Round Inner Caps (13) into the
ends of the Long Pad Tube (12) and the Short Pad
Tube (31).
Slide a Plastic Spacer (3) and a Foam Pad (11)
onto one end of the Long Pad Tube (12). Insert the
Long Pad Tube into the hole in the Seat Frame (5).
Slide a Plastic Spacer and a Foam Pad onto the
other end of the Long Pad Tube.
Attach the Short Pad Tube (31) to the Leg (6) in the
same manner.
11.
Make sure that all parts are tightened before
you use the weight bench.
Cover the floor
beneath the weight bench to protect the floor.
5
9
31
3
6
11
11
3
3
3
5
13
12
13
15
15