Weslo Portable Spa Canadian English Manual - Page 10
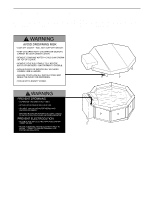
Place the Spa Jet Unit over the Side Panel 1
 |
View all Weslo Portable Spa manuals
Add to My Manuals
Save this manual to your list of manuals |
Page 10 highlights
4. Place the Insulated Floor Cover (8) inside the assembled Side Panels (1). The edge of the Insulated Floor Cover should cover the bottom two inches of the Side Panels (see the inset drawing). Measure the width of the DAYBREAK, from the top center of one Side Panel (1) to the top center of the Side Panel directly across from it. Take two measurements, as shown. Both measurements must be the same. The measurement should be between 56" and 58". If the frame is not squared, the Spa Cover (not shown) will not fit properly. If necessary, adjust the positions of the Side Panels so the frame is squared. 5. Place the Spa Liner (9) on top of the Insulated Floor Cover (8). Smooth out the Spa Liner, working the wrinkles to the edges. The seam in the Spa Liner should be lined up with a joint between two of the Side Panels (1). Stretch the edge of the Spa Liner (9) over the top of the Side Panels (1), working the wrinkles to the top. The edge of the Spa Liner should hang over the Side Panels about two inches. 4 8 1 5 Seam 9 1 6. Place the Small Edge Protector (14) on top of the 6 Side Panel (1) closest to the electrical outlet which you will use to power the DAYBREAK. This is the 14 Side Panel where the Spa Jet Unit (not shown) will be placed. Place the seven Edge Protectors (12) around the top of the remaining Side Panels (1). 1 1 8 1 Both measurements must be equal 8 12 7. Remove the power cord from the Spa Jet Unit (13). 7 Place the Spa Jet Unit over the Side Panel (1) with the Small Edge Protector (14). Be extremely care- ful not to tear the Spa Liner (9) as you slide the Spa Jet Unit into place. Power Cord 1 10 13 9 14
-
 1
1 -
2
-
3
-
4
-
 5
5 -
 6
6 -
 7
7 -
 8
8 -
 9
9 -
 10
10 -
 11
11 -
 12
12 -
 13
13 -
 14
14 -
 15
15 -
16
-
17
-
18
-
19
-
20
-
21
-
22
 |
 |
