Weslo Portable Spa Canadian English Manual - Page 9
Assembly
 |
View all Weslo Portable Spa manuals
Add to My Manuals
Save this manual to your list of manuals |
Page 9 highlights
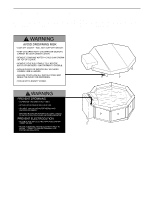
ASSEMBLY Before beginning assembly, carefully read the following information and instructions: • Place all parts in a cleared area and remove the packing materials; do not dispose of the packing materials until assembly is completed. • Assembly requires two people. • Tighten all parts as you assemble them, unless instructed to do otherwise. • Read each assembly step before you begin. • During assembly, make sure that all parts are oriented as shown in the drawings. TOOLS REQUIRED FOR ASSEMBLY: • Your own phillips screwdriver • The included allen wrench • You may also need a hammer 1. Before beginning assembly, be sure that you have read and understand the information in the box above and on the previous page. Press a Floor Cap (2) onto the bottom of each of the eight Side Panels (1). Be sure to align the indicated holes. The Side Panels must be oriented and fully inserted in the Floor Caps as shown in the inset drawing. 1 Align these holes 1 Foam Wood 1 2 2 2. Slide an Angle Bracket (3) between one of the Side Panels (1) and the Floor Cap (2), as shown. Attach 2 the Angle Bracket to the Side Panel with a Bracket Screw (4). Attach an Angle Bracket (3) to each of the remaining Side Panels (1) in the same manner. Align these holes 1 3 4 2 3. Slide two of the Side Panels (1) together as shown. 3 The indicated Angle Bracket (3) should go between the Side Panel and the Floor Cap (2). 6 Slide a Connector Bracket (6) into the Side Brackets 1 (5). Attach the Angle Bracket to the other Side Panel 1 with a Bracket Screw (4). 5 Continue to connect the remaining Side Panels (1) in the same manner. 2 4 3 9
-
 1
1 -
2
-
3
-
 4
4 -
 5
5 -
 6
6 -
 7
7 -
 8
8 -
 9
9 -
 10
10 -
 11
11 -
 12
12 -
 13
13 -
 14
14 -
15
-
16
-
17
-
18
-
19
-
20
-
21
-
22
 |
 |
