Whirlpool EED4100WQ Installation Instructions - Page 11
Venting Requirements
 |
View all Whirlpool EED4100WQ manuals
Add to My Manuals
Save this manual to your list of manuals |
Page 11 highlights
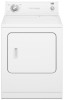
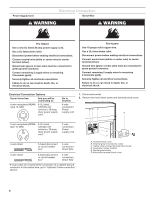
4. Connect the other wires to outer terminal block screws. Tighten screws. If using an existing vent system ■■ Clean lint from the entire length of the system and make sure exhaust hood is not plugged with lint. ■■ Replace any plastic or metal foil vent with rigid heavy metal vent or flexible metal vent. ■■ Review Vent system chart. Modify existing vent system if necessary to achieve the best drying performance. Only rigid or flexible metal vent shall be used for exhausting. If this is a new vent system 5. Tighten strain relief screws. 6. Insert tab of terminal block cover into slot of dryer rear panel. Secure cover with hold-down screw. 7. Connect a separate copper wire (G) from the external ground conductor screw (A) to an adequate ground, as determined by a qualified electrician. Vent Material ■■ Use a heavy metal vent. Do not use plastic or metal foil vent. ■■ 4" (102 mm) heavy metal exhaust vent and clamps must be used. DURASAFE™ venting products are recommended. A G Venting Requirements WARNING Fire Hazard use a heavy metal vent. Do not use a plastic vent. Do not use a metal foil vent. Failure to follow these instructions can result in death or fire. WARNING: To reduce the risk of fire, this dryer MUST BE EXHAUSTED OUTDOORS. IMPORTANT: Observe all governing codes and ordinances. Dryer exhaust must not be connected into any gas vent, chimney, wall, ceiling, attic, crawlspace, or a concealed space of a building. 4" (102 mm) heavy metal exhaust vent DURASAFE™ vent products can be purchased from your dealer or by calling the toll-free number listed on the cover of the Dryer User Instructions. For more information, see the "Assistance or Service" section of the Dryer User Instructions. Rigid metal vent: ■■ For best drying performance, rigid metal vents are recommended. ■■ Rigid metal vent is recommended to avoid crushing and kinking. Flexible metal vent: ■■ Flexible metal vents are acceptable only if accessible for cleaning. ■■ Flexible metal vent must be fully extended and supported when the dryer is in its final location. ■■ Remove excess flexible metal vent to avoid sagging and kinking that may result in reduced airflow and poor performance. ■■ Do not install flexible metal vent in enclosed walls, ceilings, or floors. ■■ The total length of flexible metal vent shall not exceed 7¾ ft. (2.4 m). Elbows: ■■ 45° elbows provide better airflow than 90° elbows. Good Better 11
-
 1
1 -
2
-
3
-
4
-
5
-
 6
6 -
 7
7 -
 8
8 -
 9
9 -
 10
10 -
 11
11 -
 12
12 -
 13
13 -
 14
14 -
 15
15 -
 16
16
 |
 |
