Whirlpool RF265LXTS Installation Instructions - Page 4
Installation Instructions - electric range
 |
View all Whirlpool RF265LXTS manuals
Add to My Manuals
Save this manual to your list of manuals |
Page 4 highlights
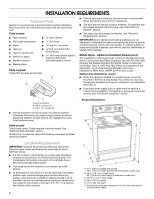
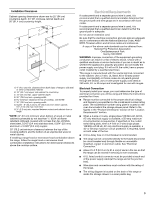
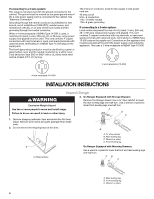
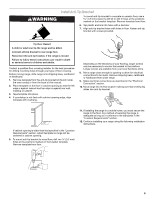
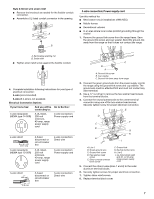
If connecting to a 4-wire system: This range is manufactured with the ground connected to the cabinet. The ground must be revised so the green ground wire of the 4-wire power supply cord is connected to the cabinet. See "Electrical Connection." Grounding through the neutral conductor is prohibited for new branch-circuit installations (1996 NEC); mobile homes; and recreational vehicles, or an area where local codes prohibit grounding through the neutral conductor. When a 4-wire receptacle of NEMA Type 14-50R is used, a matching UL listed, 4-wire, 250-volt, 40- or 50-amp, range power supply cord (pigtail) must be used. This cord contains 4 copper conductors with ring terminals or open-end spade terminals with upturned ends, terminating in a NEMA Type 14-50R plug on the supply end. The fourth (grounding) conductor must be identified by a green or green/yellow cover and the neutral conductor by a white cover. Cord should be Type SRD or SRDT with a UL listed strain relief and be at least 4 ft (1.22 m) long. The minimum conductor sized for the copper 4-wire power cord are: 40-amp circuit 2 No.-8 conductors 1 No.-10 white neutral 1 No.-8 green grounding If connecting to a 3-wire system: Local codes may permit the use of a UL listed, 3-wire, 250-volt, 40- or 50-amp range power supply cord (pigtail). This cord contains 3 copper conductors with ring terminals or open-end spade terminals with upturned ends, terminating in a NEMA Type 10-50P plug on the supply end. Connectors on the appliance end must be provided at the point the power supply cord enters the appliance. This uses a 3-wire receptacle of NEMA Type 10-50R. 3-wire receptacle (10-50R) 4-wire receptacle (14-50R) INSTALLATION INSTRUCTIONS Unpack Range WARNING Excessive Weight Hazard 3. On Ranges Equipped with Storage Drawers: Remove the storage drawer. Use a ³⁄₈" drive ratchet to lower the rear leveling legs one-half turn. Use a wrench or pliers to lower front leveling legs one-half turn. Use two or more people to move and install range. Failure to do so can result in back or other injury. A D C 1. Remove shipping materials, tape and protective film from range. Remove oven racks and parts package from inside oven. 2. Do not remove the shipping base at this time. B A A. Shipping base A. ³⁄₈" drive ratchet B. Rear leveling leg C. Wrench or pliers D. Front leveling leg On Ranges Equipped with Warming Drawers: Use a wrench or pliers to lower the front and rear leveling legs one-half turn. AB C A. Rear leveling leg B. Front leveling leg C. Wrench or pliers 4
-
 1
1 -
 2
2 -
 3
3 -
 4
4 -
 5
5 -
 6
6 -
 7
7 -
 8
8 -
 9
9 -
 10
10 -
11
-
12
 |
 |
