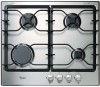
Whirlpool WCG52424AS Installation Guide - Page 2
Installation Requirements
 |
View all Whirlpool WCG52424AS manuals
Add to My Manuals
Save this manual to your list of manuals |
Page 2 highlights
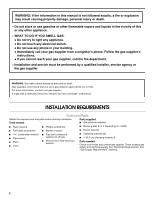
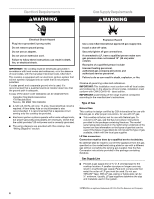
WARNING: If the information in this manual is not followed exactly, a fire or explosion may result causing property damage, personal injury or death. - Do not store or use gasoline or other flammable vapors and liquids in the vicinity of this or any other appliance. - WHAT TO DO IF YOU SMELL GAS: • Do not try to light any appliance. • Do not touch any electrical switch. • Do not use any phone in your building. • Immediately call your gas supplier from a neighbor's phone. Follow the gas supplier's instructions. • If you cannot reach your gas supplier, call the fire department. - Installation and service must be performed by a qualified installer, service agency or the gas supplier. WARNING: Gas leaks cannot always be detected by smell. Gas suppliers recommend that you use a gas detector approved by UL or CSA. For more information, contact your gas supplier. If a gas leak is detected, follow the "What to do if you smell gas" instructions. INSTALLATION REQUIREMENTS Tools and Parts Gather the required tools and parts before starting installation. Tools needed Parts supplied ■ Gas pressure regulator ■ Tape measure ■ Phillips screwdriver ■ Burner grates (2 or 4 depending on model) ■ Flat-blade screwdriver ■ Marker or pencil ■ Burner caps (4) combination wrench ■ Pipe wrench ■ Pliers ■ Level ■ Pipe-joint compound resistant to LP gas ■ Noncorrosive leak-detection solution ■ Clamping brackets (4) ■ 1" (2.5 cm) clamping screws (4) Parts needed Check local codes and consult gas supplier. Check existing gas supply and electrical supply. See "Electrical Requirements" and "Gas Supply Requirements" sections. 2
-
 1
1 -
 2
2 -
 3
3 -
 4
4 -
 5
5 -
 6
6 -
 7
7 -
 8
8 -
9
-
10
-
11
-
12
-
13
-
14
-
15
-
16
-
17
-
18
-
19
-
20
 |
 |
