Whirlpool WED7500VW Owners Manual - Page 11
Plan Vent System - installation
 |
UPC - 883049138251
View all Whirlpool WED7500VW manuals
Add to My Manuals
Save this manual to your list of manuals |
Page 11 highlights
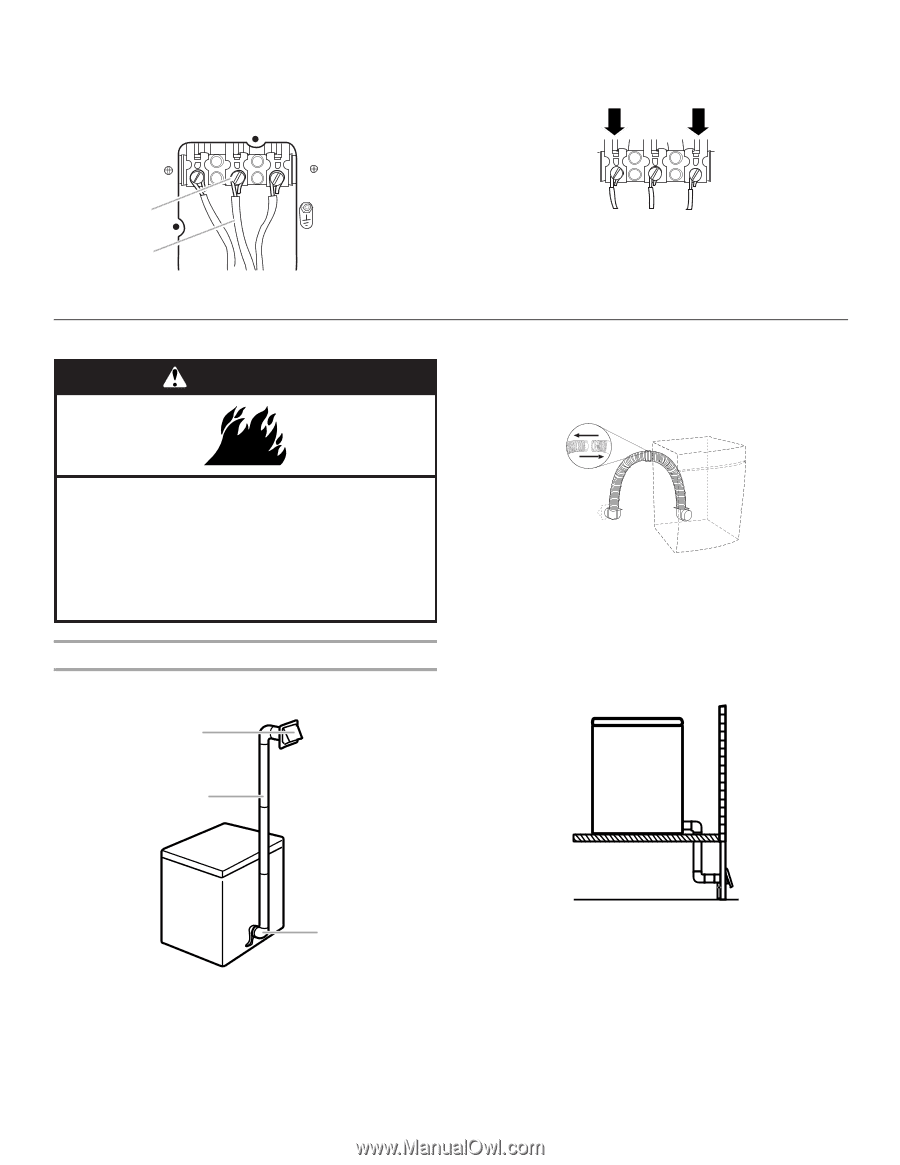
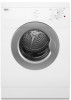
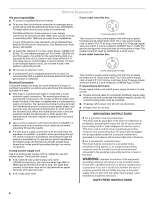
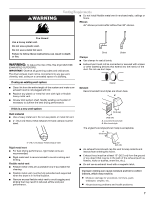
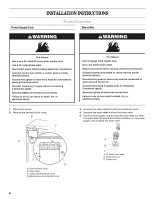
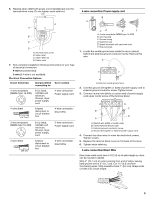
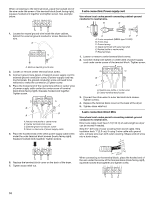
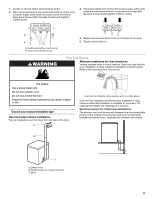
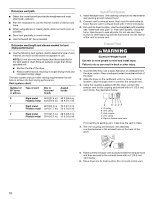
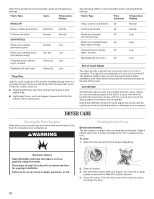
1. Loosen or remove center terminal block screw. 2. Place the hooked end of the neutral wire (white or center wire) of power supply cable under the center screw of terminal block (hook facing right). Squeeze hooked end together. Tighten screw. 3. Place the hooked ends of the other power supply cable wires under the outer terminal block screws (hooks facing right). Squeeze hooked ends together. Tighten screws. B A A. Neutral wire (white or center wire) B. Center terminal block screw WARNING 4. Replace the terminal block cover on the back of the dryer. 5. Tighten strain relief nut. Plan Vent System Alternate installations for close clearances Venting systems come in many varieties. Select the type best for your installation. A close-clearance installation is shown below. Refer to the manufacturer's instructions. Fire Hazard Use a heavy metal vent. Do not use a plastic vent. Do not use a metal foil vent. Failure to follow these instructions can result in death or fire. Choose your exhaust installation type Recommended exhaust installations Typical installations vent the dryer from the rear of the dryer. A Over-the-top installation (also available with one offset elbow) Over-the-Top Installation Kit Part Number 4396028 for close clearance alternate installation is available for purchase. For ordering information see "Assistance or Service." Special provisions for mobile home installations The exhaust vent must be securely fastened to a noncombustible portion of the mobile home structure and must not terminate beneath the mobile home. Terminate the exhaust vent outside. B C A. Exhaust hood B. Flexible metal vent or rigid metal vent C. Elbow 11
-
 1
1 -
2
-
3
-
4
-
5
-
 6
6 -
 7
7 -
 8
8 -
 9
9 -
 10
10 -
 11
11 -
 12
12 -
 13
13 -
 14
14 -
 15
15 -
 16
16 -
17
-
18
-
19
-
20
 |
 |