Whirlpool WFE775H0H Owners Manual
Whirlpool WFE775H0H Manual
 |
View all Whirlpool WFE775H0H manuals
Add to My Manuals
Save this manual to your list of manuals |
Whirlpool WFE775H0H manual content summary:
- Whirlpool WFE775H0H | Owners Manual - Page 1
RANGE USER INSTRUCTIONS THANK YOU for purchasing this high-quality product. Register your new range at www.whirlpool.com. For future reference, please make a note of your product model and serial numbers. These can be located on the oven frame behind the top right side of the oven door. Model Number - Whirlpool WFE775H0H | Owners Manual - Page 2
very important. We have provided many important safety messages in this manual and on your appliance. Always read and obey all safety messages. reduce the chance of injury, and tell you what can happen if the instructions are not followed. The Anti-Tip Bracket The range will not tip during normal - Whirlpool WFE775H0H | Owners Manual - Page 3
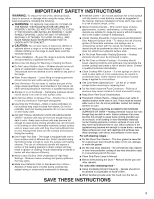
IMPORTANT SAFETY INSTRUCTIONS WARNING: To reduce the risk of fire, electrical shock, injury worn while using the range. ■ User Servicing - Do not repair or replace any part of the range unless specifically recommended in the manual. All other servicing should be referred to a qualified technician. - Whirlpool WFE775H0H | Owners Manual - Page 4
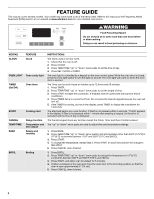
FEATURE GUIDE This manual covers several models. Your model may have some or all of the items listed. Refer to this manual or the Frequently Asked Questions (FAQs) section of our website at www.whirlpool.com for more detailed instructions. WARNING Food Poisoning Hazard Do not let food sit in oven - Whirlpool WFE775H0H | Owners Manual - Page 5
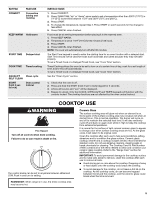
warm START TIME Delayed start COOK TIME Timed cooking AQUALIFT SELF CLEAN START (hold 3 sec to lock) Clean cycle Oven control lockout INSTRUCTIONS 1. Press CONVECT. 2. Press TEMP/TIME "up" or "down" arrow pads to set a temperature other than 350°F (175°C) in 5°F (5°C) increments between 170 - Whirlpool WFE775H0H | Owners Manual - Page 6
. When any control knob on the console panel is turned on, the Cooktop On indicator light will glow. Hot Surface Indicator Light On ceramic glass models, the hot surface indicator light is located on the console panel. The hot surface indicator light will glow as long as any surface cooking area - Whirlpool WFE775H0H | Owners Manual - Page 7
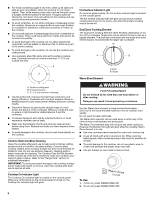
to the cooktop if overheated. ■ Follow manufacturer's instructions. ■ Use on low heat settings. ■ May Use the following chart as a guide for cookware material characteristics. COOKWARE elements at the same time. ■ On ceramic glass models, use only flat-bottomed canners to avoid damage to - Whirlpool WFE775H0H | Owners Manual - Page 8
signals, indicating the following: Basic Functions One tone ■ Valid pad press ■ Oven is preheated (long tone) ■ Function has been entered ■ Reminder (on some models), repeating every 20 seconds after the end-of-cycle tones Three tones ■ Invalid pad press Four tones ■ End of cycle Energy Save The - Whirlpool WFE775H0H | Owners Manual - Page 9
cooking mode (not Sabbath Mode compliant). To set a Timed Bake using Sabbath Mode (on some models): WARNING Food Poisoning Hazard Do not let food sit in oven more than one hour before or after cooking , and then lift out. Use the following illustration and charts as a guide. 7 6 5 4 3 2 1 9 - Whirlpool WFE775H0H | Owners Manual - Page 10
Side 1 should cook for approximately 2½ - 3½ minutes. Side 2 should cook for approximately 45 minutes. Expect a moderate degree of smoke when broiling. *If your model has a Max Capacity Oven Rack, the recessed ends must be placed in the rack position above the desired position of the food. See the - Whirlpool WFE775H0H | Owners Manual - Page 11
come back on when the oven door is closed. Cook Time (on some models) WARNING To Set a Delayed Timed Cook: Before setting, make sure the clock the correct time of day. See the "Clock" keypad feature in the "Feature Guide" section. Food Poisoning Hazard 1. Press BAKE. Do not let food sit in - Whirlpool WFE775H0H | Owners Manual - Page 12
RANGE CARE Clean Cycle 5. Press CANCEL at the end of the cycle. CANCEL may be pressed at any time to stop the Clean cycle. 6. Remove the residual water and loosened soils with a sponge or cloth immediately after the Clean cycle is complete. Much of the initial 2 cups (16 oz [500 mL]) of water will - Whirlpool WFE775H0H | Owners Manual - Page 13
label instructions on cleaning products. For additional information, you can visit the Frequently Asked Questions (FAQs) section at www.whirlpool.com. vegetable oil applied to the rack guides will help them slide. STORAGE DRAWER OR WARMING DRAWER (on some models) Check that storage drawer or warming - Whirlpool WFE775H0H | Owners Manual - Page 14
power. TROUBLESHOOTING First try the solutions suggested here. If you need further assistance or more recommendations that may help you avoid a service call, refer to the warranty page in this manual and scan the code there with your mobile device, or visit http://www.whirlpool.com/product_help - Whirlpool WFE775H0H | Owners Manual - Page 15
PROBLEM Clean oven bottom during the Clean cycle. Level the range. See the Installation Instructions. To remove deposits, use a cloth soaked with vinegar. Then use a you can visit our website at www.whirlpool.com. Cooktop Care Kit (ceramic glass models) (includes cleaner, protectant, scraper, and - Whirlpool WFE775H0H | Owners Manual - Page 16
few minutes to review the Troubleshooting or Problem Solver section of the Use and Care Guide, scan the QR code on the right to access additional resources, or visit www.whirlpool.com/product_help. 2. All warranty service is provided exclusively by our authorized Whirlpool Service Providers. In the
-
 1
1 -
 2
2 -
 3
3 -
 4
4 -
 5
5 -
 6
6 -
 7
7 -
8
-
9
-
10
-
11
-
12
-
13
-
14
-
15
-
16
 |
 |

THANK YOU for purchasing this high-quality product. Register your new range at
www.whirlpool.com
.
For future reference, please make a note of your product model and serial numbers. These can be located on the oven frame behind
the top right side of the oven door.
Model Number __________________________________________
Serial Number __________________________________________
Para una versión de estas instrucciones en español, visite
www.whirlpool.com
.
Deberá tener a mano el número de modelo y de serie, que están ubicados en el marco del horno, detrás del lado derecho superior
de la puerta del horno.
ELECTRIC RANGE
USER INSTRUCTIONS
Table of Contents
RANGE SAFETY
.......................................................................................
2
The Anti-Tip Bracket
.............................................................................
2
FEATURE GUIDE
.....................................................................................
4
COOKTOP USE
........................................................................................
5
Cookware
..............................................................................................
7
Home Canning
......................................................................................
7
OVEN USE
................................................................................................
8
Electronic Oven Controls
......................................................................
8
Sabbath Mode
......................................................................................
8
Aluminum Foil
........................................................................................
9
Positioning Racks and Bakeware
.........................................................
9
Oven Vent
............................................................................................
10
Baking and Roasting
...........................................................................
10
Broiling
................................................................................................
11
Convection Baking and Roasting (on some models)
.........................
11
Cook Time (on some models)
.............................................................
11
RANGE CARE
.........................................................................................
12
Clean Cycle
.........................................................................................
12
General Cleaning
.................................................................................
13
Oven Light
...........................................................................................
14
TROUBLESHOOTING
............................................................................
14
ACCESSORIES
......................................................................................
15
WARRANTY
............................................................................................
16
W10719729A