Whirlpool WRS537SIAB Use & Care Guide - Page 16
Refrigerator Care
 |
View all Whirlpool WRS537SIAB manuals
Add to My Manuals
Save this manual to your list of manuals |
Page 16 highlights
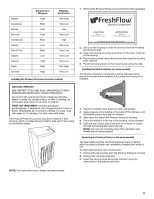
4. Take the new filter out of its packaging and remove the covers from the O-rings. Be sure the O-rings are still in place after the covers are removed. 5. With the arrow pointing up, align the new filter with the filter housing and slide it into place. The filter cover door will automatically begin to close as the new filter is inserted. 6. Close the filter cover door completely in order to snap the filter into place. You may need to press hard. 7. Flush the water system. See "Water and Ice Dispensers." REFRIGERATOR CARE Cleaning WARNING Explosion Hazard Use nonflammable cleaner. Failure to do so can result in death, explosion, or fire. Both the refrigerator and freezer sections defrost automatically. However, clean both sections about once a month to avoid buildup of odors. Wipe up spills immediately. IMPORTANT: Because air circulates between both sections, any odors formed in one section will transfer to the other. You must thoroughly clean both sections to eliminate odors. To avoid odor transfer and drying out of food, wrap or cover foods tightly. To Clean Your Refrigerator: NOTE: Do not use abrasive or harsh cleaners such as window sprays, scouring cleansers, flammable fluids, cleaning waxes, concentrated detergents, bleaches or cleansers containing petroleum products on plastic parts, interior and door liners or gaskets. Do not use paper towels, scouring pads, or other harsh cleaning tools. 1. Unplug refrigerator or disconnect power. 2. Hand wash, rinse, and dry removable parts and interior surfaces thoroughly. Use a clean sponge or soft cloth and a mild detergent in warm water. 3. Wash stainless steel and painted metal exteriors with a clean sponge or soft cloth and a mild detergent in warm water. 4. There is no need for routine condenser cleaning in normal home operating environments. If the environment is particularly greasy or dusty, or there is significant pet traffic in the home, the condenser should be cleaned every 2 to 3 months to ensure maximum efficiency. If you need to clean the condenser: ■ Remove the base grille. See the "Door Removal" instructions, either in the User Instructions or the separate instruction sheet provided with your refrigerator. ■ Use a vacuum cleaner with a soft brush to clean the grille, the open areas behind the grille and the front surface area of the condenser. ■ Replace the base grille when finished. 5. Plug in refrigerator or reconnect power. 16 Lights The interior and dispenser lights are LEDs that cannot be changed. ■ If the dispenser lights do not appear to be working as described in "Water and Ice Dispensers" or if the interior lights do not illuminate when either door is opened, call for assistance or service. See either the front cover or the Warranty for contact information. Vacation and Moving Care Vacations If You Choose to Leave Refrigerator On While You Are Away: 1. Use up any perishables and freeze other items. 2. If your refrigerator has an automatic ice maker: ■ Raise wire shutoff arm to OFF (up) position or move the switch to the OFF (right) setting. ■ Shut off water supply to the ice maker. 3. Empty the ice bin. If You Choose to Turn Refrigerator Off Before You Leave: 1. Remove all food from the refrigerator. 2. If your refrigerator has an automatic ice maker: ■ Turn off the water supply to the ice maker at least one day ahead of time. ■ When the last load of ice drops, raise the wire shutoff arm to the OFF (up) position or move the switch to the OFF (right) setting. 3. Depending on the model, turn the Refrigerator Control to OFF or turn cooling off. See "Using the Control(s)." 4. Clean refrigerator, wipe it, and dry well. 5. Tape rubber or wood blocks to the tops of both doors to prop them open far enough for air to get in. This stops odor and mold from building up. Moving When you are moving your refrigerator to a new home, follow these steps to prepare it for the move. 1. If your refrigerator has an automatic ice maker: ■ Turn off the water supply to the ice maker at least one day ahead of time. ■ Disconnect the water line from the back of the refrigerator. ■ When the last load of ice drops, raise the wire shutoff arm to the OFF (up) position or move the switch to the OFF (right) setting. 2. Remove all food from the refrigerator and pack all frozen food in dry ice. 3. Empty the ice bin. 4. Depending on the model, turn the Refrigerator Control to OFF or turn cooling off. See "Using the Control(s)." 5. Unplug refrigerator. 6. Clean, wipe, and dry thoroughly. 7. Take out all removable parts, wrap them well, and tape them together so they don't shift and rattle during the move. 8. Depending on the model, raise the front of the refrigerator so it rolls more easily OR screw in the leveling legs so they don't scrape the floor. See "Adjust the Doors" or "Door Removal, Leveling and Alignment." 9. Tape the doors closed and tape the power cord to the back of the refrigerator. When you get to your new home, put everything back and refer to the Installation Instructions for preparation instructions. Also, if your refrigerator has an automatic ice maker, remember to reconnect the water supply to the refrigerator.
-
 1
1 -
2
-
3
-
4
-
5
-
6
-
7
-
8
-
9
-
10
-
 11
11 -
 12
12 -
 13
13 -
 14
14 -
 15
15 -
 16
16 -
 17
17 -
 18
18 -
 19
19 -
 20
20 -
 21
21 -
22
-
23
-
24
-
25
-
26
-
27
-
28
-
29
-
30
-
31
-
32
-
33
-
34
-
35
-
36
-
37
-
38
-
39
-
40
-
41
-
42
-
43
-
44
-
45
-
46
-
47
-
48
-
49
-
50
-
51
-
52
-
53
-
54
-
55
-
56
-
57
-
58
-
59
-
60
-
61
-
62
-
63
-
64
-
65
-
66
 |
 |
