Xerox 2006NPC DocuColor 2006 Tools Mode - Page 10
Select, Start, Tools, Cover the Auto Color Adjustment Patch
 |
UPC - 042215475440
View all Xerox 2006NPC manuals
Add to My Manuals
Save this manual to your list of manuals |
Page 10 highlights
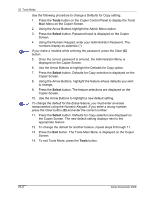
23. Tools Mode 10. Confirm that the Printout Document option is highlighted. Press the Select button. 11. Load 8.5 in. x 11 in. or A4 paper in the Bypass Tray and press the Start button. Load by long edge first. For directions on loading paper in the Bypass tray, go to the Copy Features chapter. 12. The Auto Color Adjustment Patch Page prints out to the Exit Tray. 13. Place the Auto Color Adjustment Patch Page face down on the Document Glass. Position the magenta patches on the left-hand side of the glass. 14. Cover the Auto Color Adjustment Patch Page with 5 sheets of white paper. 15. Press the Start button. The copier/printer begins the color adjustment process. 16. Press the Exit button when the color adjustment is complete. The copier/printer prompts you to print a confirmation page. 17. Load 8.5 in. x 11 in. LEF or A4L paper in the bypass tray and press the Start button. Load long edge first. 18. Retrieve the printout from the Exit Tray and inspect it to see if an accurate color compensation has taken place. 19. Use the Arrow Buttons to highlight one of the following: • No if the printout results are not satisfactory and to cancel the color adjustment. • Yes if the printout results are satisfactory and to apply the color adjustment. 20. Press the Select button. Auto Color Adjustment Document Type selection is displayed on the Copier screen. 21. To perform the color adjustment for other document types, repeat steps 8 through 20. 22. Press the Exit button. The Administrator Menu is displayed on the Copier Screen. 23. Press the Exit button. The Tools Main Menu is displayed on the Copier Screen. 24. Press the Tools button to exit Tools Mode. 23-10 Xerox DocuColor 2006
-
 1
1 -
2
-
3
-
4
-
 5
5 -
 6
6 -
 7
7 -
 8
8 -
 9
9 -
 10
10 -
 11
11 -
 12
12 -
 13
13 -
 14
14 -
 15
15 -
16
-
17
-
18
-
19
-
20
-
21
-
22
 |
 |
